Showing posts with label texture. Show all posts

Thursday, June 2, 2016

One of these is not like the others......


by Staci Louise Smith


Last week I did a post on Doing it All (or NOT doing it all, actually ).

In last weeks post I touched on some ways I have been trying to make my time more efficient in the studio.

One of the ways I do this when making beads, is to make molds of them.  
  It is a great way to save yourself some time in the studio- and a way to preserve a design you were really happy with.  Here is a post I did awhile back on how to use a two part silicone compound to make a mold of your polymer clay beads.


The only problem is, I never want to have too many beads that are too similar out there in the world.  I want everyone to be able to make unique art with my beads, so the beads themselves need to be different.

I paint them each a million different ways, the colors are never the same twice.  However, there are other ways to change it up too.

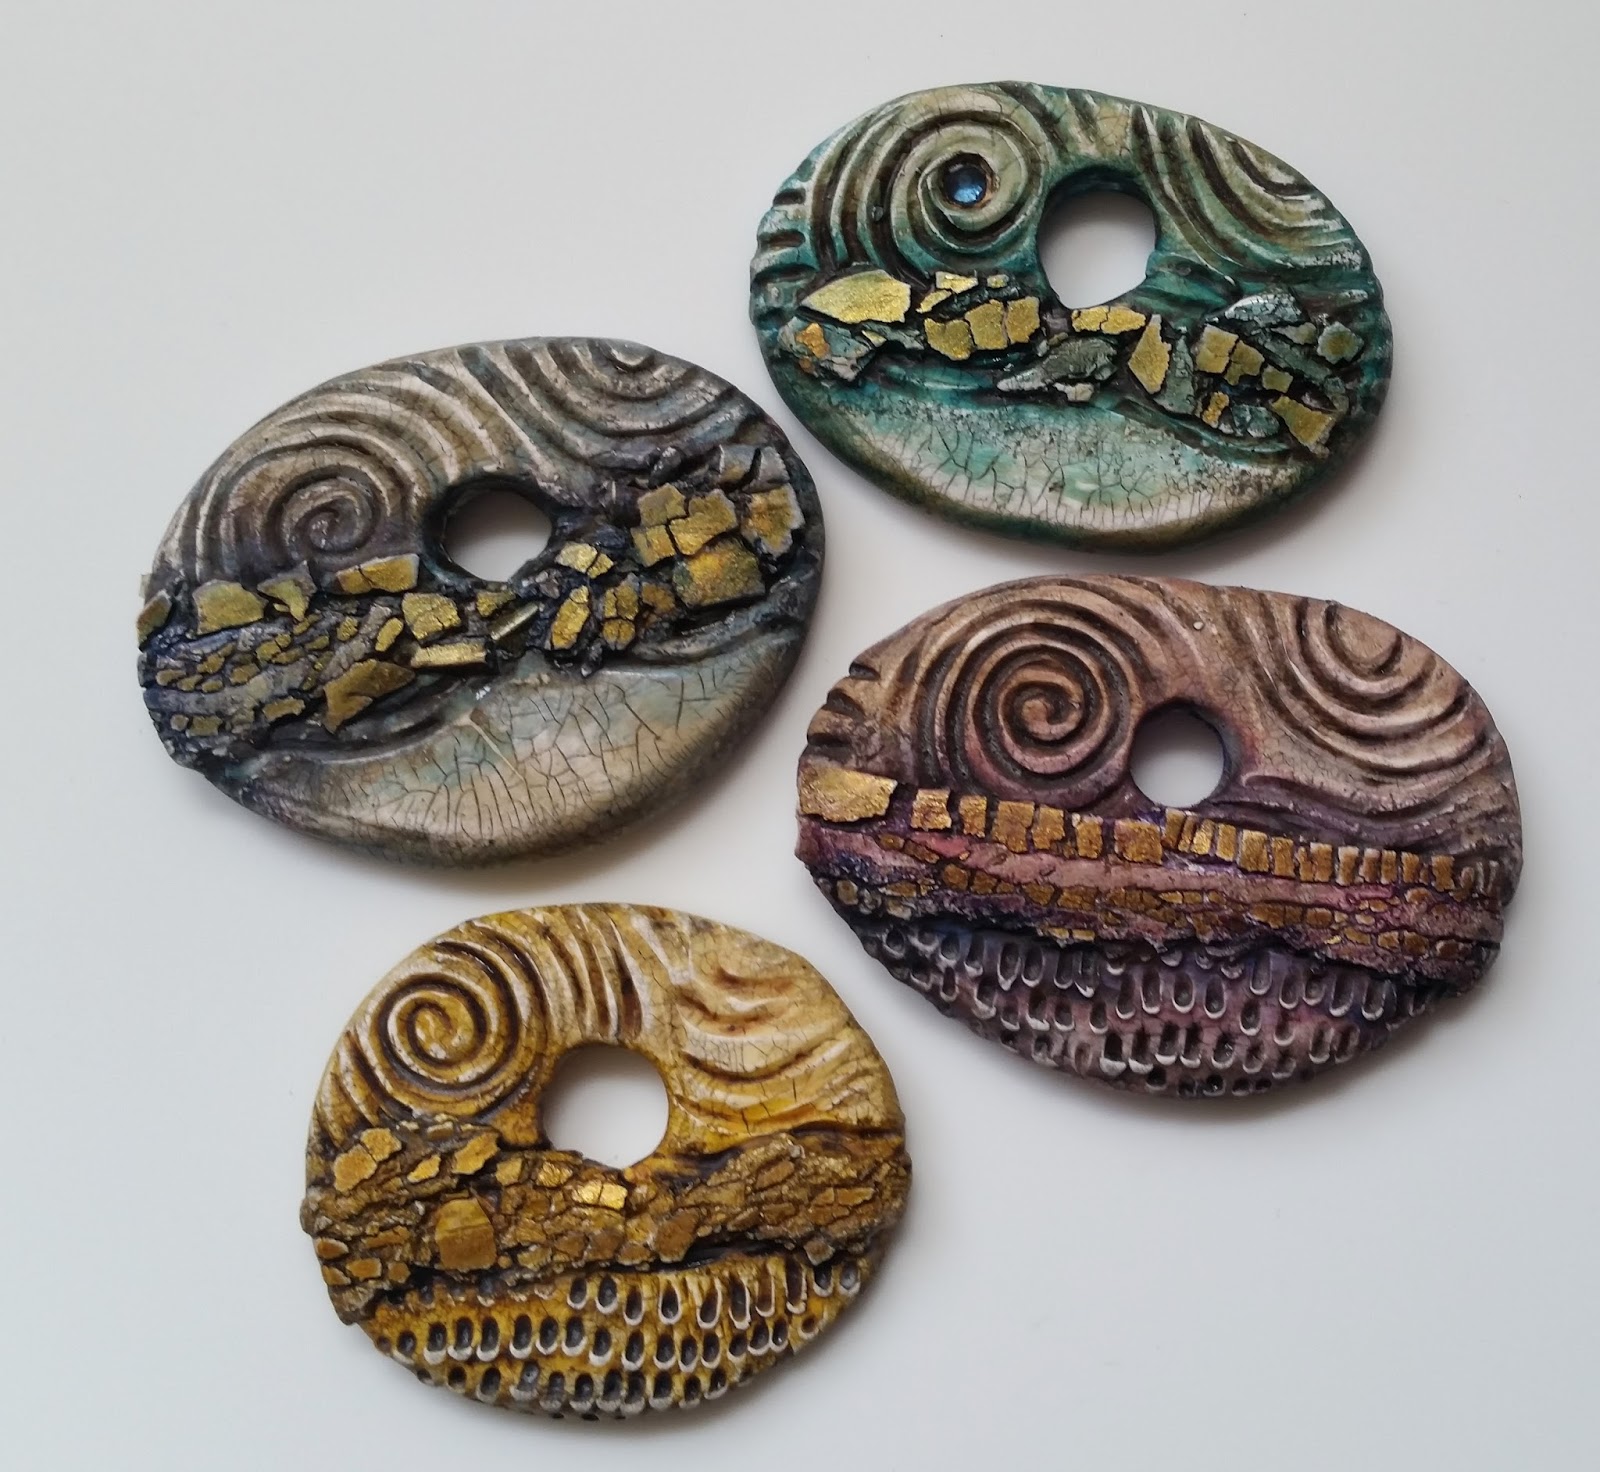
I have recently been making these awesome Gold Rush beads, with the gold crackle, and then carving them as well.  The carving of each bead is immensely time consuming, and then you have the painting on top that too.  I just could not make them fast enough. 


So I decided to make a mold of them.  I made blank white beads, and then after curing them, I carved the parts I wanted designed.  Then I made molds.  That gave me the carved design quickly.  Then I was free to add my crackle and other embellishments to each one.

For example- here are some of the molds I made.  You can see the shapes and carved pattern are the same, however, I have added elements such as crystals, and holes and other textures to make each one unique.  They are painted different and the gold crackle on each is a little different.  


At first I felt a bit like a sell out not hand carving each one.  However, I was quite happy with the results, and found it allowed more time for other details to be added!

Also, here is ONE fossil Ammonite (shown at the bottom of the picture) I use as a mold, and all the many different designs I make from it.  The key here is to play, and try things a different way so you don't get stuck in a rut!!!  I mean, you KNOW I love ammonites!  So I am always trying to do them in a new and fun way.


So what is the take away here?  Make a mold, re-create your favorite beads, but you don't have to stop there.  Use your texture tools to add dots, or stripes or embed beads and crystals, layer them on top of patterned bases.  Make each one unique anyhow!!!  There is no limit to what you can do!


(Please note that you may not re-create MY beads.....the carved crackle beads are my design and not to be replicated, as well as the spins on the ammonites.  These beads are not shown to be copied but merely as samples of what you can do to your own handmade beads to make them original while using a mold- THANK YOU for respecting that!)

Speaking of the Gold Rush technique and carving polymer, I can finally announce my two pieces got accepted into the Polymer category of the Bead Dreams Competition, which is held at the Bead and Button Show.  Right now voting is open for the Peoples Choice award.  If you are so inclined, you can vote up to 5x per day.  You just need to create a login or login with Facebook.  Here are links to my two pieces that are entered.  If viewing all the pieces- the polymer ones are one page 6.

Sunset Gold Rush
to vote for this one go here

and Zen Cairn
To vote for this one go here

Thank you for the support!


Wednesday, May 6, 2015

Inspiring Fibers

Carol Dekle-Foss
Hello everyone! I've been playing with fibers a bit and wanted to share some of my latest creations, as well as display some fiber artists who inspire me. First, Sherri Stokey did a great post here on her beautiful macrame jewelry. I will be honest, I am terrible at small detailed work, I just don't have that kind of patience. I truly admire those who can knit and sew in intricate detail. One of my favorite bracelets from Sherri is below. I love the woven work and accent of tiny beads. So beautiful!!! 
You can visit Sherri's Etsy shop here for more to die for designs. 

I'll admit, working with fiber in jewelry has been a challenge for me. I don't dare show some of my earlier work! Seriously, I think there was a crazy lady was in my studio!!! So now, when I use fiber in my designs, I try to add different textures to balance the softness and also play with different color combinations to try and create interest. With lots of practice, I've gotten better!

 I just finished this bracelet. I used some of Marsha's gorgeous silks that you can find in her Etsy shop. The bracelet bar and tiny leaf are my latest ceramic pieces. I love how the glaze colors turned out.

A simple copper etched leaf bracelet with braided waxed linen cord and ceramic beads from Gaea.


I love this simple design. It can be either a bracelet or a necklace. Ceramic beads are made by me, and the silks are from Marsha Neal Studio.


 This is one of my older creations.  I used one of my sandblasted pendants, lampwork beads from All Fired Up Studio, some enameled charms from yours truly (my brief enameling phase), and some sari silk.

Another older necklace. The Tree of Life design was etched and then enameled. I love how the enameling created a crackling affect. I then braided some sari silk and formed a wire loop for the bail.

Now, for some more eye candy. Here are some of my favorite fiber artists, in no particular order.
 Oh my...I fell in love with Debra Dorgan's work when I first laid my eyes on the above cuff. It brings out my inner la bohรจme. Wow, look at all the intricate detail!
Her little butterfly is too cute!

 These earrings and the cuff below are from Mary of Queen of cuffs. Holy moly look at those gorgeous textures! Swoon!

 And of course, the intricate and meaningful work of Mary Jane Dodd. She inspires me to be more mindful, not only in my jewelry, but everyday life.

I will leave you with this simple design.
A dainty and delicate pendant from Manya at Humming Needles. I love how she combines silk ribbons with embroidery to create beautiful detailed flowers. Visit her Etsy shop to see more beautiful creations!

Thank you for reading!


Saturday, January 10, 2015

... in the details

offering bowl - mjd 2014

-----
the air of winter 
may be biting, but in its
sting i feel alive. 
-----

my work over time has evolved into simpler things. my focus is upon solid craftsmanship and defining details. even my writing this year (because i felt like i was losing focus somehow) is being combined with some haiku writing - where the choices all matter - you only have 17 total syllables to work with. 

but in our work, this too is true. there are things you will always need - findings, texture, metal, beads or other materials. they are defining. 

bracelet bar - mjd 2015

-----
as i am me and
you are thee, there must be peace
for the sake of we. 
-----

there are days where components are my focus. they provide opportunities for practicing what i find to be important - creating texture, attention to details, attainment of satisfying patina, even what i choose to clean the pieces up with (sandpaper, steel wool, brass brush, nail shaping block, etc.). and figuring out if the addition of something really does add, or if it detracts and was just fun as an exercise in trying something new. 

this has taken me years - 

it's important - as you work, you find out what makes your work yours. there is no way to really know at the beginning, it takes time and mistakes and victories to find out. it takes listening to your heart and being attentive to what makes it sing. you can successfully execute a design, but is it something you want to do again or reflects your aesthetic? 

what are details that matter to you? what ones do you feel are key to your work? 

wishing you all a year filled with what you need - i think i speak for many when i say that 2014 was a bit of a brutal one. let's hope for something a bit gentler. 


Thursday, December 11, 2014

Textures, Color and Fibers

As a nature lover and ceramic artist, it is easy to say that I am inspired in my work to create textures often repeated by what I see in nature.
With Ceramics, it is usually in my hand carved texture plates (which I later use when bisque fired - hard and porous) that show the textures. I use those plates to press porcelain or stoneware clay into to create a reverse printed texture.

When it comes to using my ceramic pieces in finished jewelry, I tend to stall a bit.
This I believe is because there are so many possibilities, I have a hard time getting my brain to settle and focus on one technique (talk about ADHD!)
And I'm all about the quality, so I tend to work things through a few times before I come up with something I'm happy with (this bracelet below is still a work in progress).

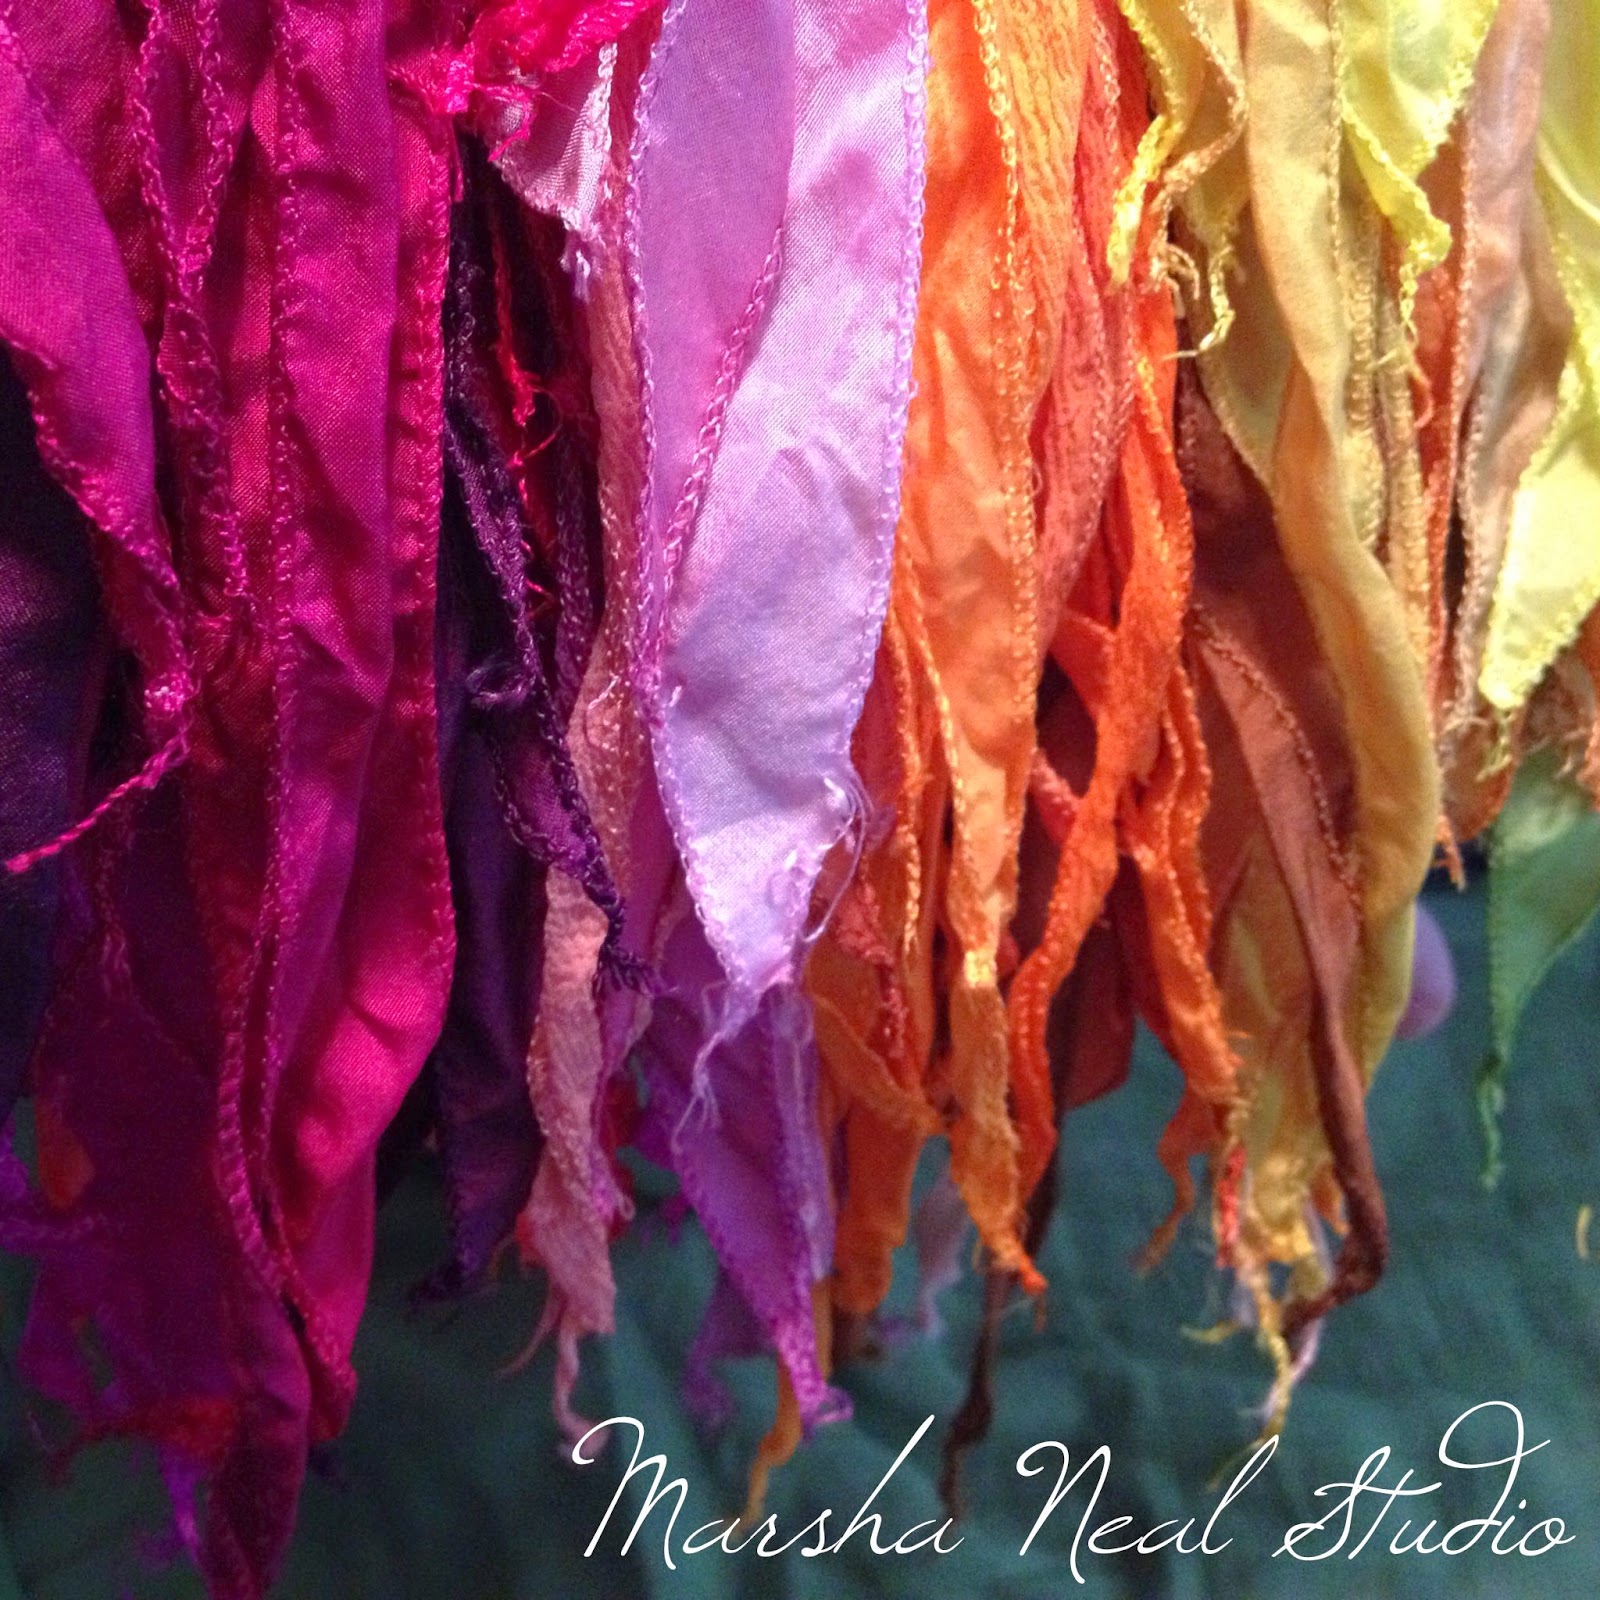
 When it comes to colors, these Hand Painted Silks (painted by Ute of Silk Painting is Fun) that I have been carrying now for over 10 years, are an endless supply of inspiration.
Marsha Neal Studio presents Silky and Fairy Ribbons

Marsha Neal Studio presents 2mm Hand Painted Silks
 I love to pick through and make specific color palettes from the 80+ colors I carry (in three styles: Silky Ribbon, Fairy Ribbon, and 2mm round).
 And I am seriously delighted with every order that comes through because I get to see a bit into what you are picking out and are working with for your jewelry (or other) designing.
If you are interested in using these in your work to add color and texture, you can shop for these ribbons through my Etsy shop or my Marsha Neal Studio website.

Recently I have been fiddling more and more with Needle Felting Wool Roving and Locks (see SarafinaFiberArt for beautiful supplies). And luckily Sarafina Art House is about 25 minutes from my house/studio and I have picked up working there part-time, helping with orders, stock, and whatever they need me to jump in and do. Which is a whole other chapter opening up in my creative life - working outside of the home around other creative positive people helping run that business is SO what I need right now.

What kind of fibers are you into using?
And what techniques make you giddy?

Look for some posts on fibers (all kinds of fibers) coming up in the next couple of months as we get through the holidays and back to our creative time.

Wednesday, July 2, 2014

Finishing Techniques tutorial!

Alrighty! This is my second post finishing up the below earrings. You can find the first post here.

 My teacher asked me once, "Carol, why do you make so much work for yourself?" Well, that made me think. How am I making more work for myself and more importantly how the heck not to??  There are so many different ways to buff, polish, finish, texture, etc..that my little brain became confused and overwhelmed with all the different options. I sat down, did some research, listened to my teacher and watched Nancy Hamiltons videos. She has a great one here on finishing techniques. So for this post I am going to break down the process that works for me. Keep in mind you may choose to do something totally different. There are so many options out there, that you get to choose your own workflow, one that you are comfortable with and what works for you.

Ok, finishing up the earrings. With these next steps it is very important to wear goggles and a dust mask. Also, if you are headed out to run errands after, make sure you wash your face! Oh yes, I have forgotton.

Step ten
For the next step, which is my first step in finishing, I use a cratex wheel and flex shaft to remove the solder and any firescale. Firescale is the icky purplish stuff that comes up to the surface of the metal. Some designers use a process called depletion gilding for sterling silver to remove firescale. I haven't figured this out yet, so for now I just use Cratex. You can find individual ones to try here. The one pictured is the red Cratex which is a fine grit. Cratex comes in other grits and also different shapes for the types of pieces you are working on.

Another popular option is to use a slotted mandrel and wrap a strip of sandpaper around it. I tried this technique twice. The first time sandpaper flew all over my studio, and the second time...well, I FORGOT to put my hair up. OMG...it got stuck in the mandrel and instantly created a dreadlock on the whole right side of my head. I was so freaked out I kept pushing the flex shaft pedal and screamed like a dork. Yep! It took me about an hour to untangle my hair! Needless to say, I am currently turned off to the slotted mandrel, sandpaper technique.

If I  haven't soldered or used Cratex, I will just throw a bunch of pieces into the tumbler to polish.

Step eleven
After the Cratex, I will use Tripoli and a buffing wheel. Tripoli is a compound that is slightly abrasive and leaves a dull finish on the piece. Why yes, I did purchase this buffing wheel from Harbor Freight. It would be nice to have another in the studio like this, with the tapered spindles for easy removal of buffing wheels. Maybe some day.
This is what the pieces look like after tripoli. I don't use the finger cots or tape because I am a glutton for punishment. The metal gets super hot though, so sometimes I use a ring clamp to hold my work. 

To clean the metal you can use a crockpot with a basket. You use a mixture of water, ammonia and dish soap. Then take a soft bristle brush to scrub the metal clean. OR you can use an ultrasonic cleaner. 
Here is mine. THIS machine is AMAZING. Look at how fast it cleans the metal! Again, a MAJOR time saver. I use a mix of water, ammonia and the sonic cleaner powder for maximum cleaning! 

Step twelve
I then used the above hammers to texture the metal. If I wanted the metal to have a mirror finish, I would use the Rouge wheel after hammering. For these earrings though, I wanted a more rough texture and used the fiber wheel below.

Step thirteen
Here is the metal after a nice hot bath of liver of sulfur. I love how each metal changes a different color.
I then used an extra-fine mini fiber wheel to remove the oxidation in the areas where I wanted to highlight the metal and to give a light brushed look. To finish these earrings I sprayed with Clear Guard Lacquer, used a hole punch, and attached my handmade earwires. I usually don't spray sterling silver, but when used with other metals I do. 

So there you have my basic finishing workflow! Here are some additional tools for you to try.

My finishing kit arsenal
I made this kit with graphs of grits taped to the lid for reference. Sometimes pieces require special finishing such as ring bands or pieces with tight spots. (You can use a slotted ring mandrel with sandpaper also if you are brave). 

Here are the items in my kit.
3m Radial Bristle Discs in various sizes and grits

Also, here are some sanding wheels I learned how to use from Nancy Hamiltion. You use all items listed below together.
PSA Quick-Change sanding discs in various grits.

Basically you put the sanding discs on top of the Magnum and score the center. You then snap it on the mandrel. What's nice about using these, is the Magnum is plastic-backed so you can bend it when sanding, therefore you have better control. Nancy talks about how to use them in her video. I really like using these!

I hope you picked up a few tricks on finishing and therefore don't spin your wheels in the studio like I used to do! So how do you finish your work? Do you have any tips or tricks you would like to share?  Please feel free to leave a comment!

In closing, I wanted to share something that isn't really thought about too much during the Fourth of July holiday. Animals. Wild or domesticated, they get super scared and freak out during our celebration. If you can, place animals in a quiet place and also consider livestock or wild creatures that may be around. I wanted to mention this because of the wonderful conservation efforts of Karen McGovern. I know she will be taking care of her animals and making sure they are ok during all the fireworks. Thank you so much for all your hard work Karen!

I hope everyone has a safe and happy Fourth of July!

Monday, April 1, 2013

texture boot camp -

mary jane dodd

piece of railroad track purchased at a flea market

this edition of texture boot camp is brought to you by a lipstick chicken, you know, a person who doesn't like to wear lipstick that looks like you are wearing lipstick (and so why struggle to find that perfect color at all, right?)... this aesthetic carries over into my work... as an admirer of the subtle i would like to show you how i add texture to my metal...

i find texture on things - like this old railroad tie... i was told how i could clean up the face - but why would i do that?

small bench top anvil

this anvil's finish did not hold up over time - but if you put metal on it and hammer, when you turn it over, you will find a lovely texture that is picked up by liver of sulphur or other patina...

with a pitted surface

did you ever mar the surface of a hammer? unknowingly, like before you learned that a brass head is better suited for striking metal design stamps? i did - and now i have a head that creates texture similar to the raw silk texture hammer...

'marred' hammer face

and finally i wanted to show you how i used patterned brass sheet - no rolling mill required!


tape the metal you are working with to the patterned sheet , hammer all over the surface evenly and...


viola!

my apologies on not having pieces finished with the patina to show the contrast - this was my first time down to the bench in almost 3 months and i don't have everything set up... 


Friday, March 29, 2013

Textured Earrings Tutorial

I wanted to put together a little tutorial using some metal chain that I had purchased from a garage sale last year.While looking around the house for something to use for texture, I came across it and wondered if the hoops would be hard enough to create texture with. It was. I probably should have annealed the 3/4" disc first, but didn't. As you can see, you can still texture without annealing; it just takes more work.

I hope you like them.....

Materials: 3/4" discs, 18 gauge wire (for jump rings), 24 gauge wire, ear wires, metal hoop (could be done without this), center punch, marker, hammer, bowl for water, torch, mandrel (disc could be held with pliers), hammering block, 1/4" tube, tube cutter (optional), 2 small beads.

1. Set your disc on the hammering block. Center the metal hoop.


2. Watching out for your fingers, gently hammer an indentation into the metal disc.


3. Punch one hole on the indentation.


4. Using the hole as your guide, make marks at 6 o'clock, 3 o'clock and 9 o'clock.


5. Continue to fill in the additional placements that you would see on an analog clock. Using your punch, lightly tap on each mark 4-5 times.


6. This is how it will look.


7. Turning punched side away, heat the disc with your torch.


8. Set orange hot disc in cold water. This step is personal preference. You can play around with how to get different colors. I'm not a pink kinda gal, so I kept experimenting until I got a color that I liked. As you can see, if you get it hot enough, adding the discs to cold water adds additional texture.


9. Having already cut your tube to 1/4" pieces (jump rings can be used instead), hammer them lightly until flattened.


10. Using premade 18 ga. jump rings, slide through disc and hammered tube.


11. Using 18 ga wire, make small hoop, slide through hammered tube and slide small bead on. Create hoop on top of bead.


12. Using 24 ga, wire, wrap hoops made on top and bottom of bead.


13. For the last step, I chose to experiment with Stacie's tutorial on adding texture to ear wire. I discovered that I still need a little practice with this. Also, darkening is optional. I used liver of sulfur for my final step to patina.

There you have it.... light weight and fun to wear.


As always, thank-you for supporting artists who create handmade with handmade.

MaryAnn
face
Related Posts Plugin for WordPress, Blogger...