Showing posts with label discs. Show all posts

Sunday, January 5, 2014

A change for the new year......

So, last week I made a promise to myself to reorganize the studio. You might have read the post. This probably is not the best picture I could have started with because it appears more cluttered than it really is, but, in reality it gives me so much room to work on considering I was dusting off little areas to be able to hammer, cut discs, etc.


I first had to decide what it was that I was lacking and that was storage space. Everything in the room was landing on my workbench and it needed to go. I decided to only keep the stuff that I reach for on a regular basis on the bench. I knew that I needed a few more shelves since the wall space was wasted. I bought some inexpensive brackets and Bill cut the wood. Together, we had those up in 20 minutes.

I also looked around and gave some thought to what storage I really like the most since I own LOTS of plastic storage in various shapes and sizes. I decided that the one I have always liked the best are these little $10 Sterilite drawers that you can buy at Walmart.


Now, I have easy access to different things I might need while working. I might pick up a couple more of these. The five drawer ones are 12 inches high and only about 8 inches deep so they do not take up much space.


I had shelves that my husband Bill Perrine built me a couple of years ago. I had stored all of my commercial beads on them. Since I really do not use any of those, I decided that they could just go in a place that is harder to reach for me and make some room for the things that I use more. As you can see, I have mandrels (very long because I cut my own), copper pipe and various gauges of wire that I purchase from Lowes or Home Depot. I also sorted out my copper sheets and noticed my supply is starting to get low. It's time to call the roofing company and see what they have in scraps.


And... then there was the TV stand that I was just going to get rid of. I decided that since it was on wheels and I absolutely hated where I had my makeshift light box, that it might work as a stand for my light box. Now, I can roll it over to the window for some natural light too. I haven't tried it out yet, but I am hoping that I like the choice that I made. I am using the shelves underneath as storage for my various props that I sometimes use when taking pictures.


That now left me with a work table where the light box was. I have no clue what to do with that, so for now, it is a spot to put the other things that I have no clue what to do with!


Lastly, and most importantly to me, is my firing station. I use fire bricks because I can get a little crazy with the torch.  I won't zoom in on the burn marks on the rug! I also had this little shelf that my mother-in-law picked up at a garage sale. It was just sitting in storage since I really didn't think it was something I would ever use, but as it turns out, it holds the enamels perfectly! One day I will remove the Mighty Dog labels and label the colors.... maybe.....


So, when I am done with this I am excited to go and work on my first project enameling discs for my friend Karen McGovern. I LOVE making discs for her! Not only does she give me free rein to do as I do, but I smile every time I see them in her creations. She is an amazing artist!


So, I am really going to try to keep my studio neat. I know the reality is that it will not look like it does right now even after today's work. I do hope to, at the very least, not let it turn into a disaster again!

I hope you are having a Happy New Year so far!

and.... as always....

Thank-you for supporting artists who create handmade with handmade,

MaryAnn

Monday, March 18, 2013

Boot Camp: Alpha-Texture

by Staci L. Smith

I think that when people decide to try out metal stamping, the first thing they buy is a set of letters.  I know I did.   I got this very basic set ages ago. It's capital letters, and numbers and a few symbols.  I didn't use it very much for letters though.  I'd like to share with you some of my favorite ways to use my letter to make patterns and textures on metal.  Remember- using letters as letters is NOT part of this challenge.

Here are my stamps, very basic.  I think I got these at Cool Tools many years ago.


Here is the hammer I like to use for stamping.  It's shorter, which gives me good control, (I hit my finger a lot less) its heavy, and its cheap, so I don't care if it gets marred from striking the steel stamps.  I got this one from Melinda Orr of Orrtec.


I took some discs I had lying around, they are made from about 24 gauge copper sheet.  Then I took my capital letter I.  In this simple set, it is just a straight line, and I use it a lot!


I hammered it over and over in some random patterns to create a sort of trail across my disc.


Then I took my letter O.


And I filled in the gaps, randomly changing the direction of the O so it gave it more natural look.


So using two letters, I created a kinda modern organic pattern on my metal.
 
Now we will get fancy. You can use a whole bunch of letters to make a really cool Boho like pattern.
 
I started with the period. I love using this as a dot texture.  I stamped it around the entire outside of my disc.
 

Then I did the same thing using my S going side-ways.  For the next inner ring I used the letter W.


After the W's were done, I took my letter X and stamped it, turned it on its side, and stamped it again in the same spot, to create these little star bursts in the center of the disc.


I thought I would show you one more thing I love to use as texture.  It's not an alphabet stamp, its my awl.  It's just a steel awl from the hardware store, sharp point on one end.  I use it with a rubber block, ILO a steel block to get the effect I want.
 
 
I hammer it hard into the metal (a brass strip this time).  It will curl as you do this, and that is fine. 
 
 
Then you can take your rawhide or rubber mallet and hammer it gently flat on a steel block.
 
 
I like it for the reverse side texture, with the bumps sticking up.  Sometimes I even break through the metal on purpose to create a rustic torn up effect.
 
Here they are, all done, I used Liver of Sulfur to antique the copper discs and then cleaned it off the high points.  It really brings out the textures that way.


If you didn't get to see Barb's post and video from last week you can view it here.
 
The blog hop will be on April 8th- so get those creative juices flowing.  Remember, we hope you will not only try to hand texture metal, but then, use it in a design, be creative with it.  Let's inspire each other!
 

Friday, December 28, 2012

The Love of Art Jewelry...... Featuring Karen McGovern

MaryAnn Carroll
I'm not sure when I was first asked to create discs for fellow artist Karen McGovern. Quite some time ago, she wrote to me and asked if I would make some discs similar to others I have sold, but with the holes in the center. If you recall in a recent post, I was having issues with punching center holes. I had drilled the first order, but had some problems with that method. I did solve that problem and opted for the Neiko hole punch. So far..... so good. Thank-you to everyone who helped me make that decision.

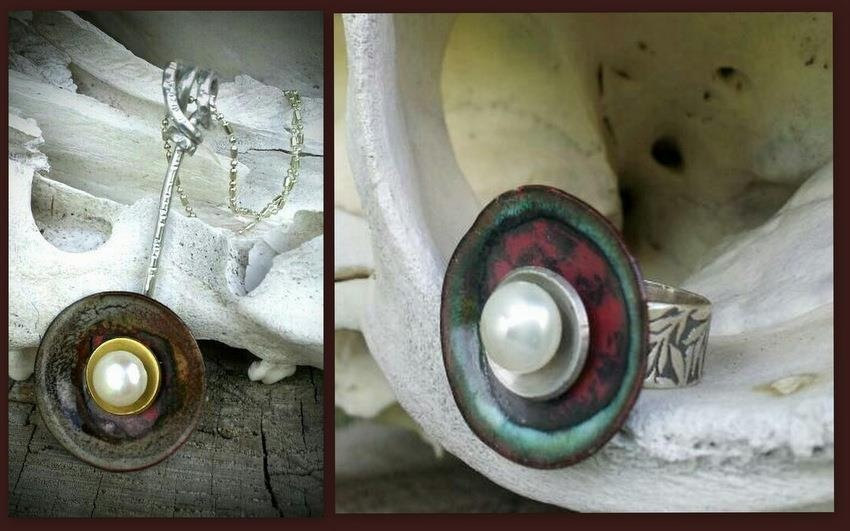
Back to Karen..... She is definitely a one-of-a-kind talent. She took the discs (similar to those pictured here) and created some incredible art jewelry.


.....starting with this very cool cuff.....


She has a recent blog post with the unique pendant pictured below.....


complimented with.... the beauty of rings......


Her imagination is unstoppable.....


Karen recently taught a cold connecting class in Traverse City, MI. These beauties are the results from that class.


And... lastly.....as they say...... 

"A picture is worth a thousand words!"


Before finishing up, I would like to share a few words that I took from Karen's Etsy shop regarding her other passion:

"Every day is Earth Day at Beadkeepers. The art and jewelry you see here is inspired by nature and created to raise funds for wildlife conservation through the Rare Species Conservatory Foundation.  Life is too short for boring jewelry!"

Check out Karen online:

http://beadkeepers.etsy.com

http://www.beadkeepers.com

http://www.beadkeepers.blogspot.com

http://www.rarespecies.org

As always, thank-you for supporting those who create handmade with handmade,

MaryAnn
face
Related Posts Plugin for WordPress, Blogger...