Showing posts with label #bootcamp. Show all posts

Thursday, April 16, 2015

Tutorial: Silk and Fabric Necklace

by Staci Louise Smith

I have always loved fabrics and its a shame I don't sew much.  Imagine how excited I was to try adding them to my jewelry!  I had some reservations, as I know some of you may as well, and I covered some of them here.


I almost exclusively use them as the back part of a necklace.  I really tend to "go big" on the front portion of my necklaces, so I don't usually bead all the way around.  I found that fabric can keep that interest of color and texture in the design without competing with the main focal.  Also, its nice to have something light to balance the visually heavy front.  Anyhow, its simple to use silks and fabrics in your pieces, and you don't even need fancy or specialized connectors (though some do like them, so I will link to them at the end).


All you will need is your necklace focal portion
(mine used one of my uber chunky boho carved focals, Suburban Girl Studio's rustic yellow drop bead, amber, agate, picasso jasper)

Starry Road Studio batik strips and Marsha Neal Studio 3mm silk
(you can use sari silk or many different kinds of silks, but this is what I used)

round nose pliers

chain nose pliers

flush cutters

clasp (I prefer an "s" clasp)

 chain


I had fun first laying out the different colors with my beads and figuring out which I liked best.  I really liked the blue added into the purples and yellows, but it just didn't work out when wire wrapping it up, so I switched to a more monochromatic palette.

1.  choose your colors


 2.  Wire together focal


 3.  Take a piece of fabric and a 3mm silk together (like to double them up, especially when I use sari silk, which can be thinner, this just gives a little more color and added support).  Some tips: make sure your fabric has no weak spots by gently pulling on it before using it in your design


 4. Feed both through the wrapped loop on one side and fold over


 5.  Hold them tight together


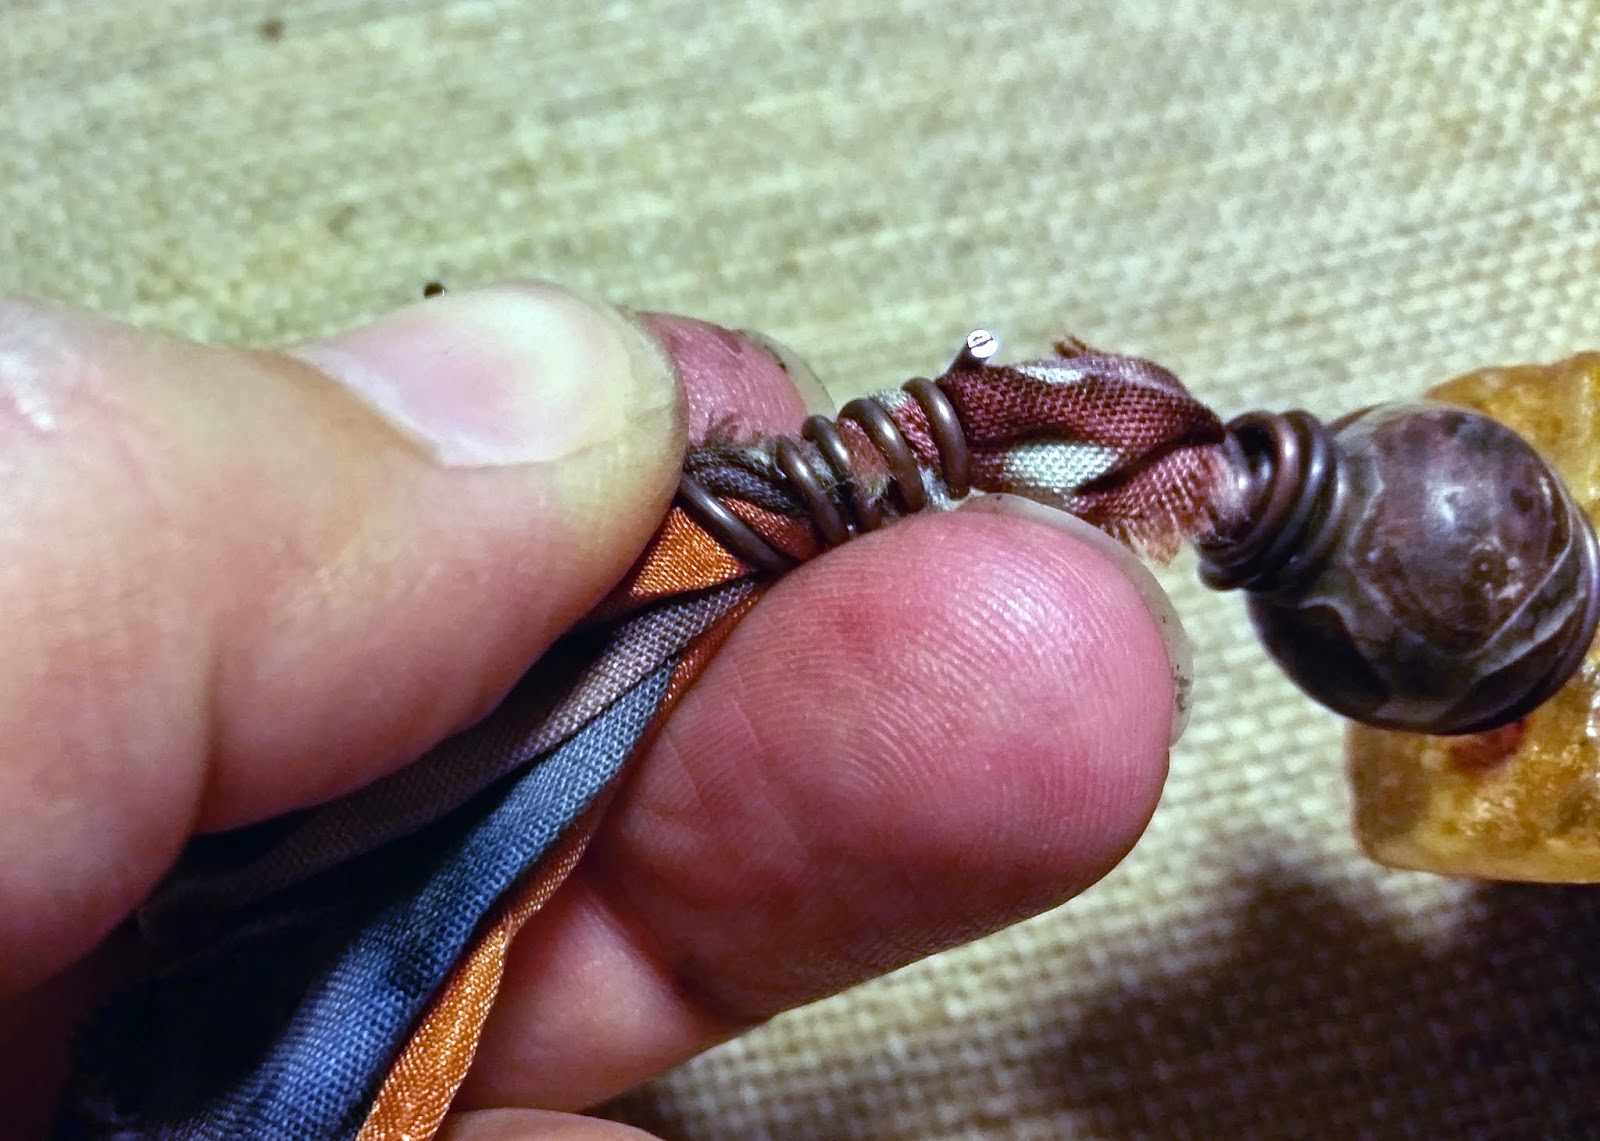
6.  take a piece of 18g wire, about 3", and hold one end with a tail sticking up, tight against the fabric


7.  begin wrapping the wire around the fabric, pushing it tightly into a coil.  this takes some practice, you need to keep tension on your piece as you wrap, holding each end of the of piece in your hands while still using your fingers


8.  when it is done, make sure you tightly crimp the top and bottom around and into the fabric.  the fact that this is tight is what holds it together


9.  You can trim the little tails off


10. now you have one side halfway done


11.  Time to add the clasp


12.  feed the fabrics through your clasp


13.  Repeat step 7 above


14.  Do the same thing on the other side.  I also added a little seed bead detail to one side, just for some more texture and fun


15. You are done!  


Now, just a word about using silk.  I sometimes like to use it only on one side of the design- as I know others do as well.  Keep in mind, your design MUST be balanced, not just visually, but by weight, or it will slide around on your neck.  I always wear my designs for a day to see how they hang, and make sure the weight is correct!  There is nothing more disappointing to a customer then buying a piece that is made to hang one way and it never does.

I leave you with some other artists who use fibers similar to the way to do, and I just LOVE their work! 

Monday, May 19, 2014

Love My Art Jewelry Fine Finishings Boot Camp BLOG HOP!!!

It's time for our Blog Hop for our Fine Finishings bootcamp!

We want to see YOUR examples of your very best fine finishings!

Have you been working on making your own ear wires?

Maybe you just started covering your crimps?

Have you been trying to make sure you get those wire ends tucked properly so they don't snag or just wondering what wire is best for each bead or type of finding?

What about your packaging? Maybe you've been working on new ideas so your packaging shines as  brightly as those beautiful handmade pieces inside?

Getting started in a new medium or perfecting the pieces you already make? Even refining your process by making sturdier charm loops, sealing your metal,  and cleaning the holes on your handmade beads can take your pieces to a new level of finishing.


WE want to SEE what you've been working on! Please post a link to your blog post below! You have plenty of time to link up below! Link ups close on Saturday Night at 10:00 EST! 

Monday, May 5, 2014

Know what you are buying......

MaryAnn Carroll
With shows in progress or coming up really soon, I thought I would share a little bit about ceramics. I think it is important to know the difference. The more informed you are, the more you are able to ask questions and make educated choices. Before I started creating my own beads six years ago, my only experience was two semesters in high school ceramics class. All that I really remembered was choosing what we wanted from bisque ware and then glazing them. I am sure that we built some things too, but if I did, it was probably ashtrays! Yuk! In 11th grade, I was an extremely intelligent and worldly 16 year old (not unlike some teens we know today) who knew all there was to know about life and school already and was done with what I needed to do. I was more focused on what was going on over the weekend much more than I was on academics. My most vivid memory is making six very huge (probably 2 liters) beer steins for friends! OMG! Can you even believe we could make beer steins in school in 1976? I'm sure that they eventually found themselves broken or in the dump, but they were a big party hit at Christmas!!!! Fortunately, for my mother and me, I grew up! I don't even like beer and gave up smoking in my early 20's.

With that said and with obvious reasons as to why those memories are vague, I then found myself back into creating with clay years later.  Since I am married to a retired art teacher, I was able to get lots of private lessons. I learned tons in a short period of time, but really got a wake up call when I graduated to firing from low fire to mid-fire in my new kiln with a malfunctioning pyrometer. You probably thought I was drinking, right?


You learn real quick when you wake up to see your beautiful creations in your brand new little 8 x 8 kiln and instead you open the door and ..... "Holy #$%@#$@!!"

That bottom that you see is part of the kiln brick that all of this melted on.  Yup, it caught all of it, bead trees, beads, nichrome wire and anything else that was upright. A very sad sight. This, however,  is a perfect example of what can happen when you fire a clay hotter than it is intended to be fired.

Also, for the record, this is not the be all end all in ceramics. It extends as far as my knowledge extends, but I think it is fair to say that these are the most common types of pottery that you will find. The main difference between clay types is firing temperature and how porous the piece is after firing. The firing temperatures for optimum hardness that I am giving you can vary. Many people choose to use firing cones that bend when the kiln reaches temperature. I do. I use a pyrometer also, but don't trust is totally! Go figure.

cones for an upcoming wood-firing (different cones melt at different temperatures)


cones that have melted in response to heat work


My summary is just to offer you some insight about the various types of pottery that you will see at shows and online and, hopefully, you will walk away with a little more knowledge about ceramics.  I will show examples of beads but, anything you see here pertains to large pieces as well.


So, what ARE you buying when you shop for ceramics? 

Low Fire Earthenware:  This is a low fire clay, which is most commonly fired in an electric kiln.  They are fired to about 1860 degrees. These clays are highly plastic (easily worked) and can be sticky.  This is what I was glazing when I was in my ceramics class.... You know... the beer steins!  It is also what I first used when I started to make my own beads.
earthenware beads

I sold these in 2009. It is funny to see how much I have evolved since then. I still see myself in these, but also see how much I've learned since this time.

Raku: This type of kiln is usually handmade. Once the kiln (often made from high fire barrel) reaches a temperature of 1860 degrees, the piece which is red hot is placed into another barrel of straw, sawdust, and paper which ignites instantly. The barrel is quickly covered and the work remains inside for a period of time. The glaze is often known for is copper like luster, but there are also many other glazes that are common with raku such as crackle glazes.

raku beads by Elements Pottery

Pit Fired: This is sometimes confused with wood-firing. I don't really know too much about this method, but I found a great little post that you might like to read. You can get there by clicking the link under the picture.

Pit-fired beads Lil Fish Studios


Mid-fire clays: There are many types. Some prefer to use stoneware and others porcelain.  There are many colors and types of stoneware. These are personal preferences for the artist and many choose what they do for the effect that they wish to achieve. There are stoneware clays that are nearly white and some that are black. The outcome of your piece depends on the type you use. If you use browns or blacks, the outcome after glazing will be extremely different than if you use white.

You can click HERE for a great post that Marsha Neal did on mid-fire clay and glazes for the Beads of Clay blog.

Mid-fire porcelain from the few left in my almost retired Etsy Shop

High-fire clays: Again, like mid-fire, these can be either stoneware or porcelain. These clay bodies can be fired to 2400 degrees. These are often used with methods such as gas, wood, soda, and salt. The process is used to create a certain look. The added materials (soda, ash from wood and salt) mix with the glaze for various outcomes. You will not see these used much with beads for a couple of reasons. Often kilns are large and designed for larger pieces. Also, the salt, soda or wood ash lands freely on the piece. When beads are glazed and put on bead trees, many can get lost due to the free form melting that takes place.

Here is a group that was showered with ash. It was a little bit of a disappointment, but it is the price you pay when wood-firing. The ones behind that grouping that were more protected came out great, but as you can see, there is a big chance of losing many.


I could not find any examples of soda or salt fired beads, but I do have wood-fired. That's because I am married to a wood-fire artist and get to put my little beads in his very big kiln!

We are going to experiment with mid-fire porcelain this time by adding it to the way back of the kiln. Here is a picture of what is going in.  I don't think I will put all of the porcelain in until I see the results.


Obviously, they need to be glazed. The ones on the tray are mid-fire porcelain and the others are high fire stoneware. Hopefully, I will share some results that are beautiful and not like the first picture that I shared in this post!

I'm a risk taker..... so, we'll see what happens.

Here are some of my favorites from past firings. The downside of wood-firing is that it is unpredictable. The kiln gets stoked with wood from every five minutes to every one minute near the end for about 16 - 20 hours.

The upside is that you get unique, one-of-a-kind pieces with every firing like a few of my favorites that I have pictured below.


So, I hope that you have learned a little more when shopping for ceramic pieces. If you are a ceramic artist or if you have any questions, please feel free to chime in.

Thank-you for supporting artists who create handmade with handmade,

MaryAnn

Monday, April 28, 2014

Psst....Your Crimps are Showing! Fine Finishing Boot Camp!

Details, details.  This month's boot camp is all about details.  Fine Finishings, the little things that make your work really POP, really shine.

As a newbie jewelry designer, some of the basic details were often the most difficult to master.  One thing in particular I have always been obsessive about is covering my crimps, and creating good, strong crimps. 

Stainless steel crimps
If you work with gemstone beads, you know how important a good crimp is.  Especially if you like heavy, large beads.  The crimp is the very foundation for any strung design.  The strength of your crimp is the difference between a design that will last for generations and a disaster that falls apart after a few wears.  So, what's the deal with crimping?  For starters, crimps come in all materials.  You may think that sterling silver or real gold crimps are the way to go to make your designs lux, but I prefer base metal crimps and here's why--pure silver and gold crimps are usually weak as Hell.  Silver and gold are soft, and a tiny crimp needs to be strong to support your design.  I have found that base metals are much stiffer and stronger, and hold up for the long haul. You can get them in stainless steel, which will last forever! 

Tools matter and a good set of crimping pliers is a must.  Learning how to use them matters.  Where to place the crimp in the jaws, how to then finish the crimp with that all important fold, then test that crimp to make sure it's holding.  I sometimes use two crimps if the design is heavy or I'm not sure about the crimps themselves.  Practice, practice, practice.
 

Then, covering those bad boys.  To me (and this is just a personal opinion), nothing makes a design look unfinished like an exposed crimp, yet I see this so often!  Get yourself some crimp covers and hide that thing!  Crimp covers are basically seamed round beads (usually 4 or 5mm) that are left open, allowing you to slip the bead around the crimp like a clamshell, then you squeeze the crimp cover closed--viola, no visible crimp!  Crimp covers are also great for fixing mistakes in layout or spacing.  Have a loose spot or space between beads you didn't notice?  Slip in a crimp cover or two and you're good to go.  If you want to get super fancy, you can also use French wire to cover the stringing material you made your loop with. French wire is fine wire coiled up like a micro spring.  You thread your stringing material through it to cover it.  I must confess that this is something I should do, but don't because I am lazy and impatient and never remember to order it.  BUT, whenever I see a strung design finished with French wire I love it and really think it adds a professional detail and look to the design.  AND, it protects your stringing material from whatever you crimped it to (clasps, hoops, etc.).  Again, these little things matter so much in the long run!! 

Gold French wire from Rio Grande
You'll discover all sorts of ways to cover crimps--pre-made crimp covers are just one quick and convenient way to do it.  I create tiny wire wrap bundles around my crimps as added texture to a design, or use a large hole bead that will slide over a crimp, followed with a crimp cover or bundle somewhere else in the design to take up the slack.  You can be creative, even with something as basic as crimping.

Two recent designs showing how I cover crimps--either with large hole beads followed by crimp covers
to take up slack, or bundles of wire as an accent following or over a crimp or large hole bead.
Finally, when trimming your stringing material behind a crimp, try not to trim flush with the crimp.  Leave yourself as much room as you can for stretching or loosening (unfortunately, this is pretty much inevitable over time).  I try to use beads with holes big enough for my stringing material to pass through twice (at lease near the crimp) so I can tuck a nice tail of material behind the finished crimp.  This way if the crimp gets loose or fails, the entire design won't immediately fall apart.  This is also a good argument for double crimping on each end.  Better to be safe than sorry!

The process--All it takes is patience.  Notice the extra tail of stringing material I left, going through the turquoise. 
If this was an extra heavy design, I would add another crimp here, then cover it.
While crimps may not be the most exciting topic in jewelry design, learning how use them properly and professionally are basic skills all jewelry designers must master.  So, go forth and CRIMP ON...just make sure you COVER YOUR CRIMPS!

Friday, April 18, 2014

True to your Art, True to your Business or Both?

MaryAnn Carroll
What is the most important to you as an artist? I think most of us would say that it is that we remain true to ourselves, grow from our experiences and perfect our techniques. I agree.

On the other hand, there is an art of selling. With show times coming up for many or if you sell online, I think you need to ask yourself if there is a balance in what you do?  This has been an ongoing discussion with my husband Bill Perrine and me. He has been a ceramic artist for many, many years, but started to create wood-fired pottery in 2008. At the time, he was not going to "bend" from being the artist that he was. I respected that, but as time went on, I started to give my female perspective on his work. Although beautiful, much of what he created had a masculine feel to it. Don't get me wrong.... I love most of it!

Although, I love what he does and he is incredibly talented, we have had many discussions about who the buyers are.  I travel with him to shows and have my little section set up for jewelry. I have paid lots of attention to how people shop when they walk into your both.

I can assure you (I think I will actually tally it this year) that the majority of your buyers are women. Once again we found ourselves having the same discussion and he came up with a way to stay true to himself while thinking about his buying "audience".


Those are a few examples of what will be going into the wood-fire kiln in a couple of weeks. The beads that will be going in still remain in one big ball of clay sitting on the kitchen table......


So, this is my take on his sales. I know you are dying to know...... "what's my take on my sales?" Well, it is basically the same thing. I have learned that some of my best work often sits because of the price tag. I also learned that I have to learn the art of creating for my audience. I am in a small gallery in Cortland, NY called Cinch Art Space. It is a great little shop filled with art from over 40 vendors.

Being in Cinch has been a learning experience for me. I had to know the community (near SUNY Cortland) and think about who the other buyers are. With that said, I began designing a range of jewelry from simple to complex. When I create simple it allows me to keep the price down. On the flip side of that, I tend to get bored easily, so I have to balance simple and more complex.

There you have it. I would love to know what strategies work for you.

On a completely different note, we have a few other things going on. Staci is offering a fabulous pendant giveaway. You can click HERE to read her post and leave your comment. Please remember to comment on the blog so that you will be counted when drawing a name.

Karen's non-profit organization Rare Species Conservatory Foundation is currently going through some difficult times. If you have a passion for preserving wildlife and our environment, please go to her website to read about their very important mission. You can also get to it by clicking the link on our sidebar. Funding is always needed to keep organizations like hers going.

Lastly, for those of you that might know me through online friendships or "in real life", you probably know that I am a big advocate for political injustice, particularly for those who are in prisons all over the United States for crimes that they did not commit. My passion evolved from one of the worst experiences that changed my life forever. The case involves a loved one and since it is not completely closed (despite the fact that it is now in year 4), I am not going to go into any details, other to say that it was very close to ending up like so many others who did not end up as "fortunate" as we did with wrongful convictions. I know we do not like to believe that the corruption can sometimes be on the side of the "good guys", but it can be and it has been.  I am offering a sale/donation to help Charles Erickson. You might have heard about the case since it has been all over the media. If you would like to learn more about how you can make a purchase while donating at the same time, you can click HERE. There is also a link on our sidebar.

Today, I do not only want to thank-you for supporting artists who create handmade with handmade, but also thank-you for supporting causes that are there to right the wrong.

MaryAnn


Monday, February 17, 2014

boot camp - asymmetry in earring design

mary jane dodd


creating asymmetry in earrings can add great interest. 

there are different ways to achieve this effect - 
you can use the same beads/elements and arrange them differently on each one - 
or you can strike your balance with beads of similar size, 'weight' and color. 

when i am working this way in necklaces or earrings, i tend to view my work as if there is an 'x' present - checking to see if there is balance across the work and from top to bottom, side to side. 

in the first pair of earrings i merely switched the arrangement of the turquoise and amber. subtle asymmetry.

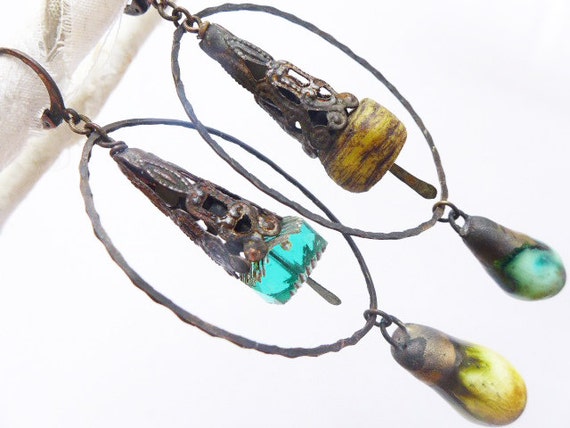
here, the ever inventive fanci shows how to create balance across the set. 


she keeps the structure and size of the earrings similar but switches up her beads in terms of color and/or shape.


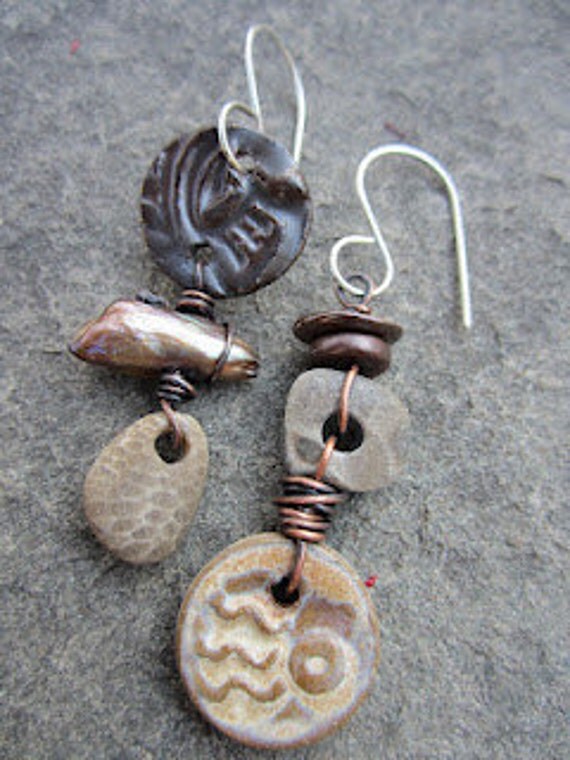
in this pair by our own staci, she kept her color scheme and scale consistent, but created interest with different shapes of beads and switching the arrangement of the discs from top to bottom. when viewed side by side, you can see how there is balance across the set when you are looking at it as an 'x'.

mjd

all of the same components were used in this example - i just changed the orientation of the accent beads from horizontal to vertical. the scale, color and shape are consistent. 


i love how the eye moves in this pair - kate has balanced them across the set, keeping scale and color consistent, she plays beautifully with shapes. 


mjd

here i have played with the negative space on the left by filling it with chain and beads. on the right, a bead from the same set is used, but i have left the negative space open. 


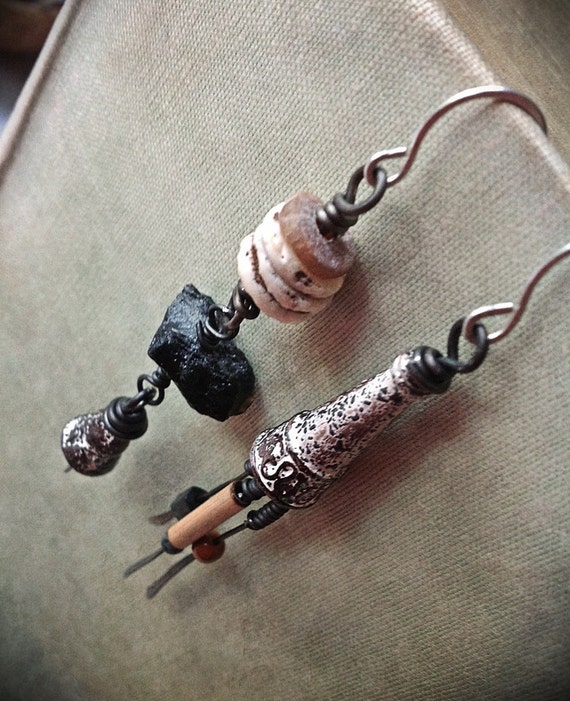
this is a gorgeous example of asymmetry in earring design - color, overall shape and size are consistent. here the balance is more in the form of triangles - top and bottom of left related to center of right and vice versa. 

------------------

i wanted to add some thoughts re: designing necklaces. i agree completely with the other women in the group about how weight is crucial. a necklace that stuns flat on your work table but slides all around your neck is not a successful design. 

developing an asymmetrical way of thinking isn't always easy. some people take right to it, others find it to be more challenging. if you are finding it hard to do, remember, even throwing in one bead of a different color or shape (with a similar relative scale) on one side of the design creates asymmetry. it does not have to be complex. it can be, but doesn't have to be. 

mjd

in my fiber necklaces, if you look closely, you can see that the neck piece has 4 different sections - all in the same color scheme. closest to the pouch, i have used threads with strung beads on one side and linen with accent beads of the same sort stitched to it on the right. 

--------

so have fun - whether your version of asymmetry is bold or subtle, it adds much interest to designs and helps you to define your own look. 


face
Related Posts Plugin for WordPress, Blogger...