Showing posts with label jewelry display. Show all posts

Tuesday, November 8, 2011

Necklace bust makeover

by Patty Lakinsmith

If you do shows, and your necklace busts are worn and in need of replacing, you don't have to spring for an expensive, new set of busts just yet.  I want to share a project that I just completed that turned out great, and it didn't cost much.  There are loads of other ideas that could work for this purpose, but I chose this one because of what I had on hand.

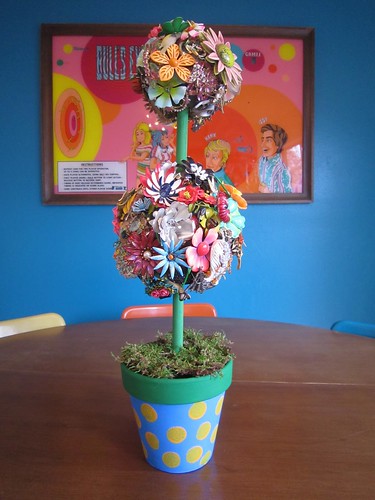
Right now I'm moving toward more natural displays that complement the organic, nature-inspired style of my jewelry.  It's hard because I have no real talent in this area, but I was inspired by Kathy Frey's similar journey, and a woodsy-themed booth she once had.  Wood, water, moss and stone are the things that tend to capture my eye when hiking, and I decided to showcase my jewelry among those elements.

I decoupaged my fabric covered busts with several layers of tissue paper (using Mod Podge), followed by several layers of handmade paper I had made several years ago after taking a really fun paper making class with local artist Jeanne Tillman.  The paper encapsulated dried flowers and seeds from my garden, and some was tinted with spices from my kitchen, such as turmeric.  I also made over my black leatherette (and one black velvet) busts with spray on faux stone (a textured paint, actually).
I think this new piece (SOLD) would have faded into dark oblivion on a black bust.
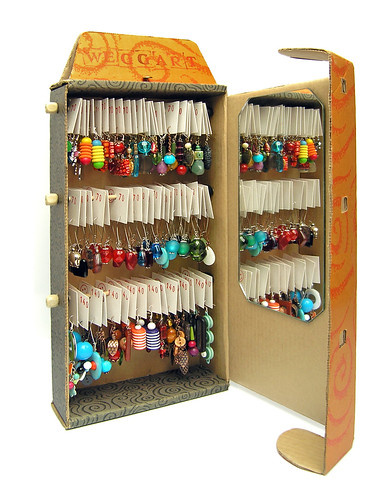
I took them for a trial run at the Sacramento Arts Festival this past weekend, and I liked the effect.  Moss sheeting covered a wooden tray, and lined the compartments of a glass case, and I had a few faux moss-covered rocks (styrofoam) that proved irresistible for browsers.  I think I'll put a tin cup out there with a sign to "Pet my rock for 5 cents" or something - it was quite entertaining.


But there is much left to improve on.  That banner, the lights I completely forgot for the front corner of the booth, the 2 PVC table risers that were a larger diameter than the others and caused my side table to leeeeeean (wooden shims are a very handy thing to keep in your show bins).  But I'm glad I didn't have to go out and buy new busts. 

P.S.  I was ecstatic to learn that Kathy Frey was exhibiting at the Sacramento Arts Festival last weekend too, and ran over to her booth the first day to introduce myself.  Her work is incredible, and so graceful, and I enjoyed chatting with her a few times over the weekend.  If you haven't read her blog, you're in for a treat.

Have you done any art projects for your booth?   Little creative touches that set your booth apart from the others?

Thursday, June 9, 2011

It's all About Presentation : How to Make a Paper Box

Today I'm going to show you how to make a simple handmade box. It's the box that inspired last month's Art Spark challenge. I first encountered this box pattern when I received a beautiful piece of jewelry from the lovely and talented Lorelei Eurto which was packaged lovingly in a box just like this.


For my boxes I purchased a couple of packages of scrapbooking card stock.

It is perfect because it is both beautiful and square.
Square is where we start with this project. You need two pieces of paper the same size, and perfectly square. The size of the paper determines the size of the box. I am illustrating with 12 x12 inch paper but if you quarter it, you end up with four boxes of petite size. (my favorite)


This is all you need. Scissors and paper. Make sure the paper is stiff like card stock. It makes your box strong and your folds crisp.


Choose two pieces of complementing paper. One will be the top and one will be the bottom of the box. Begin by removing any extra tabs that have been attached to the paper by the manufacturer.


**Please note -I have chosen two pieces of paper that are identical as one side of them is decorated and the other printed red.


Choose the paper/color that you'd like to be the bottom.
If you are using 12 x12" size paper, trim 1/2" from two perpendicular sides.

The bottom of the box needs to be a bit smaller to fit inside the top when folded. I usually eyeball this but if you are making smaller boxes, trim a smaller amount proportionally.


Next, with your chosen color for the bottom facing the table, fold the square into a triangle meeting opposite corners. Open the paper flat and fold the two other corners together. Make soft creases when you do this. You are making a guideline for the next step. Open your paper flat once more.


Above you will see the next step illustrated. Bring your four corners together into the middle using the nice 'X' you made in the center of the square.


Once every one is in, turn each one out to look like this:


Beautiful. You're doing great!


Now the edges of the square get folded to the center 'X' point. Fold them in and flatten them back out again.


My finger is pointing to the crease you will make.


Showing two sides up. All four sides will come in to meet the center point, get creased and then fold out again.


Once you have folded all sides in and then back out you will see a small crease-square in each corner of the arrangement.

What you will do now is carefully cut two places on parallel sides of the work. You know when to stop cutting when you reach the crease-square's point. The point of the scissors above are in just the right place to stop.


Now after four beautifully precise cuts, you have made this (above)


Open out the "short" sides like the unfolding wings of a bird ( I know, but it's late and it's a good visual)


With the open wings flat on the table, lift the two "long" sides up and have their corners meet and overlap. (How do-you-do corner? Just fine, corner.)


Uh oh!

The outside corner is too long and too pointy.

So we trim it. Just a bit, to make it even.


You can see both parts of the next steps above.


#1. while holding the newly acquainted corners together, let that bird wing that we opened up earlier reach up and wrap around and over them to hold them together.

( hey, this metaphor's not too bad).

When you lay the corner in the box bottom, it will hold with friction. If you wanted a more permanent bond try a bit of glue or double sticky tape.


#2. Do the same with the other side.

TA DA!
You have just completed the bottom of the box.

Nice one.


Now for the top.


The pattern I would like on the top is now facing the table as I start folding. Repeat all steps the same as with the bottom.


Your top half will be a tiny bit bigger and should be able to slide down easily but with some resistance. If you think it's too loose or too tight, don't fret.

That ill-fitted box bottom is a great drawer organizer and you can make a new one by adjusting the width of the 1/2" strips that we trimmed from two sides of the bottom paper in the beginning.


The top taking shape. Here we go again with the bird wings...


They enfold the two sides and..... BAM! A boxtop.


Pefecto.

Tuesday, April 5, 2011

Thinking about jewelry displays?

by Patty Lakinsmith

Happy Spring! It's showtime again, and many of you have already jumped into your 2011 show season. Every year (every show?!) I always start thinking about ways to spiff up my displays for the new show season. It's an ongoing thing for me, and I have to say I like it. And everyone knows that it's easier to sell beautifully displayed jewelry.

There are lots of great places to find inspiration. You can go to shows and see how other clever artists display their work (but ask first before taking pictures), and you can find great ideas on Rena Klingenberg's site. A while back Rena republished this article I wrote on my art show booth, and it's one of my most read pages.

Here's some great ideas I found on the Flickr site. Wondering how to display all of your floral brooches? This one knocked my socks off:

Mod Flower Brooch Topiary
Naughty Secretary's Club's jewelry garden is in full bloom.

Vintage dish jewelry display
Eco Retro Bling knows how to serve up some tasty jewelry, vintage style.

Just an ordinary cardboard box? Or perfect earring display? (2 of 2)
Weggart shows how to be green, efficient and stylish all at once with this innovative repurposing of a shipping box.

And if you're looking for ideas for the perfect jewelry show booth, this group and this group both have endless supplies of inspiration. Better clear your calendar because you're going to be browsing for hours.

Do you have some favorite jewelry display ideas that you'd like to share?
face
Related Posts Plugin for WordPress, Blogger...