
The first fancy clasp I fell in love with was the toggle clasp. They came in pretty designs, fun shapes, and all sizes. I used to page through my Fire Mountain Gems catalog (lol, my first source of bead supplies) and drool at the ones that had stones set in them.
I could not afford the pretty ones early on. So, I did what all poor jewelry designers do, I made some. At the time I had NO metal or wire skills.....I mean NONE.
So I took the gemstone donuts I loved, and used a stick pearl, and made it into a toggle- in the front of the necklace.
I wish I had a picture of them. You would laugh, it was genius, yes, but my execution...wellllllll...............
Anyhow, fast forward, and its still a good idea. You can make a toggle clasp out of most anything with a hole. And I still like the look of stick pearls.
I used a pearl for the toggle on this Moon Necklace of mine.

There is a challenge in finding just the right size bead to make this work.
However, if you are handy at all with wire, or even if you just know the basics, you can make your own toggle, just the right size, to fit anything.
This is a typical Staci tutorial, as it has no measurements in it- I wing it was needed. Also, please don't mind the dirty fingers...I used oxidized wire, its messy.
To make the toggle bar, cut a piece of wire, I used 16g for this be highly recommend 14g- or even 12g!! Make it about 2" larger then the diameter of your toggle....always over judge NOW, cause if its too small you have to start all over.

Take your round nose pliers and place them in the center, and make a loop


hammer the loop

hammer the bars flat

It is ok at this point if the size is off.
To size it, place it through your toggle, and move the center loop of your toggle bar to the far side of the toggle. You want to do this at the widest part. This is to figure out how long to make it so it doesn't fall though. You want the bar to go over the edge enough to hold, but not so much it will be TOO big and annoying to the wearer. Though it is always better for it too be too big then too small. Trim the wire. Repeat on the other side.

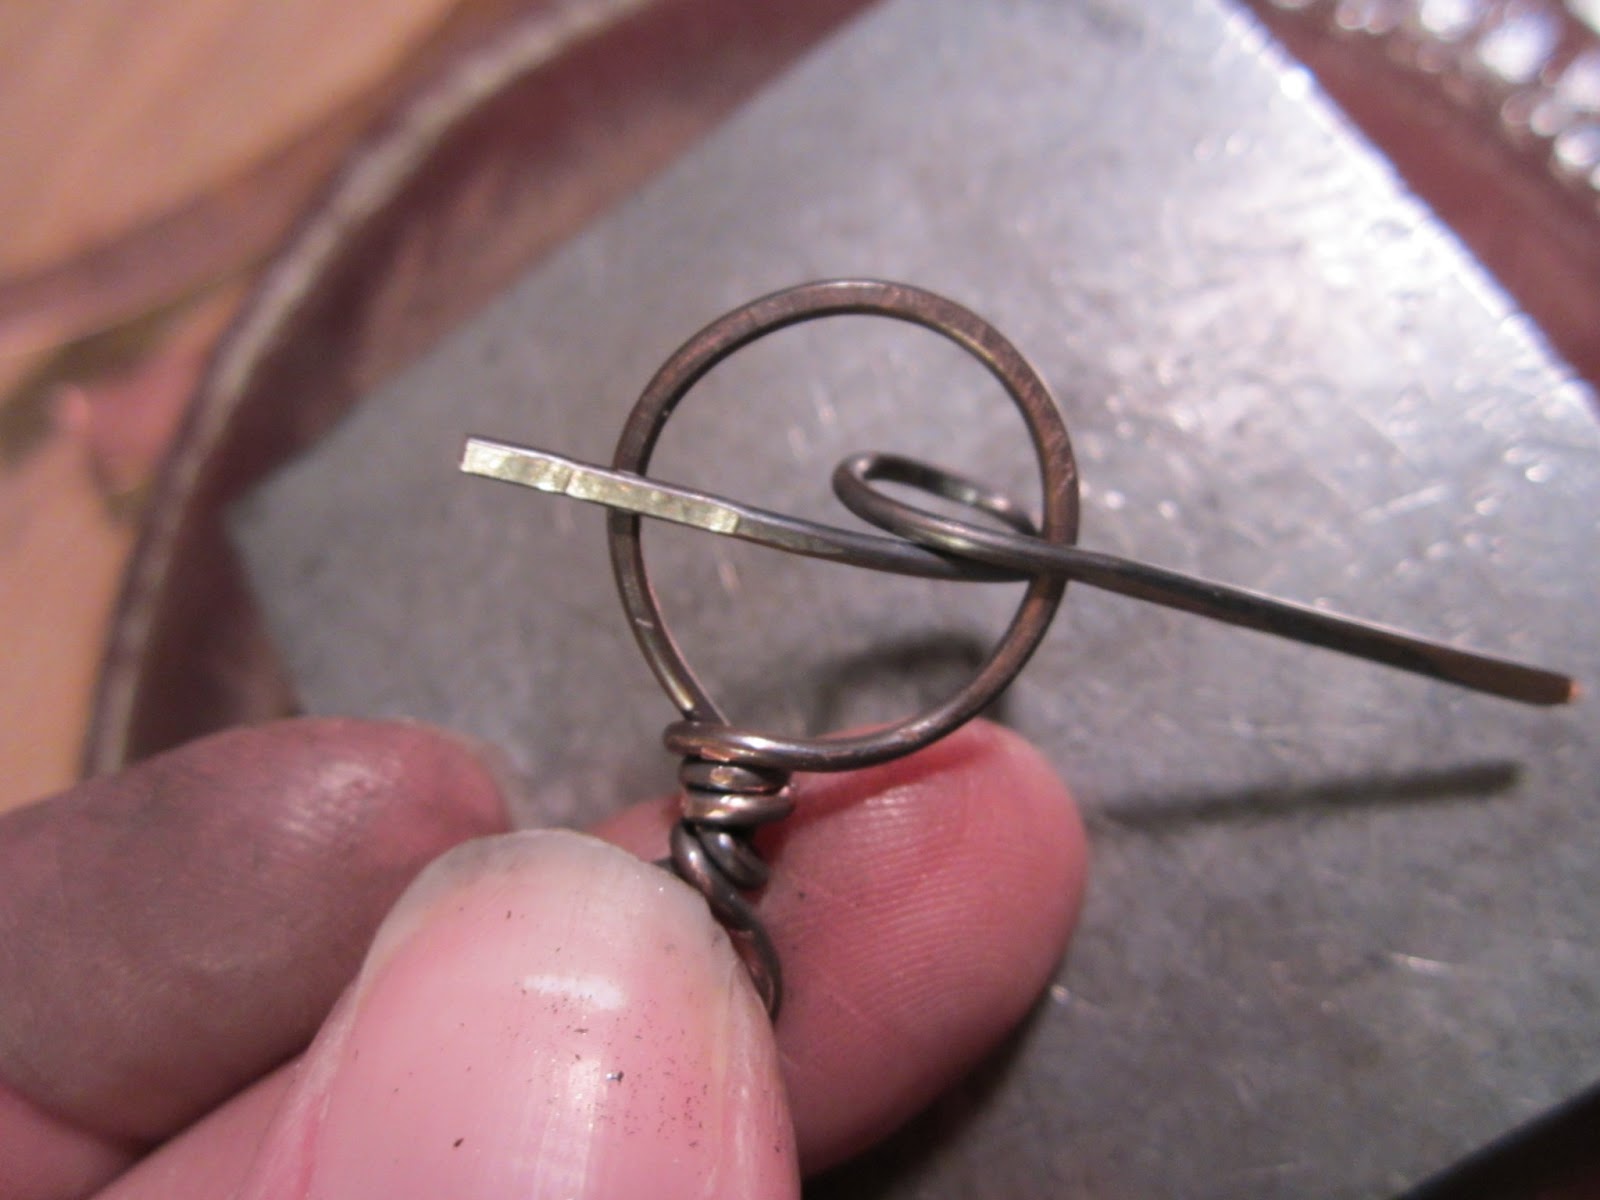
Hammer and file the ends (you don't want it to poke people!). Voila! You made a toggle bar.
To finish your project, you can make the toggle out of wire too.
Cut a long piece of wire, make a small loop at one end

Make a larger loop with a ring mandrel

Wrap end to connect and hammer

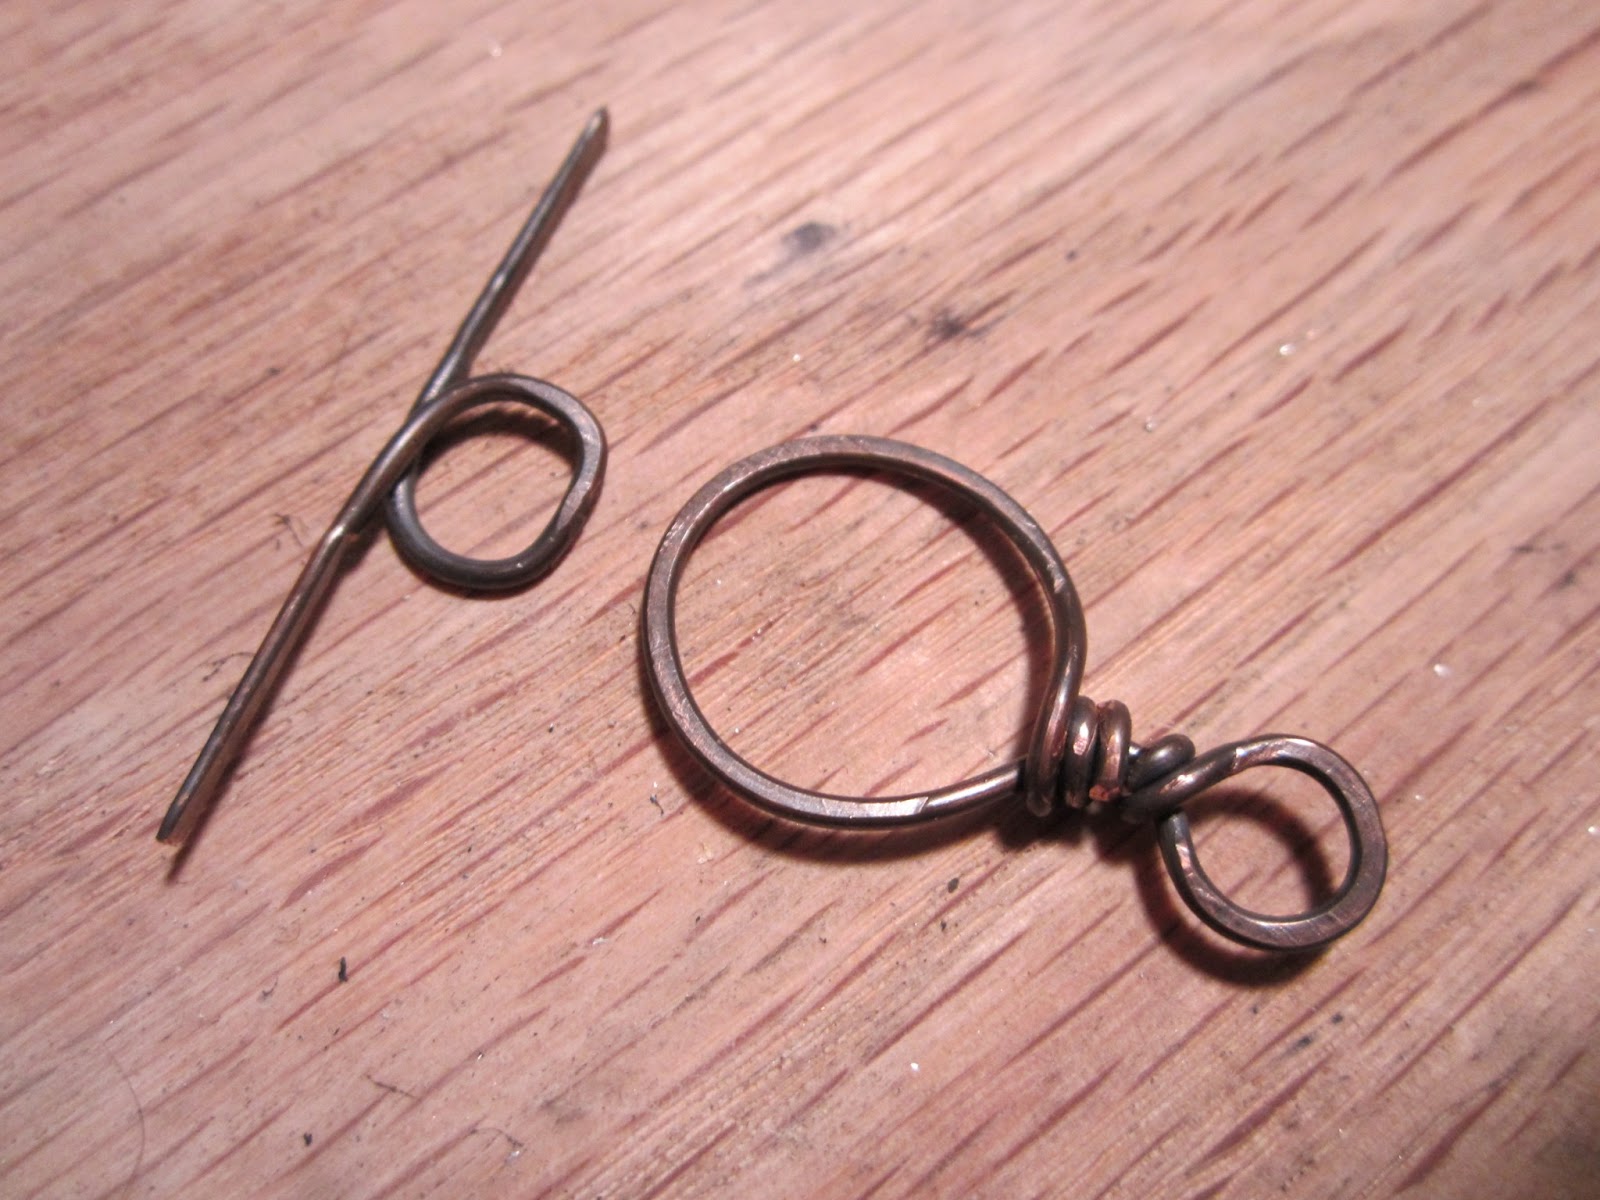
Now you have endless possibilities for toggles!!!!
I highly recommend wearing every piece you create with a toggle for a little bit, to make sure it stays put. Personally, I find them tricky to get just right.
Now go and Tackle some Toggles!!!!
5 comments:
Thanks so much for sharing this! I am very new to the craft and need all the help I can get!
Thanks again.
You make it look so easy. :)
Ooh love that necklace! I love toggles too :o)
you DO make it look so easy. & explaining how to measure(middle loop against far side, repeat) brilliantly explained~thanks
Nice jewelry! I'm Jealous. Cannot wait to see them up close.
Post a Comment