
In the beginning.
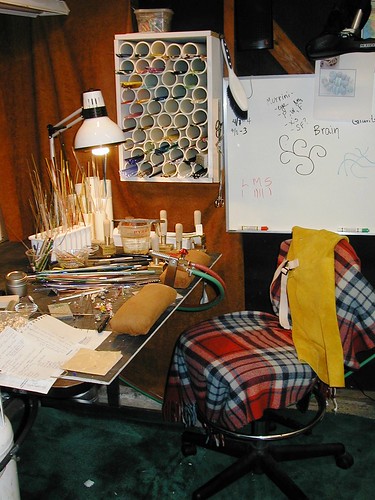
Let's start with the "before". It was hastily thrown together what, 8 years ago, using a hand me down adjustable height table, a piece of concrete backer board I spray painted black, and some fabric quickly stapled to the bare studs to make my corner of my garage studio a little less..."garagey". It's not like I wasn't able to transport myself away from those drab surroundings and dream my glassy little dreams out there, but I really wasn't excited about having people visit. I hated how sometimes things went pop and I didn't know where they went. I was also increasingly frustrated with my pile-o-tools on the table to my right. There was never enough room for them, and I was always struggling to disentangle them mid-bead. 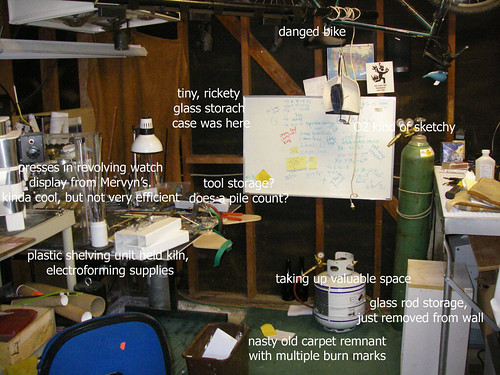
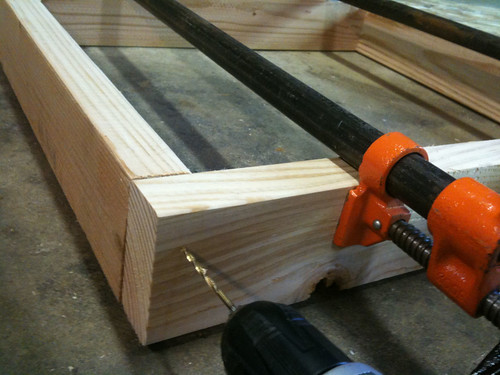
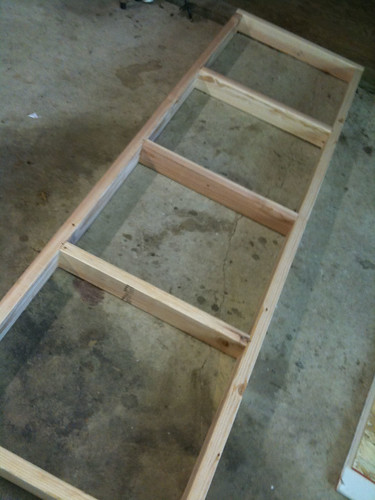
You saw what I did to my glass storage in a prior post, and that was only the beginning. I have this habit of dragging out the power tools when my husband goes on business trips, and our recent chicken coop building project only whet my appetite for building. I built a near 8' long workbench using 2 x 4s for framing and attached it to the wall, leveling it in two directions all by myself using a bit of spit, a level, and my torching chair. That was hard. I attached a bit of a ledger board on the wall first, and leveled it. My brother gave me a great tip about clamping the 2x4's for the legs (instead of cutting them first and hoping for level) while I figured out exactly how long each leg should be. This bench is secured to the wall on two sides and has three free standing legs. This is my first time building anything with 2x4s, and due to ignorance and haste I think I used the cheapest type meant for using as studs inside a wall, but I made sure they were straight when I bought them, and I have to admit it was kind of fun using something so strong for the first time. Just kidding about the spit.

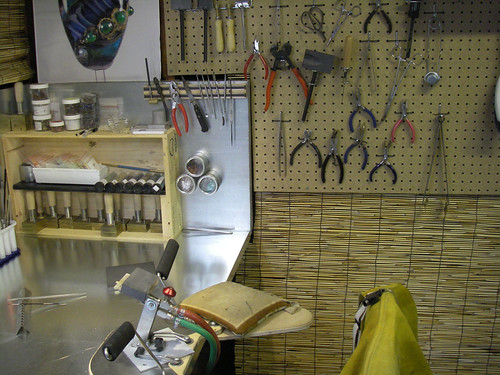
I topped the framework with MDF and then fire resistant gypsum, adding a backsplash of sorts on the back and two sides. A local roofing metal company did a great job making my inexpensive galvanized top despite a couple of measurement errors on my part. I debated surface materials, and finally settled on this relatively lightweight and clean looking metal, even though I'm not much for the industrial look. At least it will keep any dust down. This bench is solid! I can even stand on it with no perceptible movement at all. The 2x4s for the two legs on the left side extend up quite a ways to provide an attachment point for my lights, and give me a frame on which I can mount the pegboard for the tools on the left torching station.
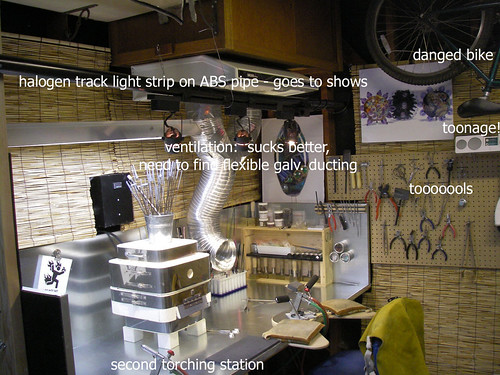
The exposed studs had me scratching my head for a good while, trying to figure out how to disguise them without just putting up drywall. In a moment of inspiration at OSH I found these reed roll-up blinds and they were just the thing to make the dingy walls disappear. I have a little inspirational mixed-media art piece in mind for the walls to replace my bead images.
Finally...a place for everything.
My ventilation has always been a range hood I found on eBay for a song, although the shipping costs were more like a box set. It did an OK job, but not great - it was way too high above my table, and needed a lower hood enclosure to be effective. Inspired by Andrea Guarino's ventilation tutorial I was determined to enhance the suckability of my setup by using ductwork, but was only able to find the flexible corrugated stuff at Lowe's. It has tremendously improved the performance of my 400 cfm hood, but I need to find the smooth flexible ducting, and ideally a ready-made "Y" joint to replace my sketchy one. It's all a bit of overkill for a garage studio where one wall can be raised at will, but in the colder months I don't usually open it all the way, so the ventilation upgrade is a good idea.
I also plumbed the gas from outside using this great tutorial from LE, and moved my flashback arrestor so it's inline in my hose instead of at the tank outside. Found a few leaks today when I finally tested it, but was able to tighten everything up.
I had some wine boxes from the local wine distributor and converted one into a little shelving unit next to my torch to hold my presses and other flotsam. I've been able to repurpose almost all of the concrete backer board I used to have on my torch table.
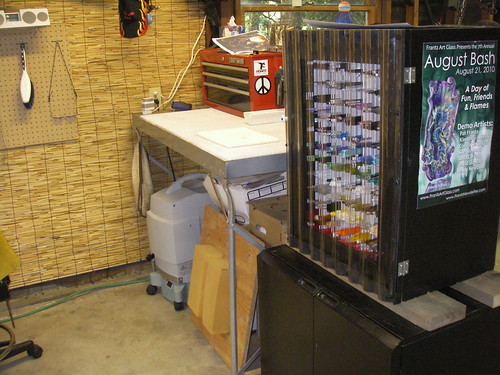
Still need a skirt for my old voter's registration table (free from the county years ago) where I dip mandrels, to hide the storage underneath. The (free) metal cabinet under my new glass storage holds extra supplies and equipment.
The guest torching station will have a pegboard for tools like I do, but on a smaller scale. I plan to start teaching private and 2-person classes soon, and when I do I'll move the kiln to a cart to make a little more elbow room at the bench.
Just for fun I'm going to try finding some old vertical blinds on Freecycle, to use as a kinetic skirt on my mandrel dipping table. I'll probably jazz them up somehow first, though.
I've already started using my tumbler on my new bench, as well as some electroforming. Finishing projects started months, even years ago is high on my list right now, as few other accomplishments rejuvenate me quite as much. I've been creating some new jewelry as well, and will photograph and list several new pieces this week, so keep your eyes on my Etsy shop.
*My dream studio will be in it's own building, and will include torching stations for eight, a kitchen, great room with fireplace, and individual lodging rooms as well. If you're thinking it sounds like a Bead & Breakfast, you're right! That's my dream.
7 comments:
i am an aspiring jewelry maker and your blog is just perfect for me :) THANK you :)
Now you're serious about the work! Good Luck in your venture.
Wow Patty!!!! I am at a loss for words! Very, very impressive! I love it!!!!
Thank you all for the feedback. :-) I can't wait to dive in and start messing this place up.
Love the new studio look. Should be very functional. Inspires me to get mine in better order. Thanks.
I'm a new reader, and am loving your blog!!
On behalf of all of us, Abeilla s miel, thank-you and we are happy to have you as a follower :o)
MaryAnn
Post a Comment