Showing posts with label lmaj boot camp. Show all posts

Sunday, October 6, 2013

Handmade Hoops Hop!

We have a few hoop creations to share. Visit the links at the bottom of this page to visit blogs, flickr and Pinterest. It is not too late to sign up. If you have created jewelry using hoops, please share a URL where we can read more about it.


If you would like to share your creations, please link your URL below. 

You also might want to check out  LMAJ Boot Camp on.....

FACEBOOK

PINTEREST

FLICKR

So, do you have something to share? Please do.....

Please make sure that you link to a post that includes the current boot camp on hoops.  Also, on your post or other site, please leave a link back to LMAJ for easier maneuvering.


Monday, July 15, 2013

Boot Camp: Tackling the Toggle

by Staci Louise Smith

The first fancy clasp I fell in love with was the toggle clasp.  They came in pretty designs, fun shapes, and all sizes.  I used to page through my Fire Mountain Gems catalog (lol, my first source of bead supplies) and drool at the ones that had stones set in them.
 
I could not afford the pretty ones early on.  So, I did what all poor jewelry designers do, I made some.  At the time I had NO metal or wire skills.....I mean NONE.
 
So I took the gemstone donuts I loved, and used a stick pearl, and made it into a toggle- in the front of the necklace.
 
I wish I had a picture of them.  You would laugh, it was genius, yes, but my execution...wellllllll...............
 
Anyhow, fast forward, and its still a good idea.  You can make a toggle clasp out of most anything with a hole.  And I still like the look of stick pearls.
 
I used a pearl for the toggle on this Moon Necklace of mine.


There is a challenge in finding just the right size bead to make this work. 
 
However, if you are handy at all with wire, or even if you just know the basics, you can make your own toggle, just the right size, to fit anything.
 
This is a typical Staci tutorial, as it has no measurements in it- I wing it was needed.  Also, please don't mind the dirty fingers...I used oxidized wire, its messy.
 
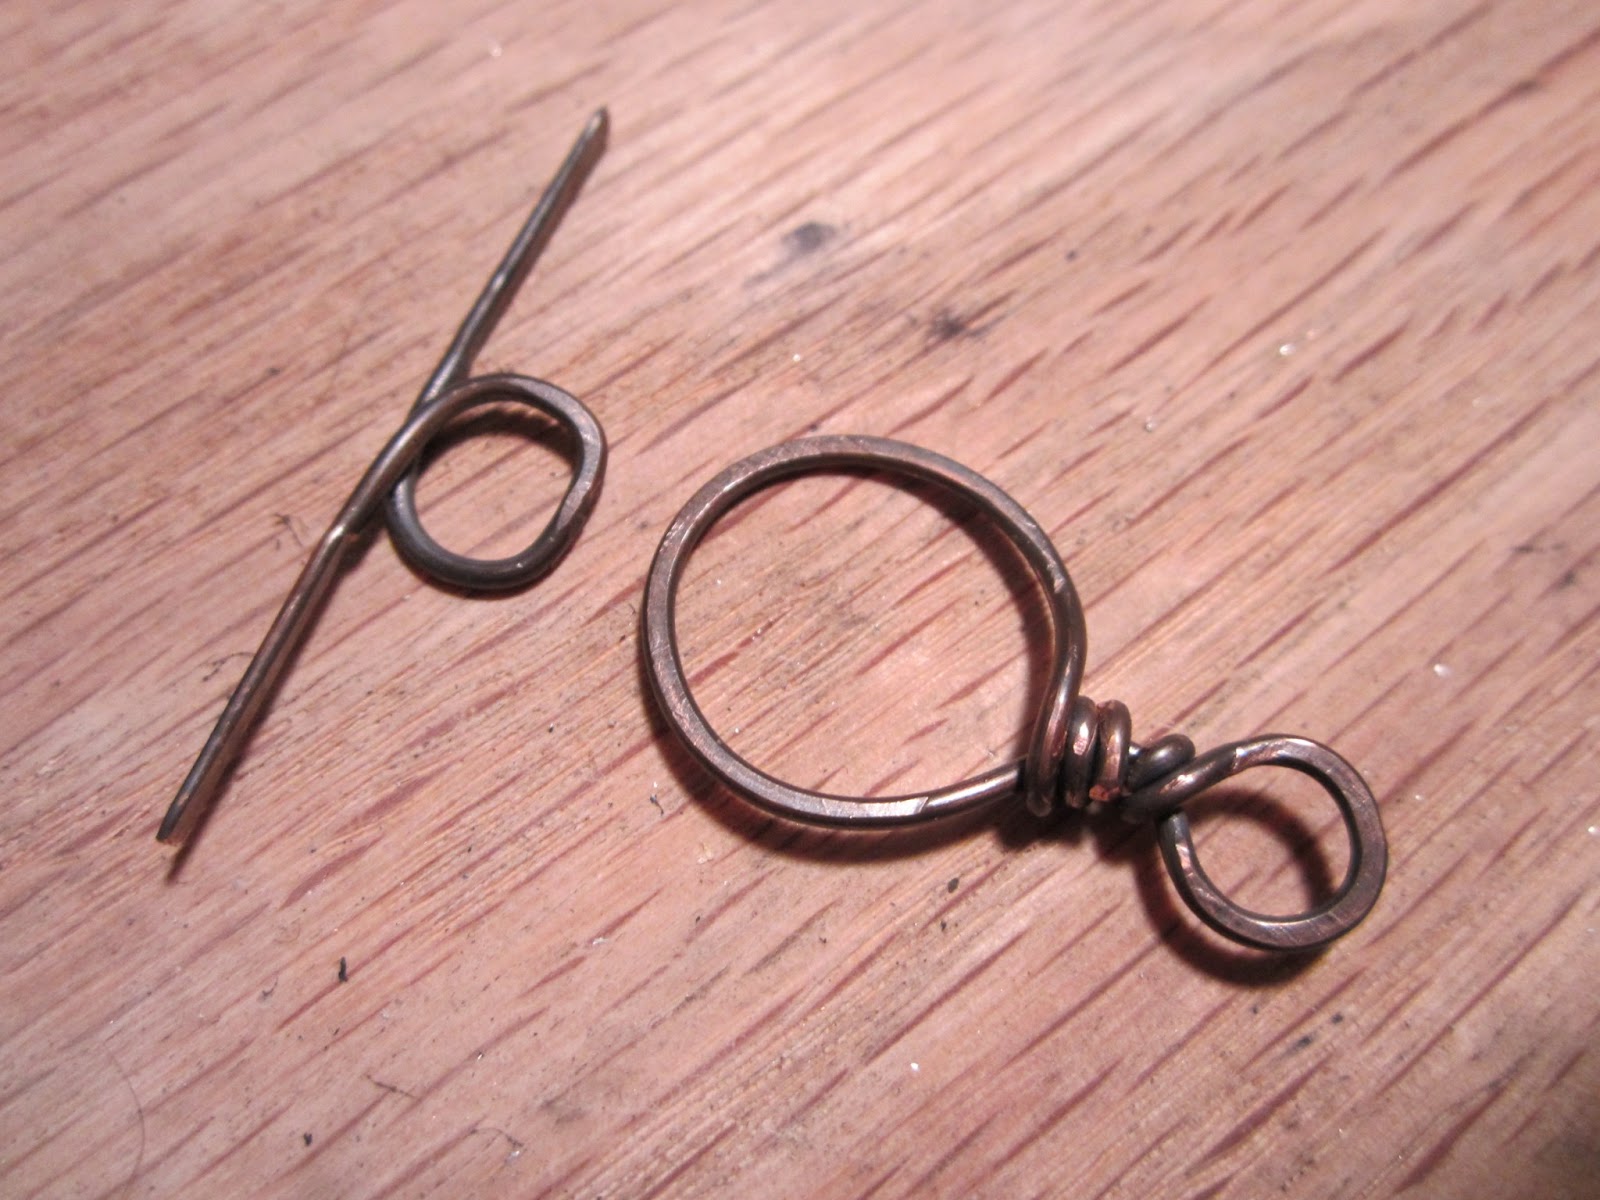
To make the toggle bar, cut a piece of wire, I used 16g for this be highly recommend 14g- or even 12g!!  Make it about 2" larger then the diameter of your toggle....always over judge NOW, cause if its too small you have to start all over.
 
Take your round nose pliers and place them in the center, and make a loop
 
hammer the loop
 
hammer the bars flat
 
It is ok at this point if the size is off.
 
To size it, place it through your toggle, and move the center loop of your toggle bar to the far side of the toggle.  You want to do this at the widest part.  This is to figure out how long to make it so it doesn't fall though.  You want the bar to go over the edge enough to hold, but not so much it will be TOO big and annoying to the wearer.  Though it is always better for it too be too big then too small.  Trim the wire.  Repeat on the other side.
 
 
Hammer and file the ends (you don't want it to poke people!).  Voila!  You made a toggle bar.
 
To finish your project, you can make the toggle out of wire too.
 
Cut a long piece of wire, make a small loop at one end
 
 
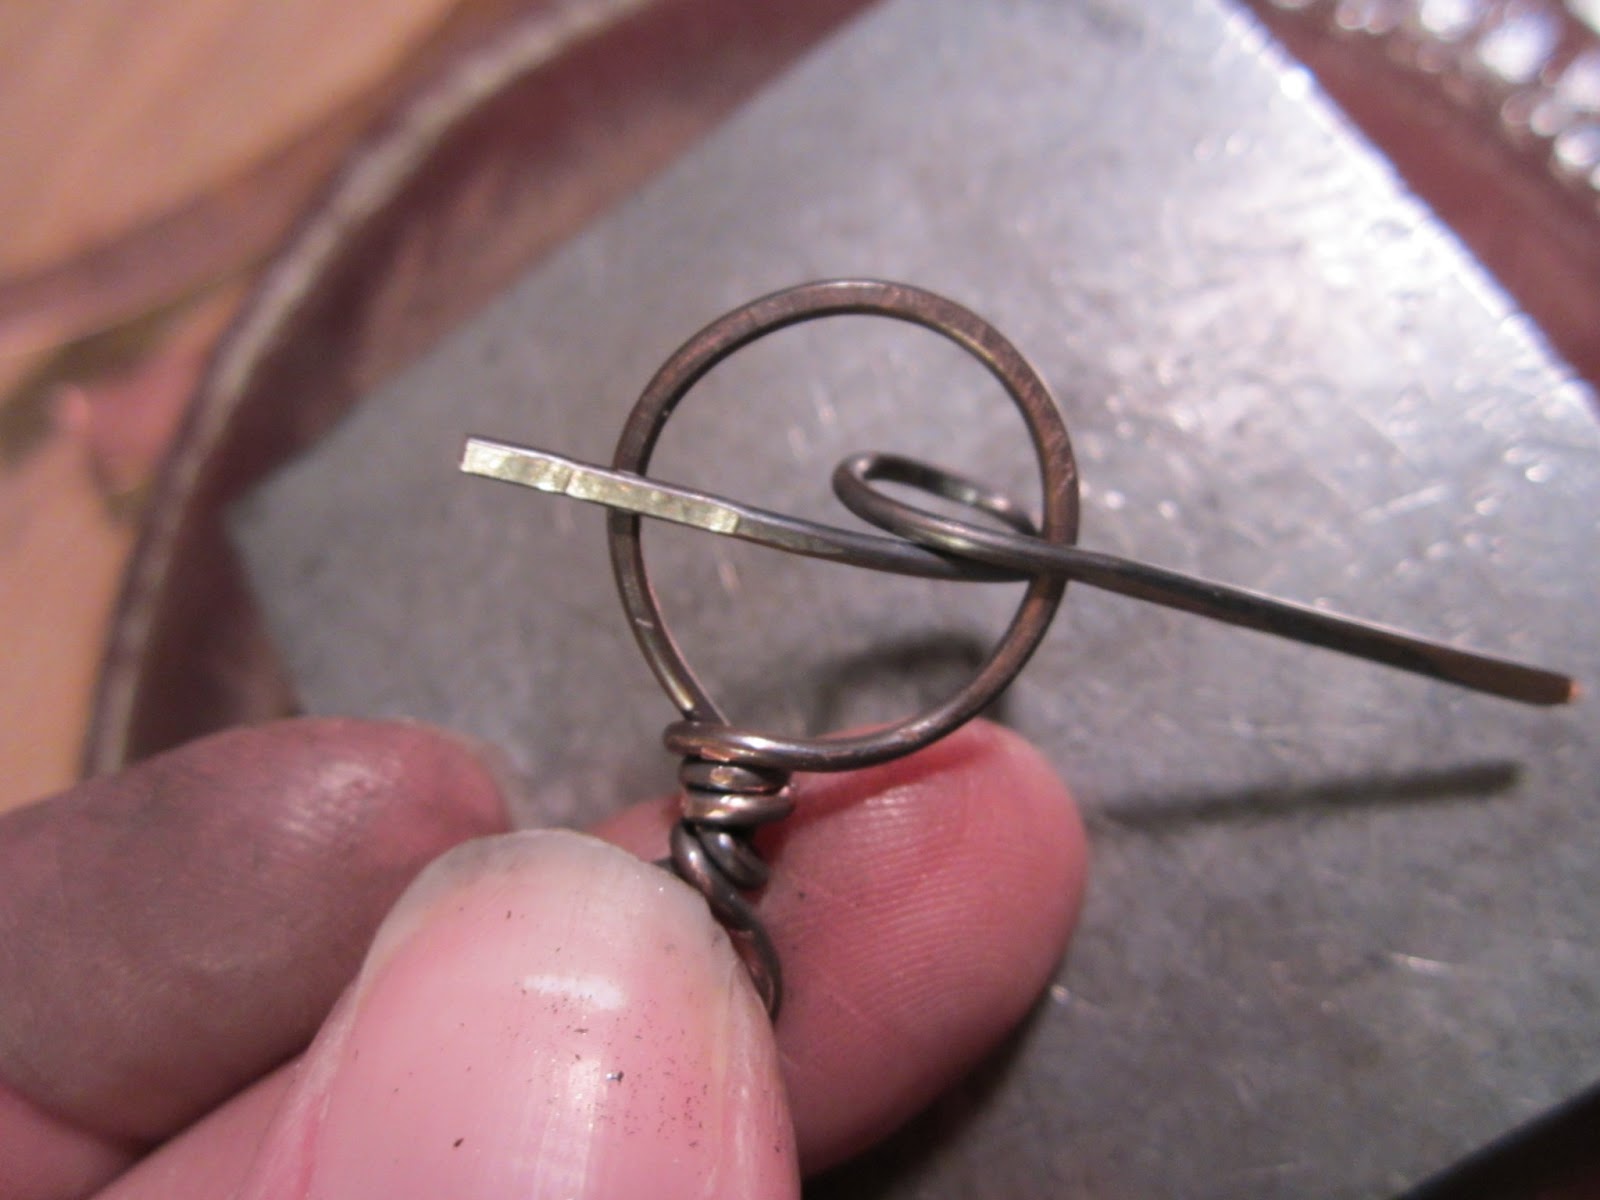
Make a larger loop with a ring mandrel
 
Wrap end to connect and hammer


Now you have endless possibilities for toggles!!!!
 
I highly recommend wearing every piece you create with a toggle for a little bit, to make sure it stays put.  Personally, I find them tricky to get just right. 
 
Now go and Tackle some Toggles!!!!


Monday, July 8, 2013

Clasp Tutorials & How to work a clasp into your Design.

Blog by Genea C-K

Hello friends!

First I would like to say thank you to the LMAJ members for inviting me to the group. I am honored to be part of such an amazingly creative group of women! 

The current Boot Camp's topic is clasps so I thought I would share some of the lampwork glass and metal clasps I have created. I love to use them in my designs!

Genea Beads Spiral S-Clasps: Rainbow Spiral, Bright Earth Bubble Button, and Recycled Bottle Glass S-Clasps.


Here are some gorgeous clasps from some of our members: MaryAnn Carol- Be Happy Ceramic buttons, Staci Smith- Large Copper Fancy S-Clasps, and Barbara Bechtel- Handmade Copper Buttons.

  I really love the style of this  Art Bead Scene  "Garden Gate Clasp". There are pages full of wonderful clasp tutorials on Pinterest as well!

Now how do you work all of these amazing clasps into designs? 
Simple style necklace with the clasp at the back.

Fancy necklace with the clasp on the right side.
Fancy style necklace with the button clasp in the front.

Now it's time to get brave! Break out those tools and try a new clasp tutorial, and work them into one of your designs in a way you have not tried yet! Break outside of that design box and show us whatcha' got!

Happy Creating!

xo Genea

Thursday, June 13, 2013

Working my Wire Out

by Staci L. Smith

 
Are you working on your piece for the Wire Work Out Blog hop?  Because its MONDAY!
 
You don't have to make some fabulouso wire wrapped cabochon or anything- just show us how you use wire, and let us know if you pursued anything new with it and how it went.
 
I started thinking about my wire work.  I wouldn't consider myself a wire artist by any means, but I sure go through wire!  I use it in every piece of jewelry I make. 
 
Here is a great example.
 
I made this piece using a gorgeous focal from Joan Miller Porcelain, a bronze scroll bead from me, and a stone effect glass bead from Genea Beads, along with a rustic garnet donut and turquoise disc.


As I began to lay it out, I thought about wire more, where I use it, how I use it.
 
I made a frame for Joan's large lentil, because I wanted to use it in a way that the holes did not lend.  I just used thick wire, and wrapped it around a few times, and then held it together by wrapping a smaller gauge wire here and there.
 
 
I also used wire to secure the leather and make the clasp.
 
 
This is something new I tried, I have to see how it actually wears- if it continues to lay right and all, but I just wired this turquoise disc onto the leather.
 
 
So there you have it, wire doesn't have to be fun or fancy, it can be very practical too. 
 
I did create a piece that is mostly wire for the blog hop though.  So I hope you will join us back here  Monday for that.  Just blog about your piece on YOUR blog, and on Monday, come to our blog and add your link at the bottom.  That's it.  Then hop around and meet some other wire workers.  Its a great way to meet new people, and find new blogs.  Not to mention, WE love to see what you guys are doing.  You inspire us too ya know!
 

I haven't taken this off yet, because I am testing it.  Yep, that's why.  That's my story and I'm stickin' to it.
 
Hope to see you all Monday.


Monday, April 1, 2013

texture boot camp -

mary jane dodd

piece of railroad track purchased at a flea market

this edition of texture boot camp is brought to you by a lipstick chicken, you know, a person who doesn't like to wear lipstick that looks like you are wearing lipstick (and so why struggle to find that perfect color at all, right?)... this aesthetic carries over into my work... as an admirer of the subtle i would like to show you how i add texture to my metal...

i find texture on things - like this old railroad tie... i was told how i could clean up the face - but why would i do that?

small bench top anvil

this anvil's finish did not hold up over time - but if you put metal on it and hammer, when you turn it over, you will find a lovely texture that is picked up by liver of sulphur or other patina...

with a pitted surface

did you ever mar the surface of a hammer? unknowingly, like before you learned that a brass head is better suited for striking metal design stamps? i did - and now i have a head that creates texture similar to the raw silk texture hammer...

'marred' hammer face

and finally i wanted to show you how i used patterned brass sheet - no rolling mill required!


tape the metal you are working with to the patterned sheet , hammer all over the surface evenly and...


viola!

my apologies on not having pieces finished with the patina to show the contrast - this was my first time down to the bench in almost 3 months and i don't have everything set up... 


Sunday, March 31, 2013

Boot Camp Features....

Good Morning.... I'm sure that many of you are celebrating Easter. Happy Easter to you.

I would like to share some pictures that have been shared on our Flickr Boot Camp site. These two lovely selections were created by Lynda Carson from Fresh Baked Designs.

While checking out more of Lynda's work, I found a connection to her blog. Yesterday's post, I think, said it all. Please take a moment to learn more about Lynda by clicking HERE.

Thank-you, Lynda, for sharing what you created for LMAJ Boot Camp.

Chiseled Hoops

Textured pendant necklace

Please continue to share your textured metal creations. The blog hop sharing will happen on April 8th. Also, please remember that the Boot Camp Flickr account is for those of you who have created something specifically for boot camp. Although, it would be nice to share everyone's beautiful designs, we would like this to be specific to those creations created for this challenge only.

As for Lynda, you can find more about her here:

http://freshbakedjewelry.etsy.com

http://freshbakeddesigns.wordpress.com

As always, thank-you for supporting artists who create handmade with handmade.

MaryAnn
face
Related Posts Plugin for WordPress, Blogger...