Showing posts with label #lmajbootcamp. Show all posts

Monday, July 7, 2014

Wrap It- Layers are IN

by Staci L. Smith


I am getting ready for my last jewelry show until the fall, and I am really not feeling the bracelets this year.

Yet, I want to have some for my customers who prefer bracelets.  I really like the new layered look, of boho bracelets- some in leather, some stacked, ect....lots of beads.....

I really like these by Mossy Creek Studio


and these by Twinkling of an Eye


And our own Barb B. has been making some great metal bangles to stack and layer (if you want to make them too, our Karen McGovern did a tutorial here)


You can find Barbs goodies here at Second Surf

 So, I thought I'd try my own version.

I got out a selection of beads, my waxed linen cord, and got to work on my floor- while catching up on some shows.


I made sure to string a variety of shapes and textures, while keeping the colors to my favorite Boho color range, with lots of orange thrown in!  I used a lot of seed beads so they wouldn't get too chunky.  I also added at least one donut bead to each bracelet, just to break up the straight stringing of beads.


I am pretty happy with them.  They feel good, are adjustable, and can be worn as a necklace as well.


Do you have a favorite stacked bracelet style?  

Feel free to try out this wrap around style.  They are really fun to make, and to wear!
Enjoy!


Monday, February 17, 2014

boot camp - asymmetry in earring design

mary jane dodd


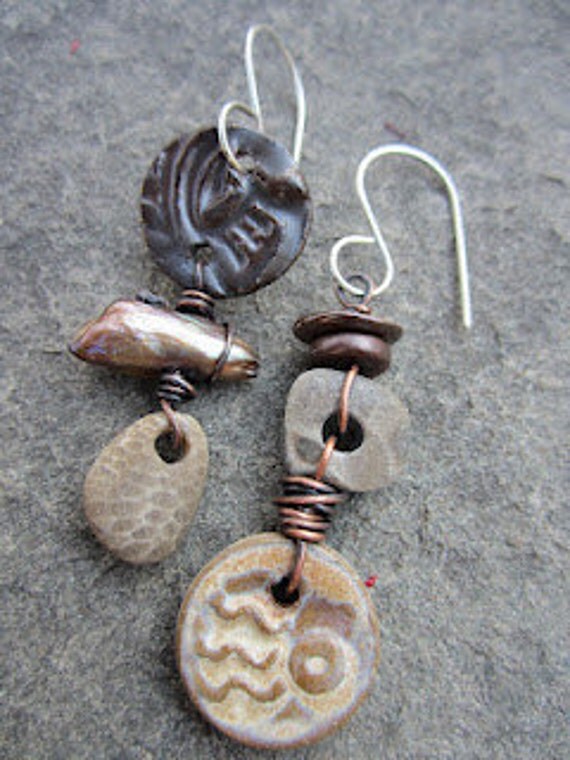
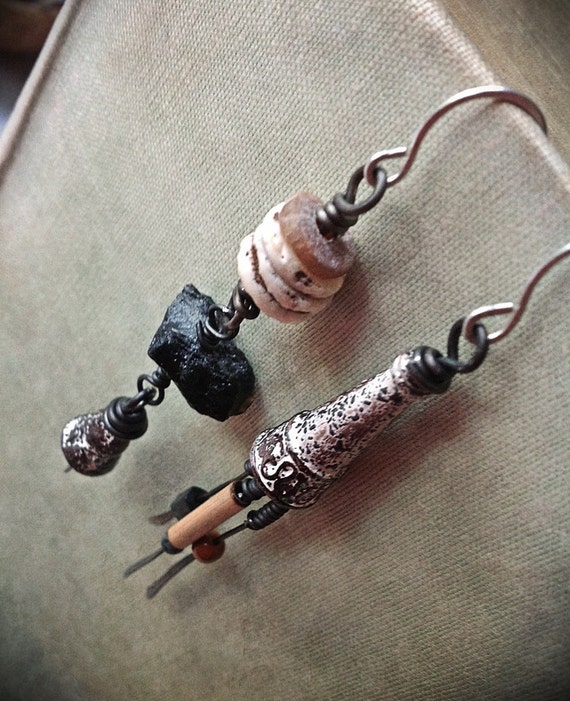
creating asymmetry in earrings can add great interest. 

there are different ways to achieve this effect - 
you can use the same beads/elements and arrange them differently on each one - 
or you can strike your balance with beads of similar size, 'weight' and color. 

when i am working this way in necklaces or earrings, i tend to view my work as if there is an 'x' present - checking to see if there is balance across the work and from top to bottom, side to side. 

in the first pair of earrings i merely switched the arrangement of the turquoise and amber. subtle asymmetry.

here, the ever inventive fanci shows how to create balance across the set. 


she keeps the structure and size of the earrings similar but switches up her beads in terms of color and/or shape.


in this pair by our own staci, she kept her color scheme and scale consistent, but created interest with different shapes of beads and switching the arrangement of the discs from top to bottom. when viewed side by side, you can see how there is balance across the set when you are looking at it as an 'x'.

mjd

all of the same components were used in this example - i just changed the orientation of the accent beads from horizontal to vertical. the scale, color and shape are consistent. 


i love how the eye moves in this pair - kate has balanced them across the set, keeping scale and color consistent, she plays beautifully with shapes. 


mjd

here i have played with the negative space on the left by filling it with chain and beads. on the right, a bead from the same set is used, but i have left the negative space open. 


this is a gorgeous example of asymmetry in earring design - color, overall shape and size are consistent. here the balance is more in the form of triangles - top and bottom of left related to center of right and vice versa. 

------------------

i wanted to add some thoughts re: designing necklaces. i agree completely with the other women in the group about how weight is crucial. a necklace that stuns flat on your work table but slides all around your neck is not a successful design. 

developing an asymmetrical way of thinking isn't always easy. some people take right to it, others find it to be more challenging. if you are finding it hard to do, remember, even throwing in one bead of a different color or shape (with a similar relative scale) on one side of the design creates asymmetry. it does not have to be complex. it can be, but doesn't have to be. 

mjd

in my fiber necklaces, if you look closely, you can see that the neck piece has 4 different sections - all in the same color scheme. closest to the pouch, i have used threads with strung beads on one side and linen with accent beads of the same sort stitched to it on the right. 

--------

so have fun - whether your version of asymmetry is bold or subtle, it adds much interest to designs and helps you to define your own look. 


Monday, December 9, 2013

Hold Your Fire Boot Camp: Online Tube Rivet Tutorial Videos

by Barbara Bechtel
How have your cold connections been coming along everyone? I had hoped to have my own video on tube rivets prepared for you today but the holiday preparations are getting the best of me this year and so I have a little more work to do on it before it's ready for you! I hope you'll join me on Wednesday to see my take on tube rivets and how to tackle them if you've never tried before!

Until then, I wanted to leave you with these two really great videos by some of my favorite YouTube resources, Nancy L.T. Hamilton and the fine folks at Beaducation.com. If you haven't already subscribed to their YouTube channels, I highly recommend checking out all of their informative videos. Both are always excellent resources.

I also want to remind you that our Boot Camp Blog Hop is next Monday, December 16th! So don't forget to blog the pieces you've been creating and come back next week to share and visit everyone's blogs!

First up is a nice video by Nancy L.T. Hamilton:


and second is this new video by Beaducation.com (it covers all types of rivets)


See you Wednesday for my own video!

Tuesday, November 26, 2013

setting rivets the easy way -

mary jane dodd

if rivets and tube rivets are something you use frequently but you'd like to save some time making them from scratch, there is a tool on the market that i have found to be quite useful.

this is the riveting system by crafted findings

one of the things i like about it is the versatility - in length of rivets, metals available and diameter of rivets. 

the rivets come in sterling, fine silver, brass and copper - 


rings & things provides this list of videos - they provide instruction and also show the different ways you can utilize the tool.


Thursday, November 21, 2013

Creating From the Heart

by Staci L. Smith

When we decided to do a cold connections Boot Camp, I had something very specific in mind. I thought it was a great time of year to apply this to gifts and ornaments. 
 
Karen's art is chocked full of photo's.  Even if they are not her own personal ones, they make the piece personal, they add a human, historical piece to the puzzle.
 
She inspired me to make these pins as gifts last year. 
 
Using cold connections allows you to use fragile materials, like photos, without ruining them.  It allows you to create from the heart, with photos or memento's that have meaning to you.
 
 I just wanted to share with you a little tutorial on how to make them.  It is not detailed, I wanted to just give you guidelines so you can make it in your own style.  I am going to explain it as a pin, but you can make a pendant, or even a tree ornament or magnet.
 
Making keepsake pins with rivets:
You will need:
Two pieces of metal, one with a hole in the center- already textured and patina’d and sealed
 
Pin back with large round glue backing
(I got these at rings and things)
 
 
Laminate or mica and acrylic sealer
 
or
 
To assemble the piece:
 
Take two layers of metal- punch or saw a hole in one of them.
Print a picture the right size to fill the middle
Laminate the picture or seal with an acrylic sealer
If not laminated, use mica sheet and cut it to the right size- same as the top layer of metal or close
Sandwich everything together and mark where your holes will go
Drill hole in your backing and your pin back, and attach them by rivet
Now sandwich all your layers and mark and drill your top layer holes and one through all the layers
Drill and Rivet carefully if you are using mica sheet, as it cracks easily
 
Rivet the layers together.  Voila!!!
 
You can also add dangles from the bottom, or rivet other accents onto your piece for decoration
 
Here are some of Karen mcGovern's wonderful riveted pieces with pictures in them!
screaming silence- read between the lines


I truly hope this boot camp will help to make some personalized creations for your holiday gift giving- after all, a handmade heartfelt gift is better then anything that can be purchased!


Saturday, November 2, 2013

cold connections - alexander calder

mary jane dodd

alexander calder - stabile

yesterday and today are about inspiration - 
susan lenart kazmer's book not only inspires, but teaches. 

today i wanted to share a side of one of the great masters of art that some of you may not have known about. many of you may recognize alexander calder for his sculpture - huge mobiles and stabiles that are perfectly balanced... often massive metal works that float seemingly effortlessly in the air, set in motion by only a slight breeze. 

this amazing man also made jewelry - and with his very large tools i might add.

i took some pictures from another of my favorite books, calder jewelry, to show you how he used cold connections in his work. 

alexander calder 

rivets

alexander calder

wire loops

alexander calder

tabs

alexander calder

paddle ended wire

cold connections aren't what you use because you don't know how to solder. this method isn't 'less' to soldering, it's just different. 

it's a choice. 

a choice that adds much to the overall design, a choice that will challenge you to be certain that your technical and aesthetic considerations have been thought out well. 

do you want these connections to take center stage? because they certainly can

or do you want them to be what they are? a way of connecting, providing structure, movement and a subtle design influence.

i am really excited about this challenge. 

like most of you, i have to allow things to percolate for a bit before sitting down to make. whenever i would submit to art bead scene's monthly challenge i inevitably would get my entry in on the last day. simply because ideas had to move around in my brain, get filtered and distilled.

mjd - 2010 calder challenge


enjoy your weekend - here in the midatlantic, foliage is peaking. 
life is good, yes?


Sunday, October 6, 2013

Handmade Hoops Hop!

We have a few hoop creations to share. Visit the links at the bottom of this page to visit blogs, flickr and Pinterest. It is not too late to sign up. If you have created jewelry using hoops, please share a URL where we can read more about it.


If you would like to share your creations, please link your URL below. 

You also might want to check out  LMAJ Boot Camp on.....

FACEBOOK

PINTEREST

FLICKR

So, do you have something to share? Please do.....

Please make sure that you link to a post that includes the current boot camp on hoops.  Also, on your post or other site, please leave a link back to LMAJ for easier maneuvering.


face
Related Posts Plugin for WordPress, Blogger...