Showing posts with label beads. Show all posts

Wednesday, August 3, 2016

Latest porcelain creations..

Carol Dekle-Foss
Hi Everyone! I hope you have had a chance to enjoy some wonderful summer activities! I have stayed home most of the time, which isn't like me. This time of year, I'm usually camping, visiting the beach, or hiking in our amazing Sierra Foothills. After the accident though, I felt like I had lost three months so I have been really focused on catching up and working on new designs. 


 Lately, I've been influenced by affirmations and positive quotes, so I've been incorporating some of my favorites into a new line. Below are a few I've made so far. 

My first batch of "it is well with my soul." I just love this quote. I made them into pendants so they can be worn close to the heart. They need a different glaze for sure, one that highlights the font better.  I changed the design to include a cute border.

These pendants are in their greenware state, I'm so excited to see them glazed! I plan on making more designs like this. If there is an affirmation or quote that you think would be a great addition, please let me know!

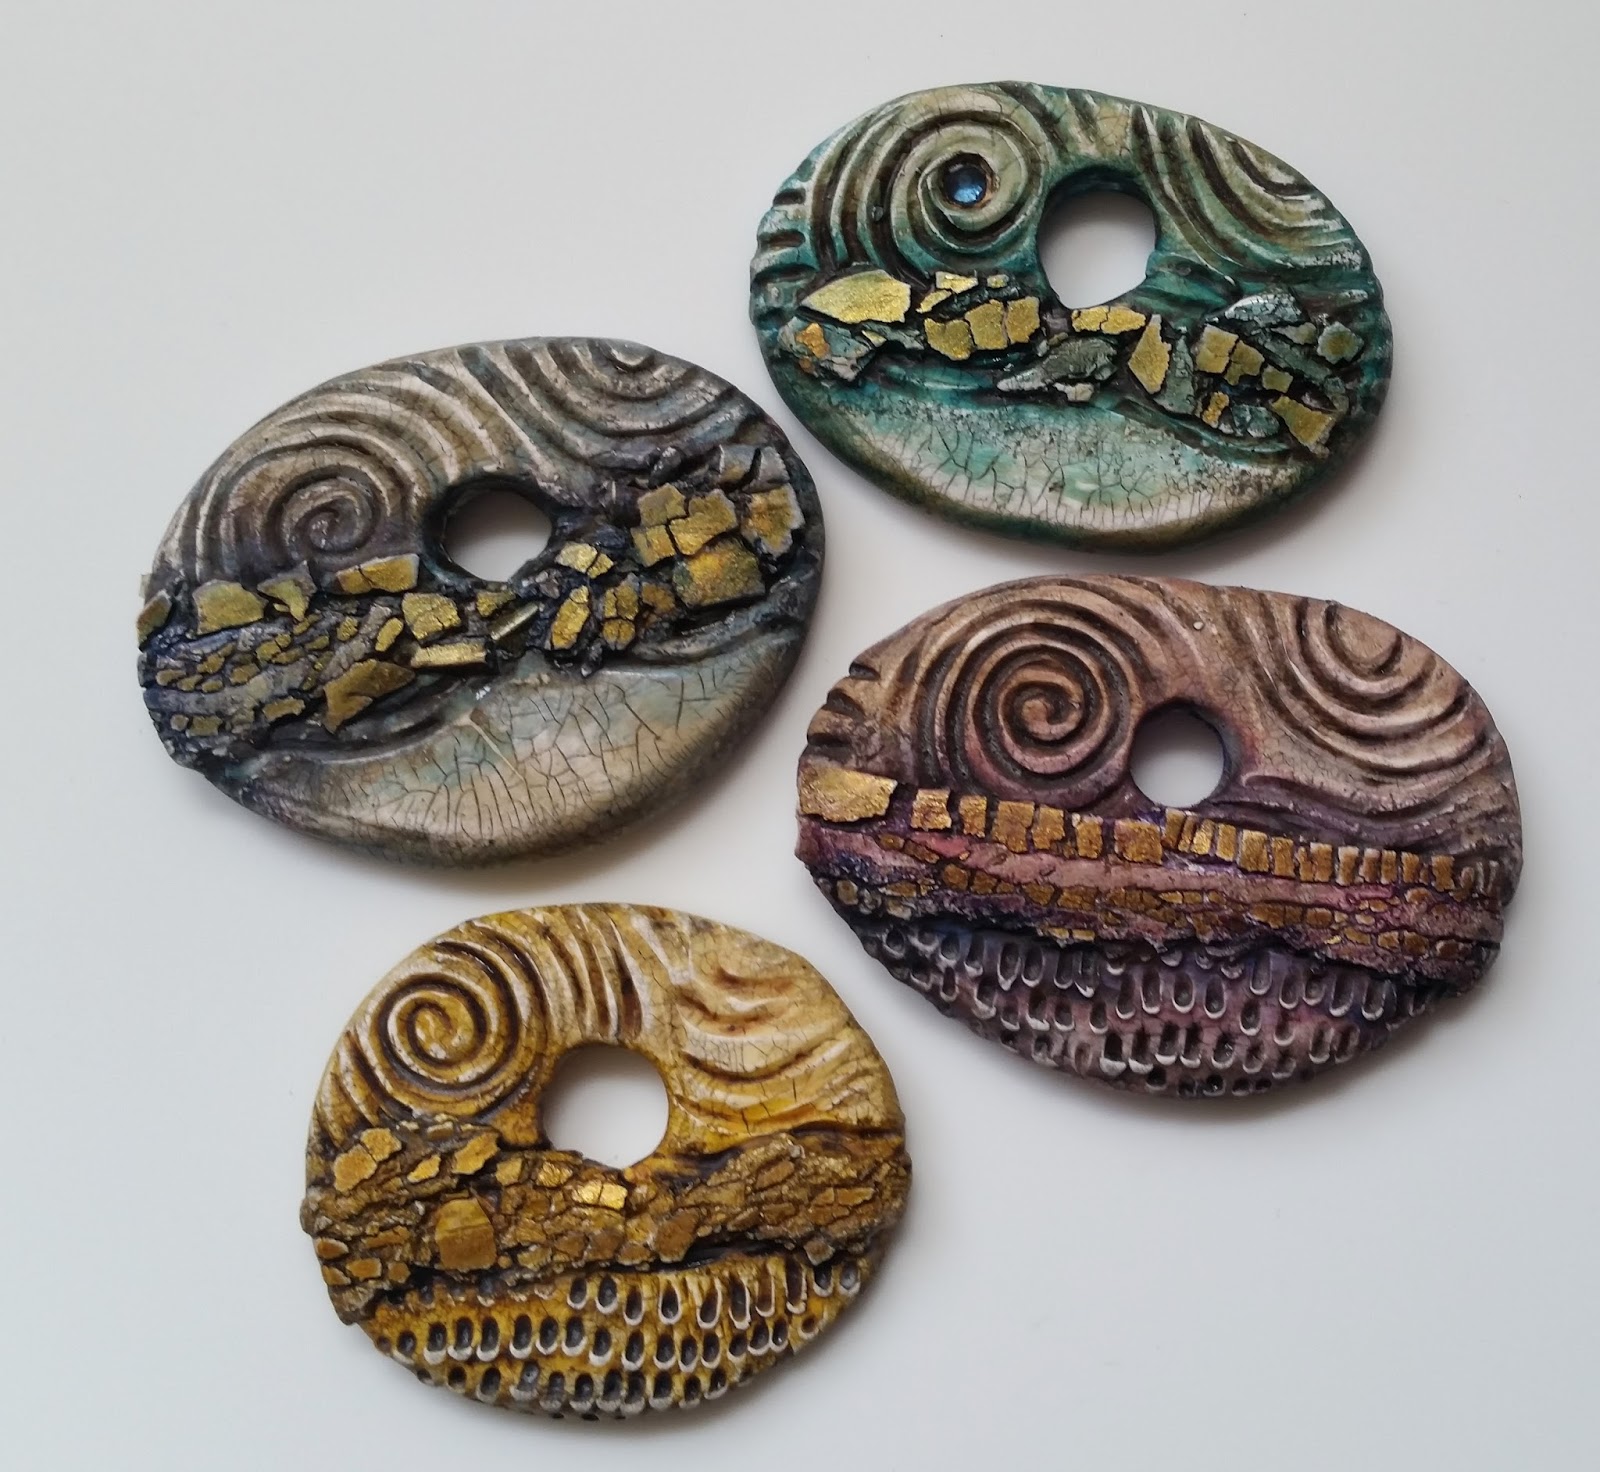
Latest designs fresh out of the kiln...

A new petal shape.

More yummy cherry blossoms.

Mandala, lotus and swirl charms and pendants.

First try at the "just breathe" quote. 

A large flourish pendant.

These beads are supposed to be carved with lotus petals. Ugh...not quite as I had envisioned!

Also, I've been working on some porcelain cone ring holders. I like the swirl leaf base and the shape is good, but I wasn't going for little brown turds. Lol! I think spaced in my booth they won't look like turds in a toilet. Hahaha! I'm working on the glaze color. Any suggestions? 

Alright ya'll, give it up for the husband!

Ronnie's beads...

and his very first pendant!!! Isn't it adorable?? It's so much fun watching him play with clay.

All of the above will be listed by the end of this week to our Etsy store here. Minus the turds. Haha! 
Thank you for reading. I hope your were inspired to create!

Wednesday, July 6, 2016

Ring display-TUTORIAL...and latest porcelain creations

Carol Dekle-Foss
Hello everyone!  Recently, I ran into the problem of not having a way to display new rings for an upcoming festival. I wanted to display them in a simple, unique way that would make each ring stand out. It seems like booth design is an ever evolving challenging process! For me, rings are the most difficult to display.

Here's what I came up with for the festival.


 I just cut a slot into little wooden rounds! They display nicely this way, and I also like being able to move them about. The only problem is the rings keep falling over! So annoying. 

 I decided to give it another try and do a tutorial with what I came up with. 


I have a plethora of little rounds that my husband cut out and these leather swatches. I wanted to use what I had on hand so this is what I made.
I just glued two rounds and a piece of leather together. I cut the edge of the leather as well to make it look a bit worn and frayed. It's deeper now so the ring sits in there much better. I'm still deciding if I like it though. See, always a work in progress! If the customer wants, I can always include the display with the ring as an added bonus!

Here are the easy steps:

After I glued all the pieces together and let dry, I marked the thickness of the band with a sharp edge.


I then used a diamond cutoff wheel and flex shaft to cut the edges. A tiny saw blade might be better for this step, but they freak me out! Yep, I'm scared to death of saws, even tiny ones!


I improvised here and used a little screwdriver as a chisel. I hammered the top of the screwdriver lightly to cut out the ring slots. It's so simple and fun to make! 

I think I like the idea of cutting out larger rounds that can hold 5 or 6 rings, and then have 3 or 4 scattered around the booth. That way I can organize them by style. We'll see!

Also, last week my husband and I were able to play with clay. 
I never get over how different they look when they come out of the kiln!

Here are some of our favorites.

These mandala pendants are so yummy!!

Sacred spiral pendants. Oh my, I love the swirling glaze pooling in the crevices.

Such a sweet detail. Leaf swirl pendants.

Dreamy cherry blossom pendants! I have a few listed in the shop.

And lastly, these adorable teensy weensy beads. They are so cute!

So how do you overcome the challenge of displaying your jewelry? I would love to hear from you!

Thursday, June 2, 2016

One of these is not like the others......


by Staci Louise Smith


Last week I did a post on Doing it All (or NOT doing it all, actually ).

In last weeks post I touched on some ways I have been trying to make my time more efficient in the studio.

One of the ways I do this when making beads, is to make molds of them.  
  It is a great way to save yourself some time in the studio- and a way to preserve a design you were really happy with.  Here is a post I did awhile back on how to use a two part silicone compound to make a mold of your polymer clay beads.


The only problem is, I never want to have too many beads that are too similar out there in the world.  I want everyone to be able to make unique art with my beads, so the beads themselves need to be different.

I paint them each a million different ways, the colors are never the same twice.  However, there are other ways to change it up too.

I have recently been making these awesome Gold Rush beads, with the gold crackle, and then carving them as well.  The carving of each bead is immensely time consuming, and then you have the painting on top that too.  I just could not make them fast enough. 


So I decided to make a mold of them.  I made blank white beads, and then after curing them, I carved the parts I wanted designed.  Then I made molds.  That gave me the carved design quickly.  Then I was free to add my crackle and other embellishments to each one.

For example- here are some of the molds I made.  You can see the shapes and carved pattern are the same, however, I have added elements such as crystals, and holes and other textures to make each one unique.  They are painted different and the gold crackle on each is a little different.  


At first I felt a bit like a sell out not hand carving each one.  However, I was quite happy with the results, and found it allowed more time for other details to be added!

Also, here is ONE fossil Ammonite (shown at the bottom of the picture) I use as a mold, and all the many different designs I make from it.  The key here is to play, and try things a different way so you don't get stuck in a rut!!!  I mean, you KNOW I love ammonites!  So I am always trying to do them in a new and fun way.


So what is the take away here?  Make a mold, re-create your favorite beads, but you don't have to stop there.  Use your texture tools to add dots, or stripes or embed beads and crystals, layer them on top of patterned bases.  Make each one unique anyhow!!!  There is no limit to what you can do!


(Please note that you may not re-create MY beads.....the carved crackle beads are my design and not to be replicated, as well as the spins on the ammonites.  These beads are not shown to be copied but merely as samples of what you can do to your own handmade beads to make them original while using a mold- THANK YOU for respecting that!)

Speaking of the Gold Rush technique and carving polymer, I can finally announce my two pieces got accepted into the Polymer category of the Bead Dreams Competition, which is held at the Bead and Button Show.  Right now voting is open for the Peoples Choice award.  If you are so inclined, you can vote up to 5x per day.  You just need to create a login or login with Facebook.  Here are links to my two pieces that are entered.  If viewing all the pieces- the polymer ones are one page 6.

Sunset Gold Rush
to vote for this one go here

and Zen Cairn
To vote for this one go here

Thank you for the support!


Thursday, November 5, 2015

An Interview with Ginger Allman of the Blue Bottle Tree

by Staci Louise Smith


I know I have referenced her site a million times.  It's because she does her homework.  When Ginger posts to her blog with a review, new info, or a how to, I KNOW it has been tested and she has asked questions and contacted people who have used these products for years, and manufacturers..........she is thorough.  That is why I send anyone who is new to polymer, or has any kind of questions to her site.  

There is a lot of mis-information out there on the web.  In the age of You Tube and blogs, anyone can post a tutorial, even if its the first time they have done something.  I cringe when I read tutorials giving people mis-information.  I read them, and I know what they make won't last (like using too thin wire to make a bracelet or clasp, or not finishing ends of things, leaving pointy wire...not sealing things that go against skin....I could go on and on).  Or they say to varnish your polymer clay beads in nail polish (never ever ever do that ....please!!!!  Ginger has a few great posts on finishing your clay too!!)


Anyhow, you get the idea.  She is the real deal for solid info on polymer clay.  

Well, she did an interview with me for her blog.  I am honored, and it was a cool experience to be featured by her.  You can read it here.  


You all know I put my life out there through various social media outlets, but it was fun to answer some questions on things you may not have known about me.  Enjoy!
(and while you are there, take a peek around her site- there is so much information there- just amazing!)


Wednesday, October 7, 2015

Peruvian adventures and a small giveaway

Carol Dekle-Foss
Recently, my son and I spent a week in Peru visiting friends and exploring ancient cities and ruins.  We had an amazing time and wanted to share with you some of our favorite photos. Included, are random shots all over Peru, amazing Pre-Columbian jewelry photos from Museo Larco in Lima, a metalsmith workshop in Pisac, and the salt mines of Maras. This post may be a bit long, but I hope it inspires you!


 First up, these amazing walls in Cusco called Sacsayhuaman.  We thought we would have a better understanding of how they were constructed if we saw them in person. Unfortunately, they baffle us even more! How in the heck did they construct them? Our guide showed us this drawing. 
I was like...
Bftt..please. They got THESE detailed corners using a wooden form and chisels? Right.
 I love that they are such a mystery! I think one day we will discover how they did it, and I don't think it will be aliens! Here is a video that brings up some interesting points on how they were constructed if you're interested.

Okay, on to some very cool jewelry. We visited Museo Larco and were amazed by the beauty of the surrounding gardens and also the artifacts.


 Pre-Columbian societies in Peru used gold, silver, copper and bronze metals not only for adornment but also for tools, and decorative objects. Below are beautiful examples of carved pendants and beads, repousse metalwork, and the lost-wax casting technique.


 Amazing owl necklace!


 Beautiful inlay!


The museum also has very fine examples of Pre-Columbian weaving and pottery that you can check out on their website. There is also an erotic pottery section that left even me blushing. Very graphic! If you're curious, just google Moche erotic pottery. Don't say I didn't warn you! 

I loved the people of Peru and tried to capture them as best I could.


They pose for tourists for soles in return.


 This adorable young boy posed for me so patiently.

We also visited the Pisac Market in the Sacred Valley.
 We had a fun time meandering all around the cobblestone alleyways and checking out the handmade goods.

The highlight for me in Pisac was a silversmith studio, where they showed us how their jewelry was made and what materials they use.
 A Peruvian metalsmith hard at work.


They inlay with lapis lazuli, chrysocolla, abalone, spondylus shell and more.


The Tumi is a ceremonial knife that was used to sacrifice animals to the god Inti. Now the symbol is used for decoration or worn for good luck. 


Absolutely beautiful craftsmanship. Yep, this place took quite a lot of my soles.

I would have to say my most favorite place of all wasn't Machu Picchu, but the salt mines of Maras. 

The salt mines are remnant of the Inca period, and have been producing since 1450 AD. A tiny spring, the only one in all of the Andes, feeds the salt ponds.

A Peruvian woman hard a work on her salt pond. Each one is owned by a different person.

To thank you for reading through all my boring vacation photos, 
I have a tiny giveaway for you!

I purchased these beads from Centro Artesanal Santo Domingo in Lima. They include hand painted ceramic beads, red jasper, angelite, serpentine, and huayruro macho seeds, that are supposed to bring luck to the wearer.
To win, all you have to do is leave a comment as to what you found most interesting about this post or what you find most interesting about Peru in general.

Thank you for reading!
face
Related Posts Plugin for WordPress, Blogger...