
I am off for my summer break and am trying to stick to my schedule of making more ceramic beads, possibly listing them and, of course making lots of jewelry. So far..... hmmmmm.... well.... I am getting there.
I would like to share a tip that another potter (Nancy Adams) passed on to me a few years ago when making ceramic beads. I don't know about you, but my hands do not always like to cooperate when it comes to creating the world of the smalls. Being 55, some of my fingers have taken on a life of their own and it totally sucks when you are trying to make beads and the left pinky is cramping and the forefinger needs to avoid use because of tendon issues. Yup!
One of my pet peeves with ceramic beads is when the holes are not cleaned properly. If there is a piece of clay on the edge of the hole when the entire process is complete, it most likely will chip, which can then either be tossed, or covered up by adding more wire or something. I tend to toss!!
The problem is that cleaning those little holes is an incredibly cumbersome and repetitive and with the finger issue I told you about, I try to especially avoid repetitive!
So.... if this is you or you know that this might be you one day (so you would like to avoid it if possible), you might like this tip.
Most people use a tumbler for metal. You buy shot and use it to harden your metal, clean your metal, etc. I do that too, but the tumbler also comes in handy for cleaning your bisqued ceramic beads. When using a tumbler for ceramic beads, you do not use shot. If you are unfamiliar with shot, here is a picture of what it looks like. This is used to tumble metals and maybe some other things like rocks, etc.


You do NOT use it for cleaning bisqued beads.

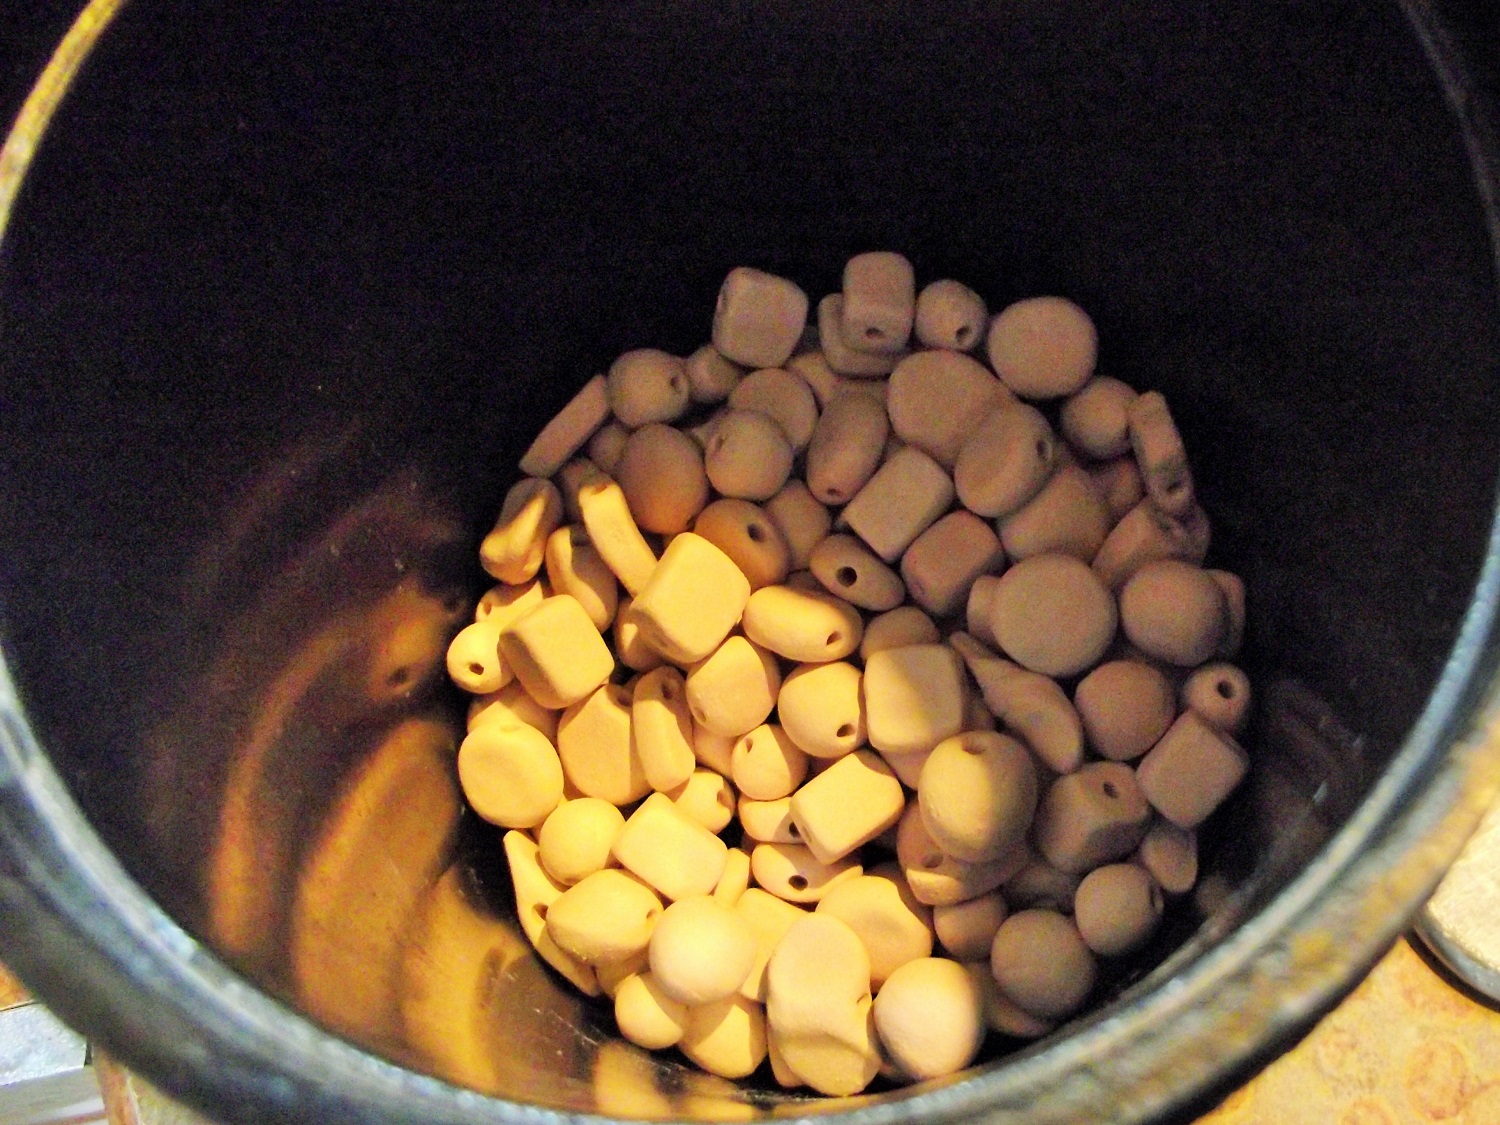
These are small which makes it even more difficult to manipulate. I just formed these yesterday when I had a couple of hours. They are not cleaned nor are they bisqued yet. You can see that many of the holes are still very rough.

For the purpose of this little tutorial, I am going to use some beads from this group that have already been bisque fired to 1860 degrees F. Firing to this temperature makes them perfect for glazing. They are still porous and will take glaze well.

I would like to note that one thing that you do not want to do is use your beads that have texture on them. This process might tumble the texture right off.
Here is a texture free group that I am going to use. These are ready to be glazed and were tumbled awhile back.

This is the tumbler that I have had for a few years. It comes in so handy and is worth every penny. I don't even remember how many pennies I used to buy this, but it wasn't too terrible.

Load you beads right into the rubber container. Typically, you should try to get this about 2/3 full. I didn't do that here, but when I am actually cleaning beads that I just made, I will add extras that I have sitting around just to fill the tumbler.
Now add water. You don't want to add too much. It should be about level with the beads or a little less.

Use Dawn dish detergent. I would recommend this as some others might have lotions, etc. which is not a good idea for beads. I use Dawn for everything. I left out pictures of putting the tumbler top back on, but I think that would be obvious.

Plug your tumbler in and tumble for 2-3 hours. You can check every hour to check on the progress. You can see in this video that the tumbler is going very quickly. If this were weighted down with more beads, it would be much slower. I am not positive, but I would think that having it spin too fast might not be a great thing.
Dump your beads into a strainer and rinse them well.

Once strained, lay them out on a paper towel and let dry completely before glazing.

And, that's it!!! See how smooth those holes are! No chipping there! If you do make ceramic beads and didn't know this trick, I hope you find it useful.
Any questions? Feel free to leave a comment.
9 comments:
This is pretty cool! I have heard of people tumbling bisque beads to make them smooth, but never saw it or got the details. Fabulous!!!
I sometimes use small drill bits that have electrical tape over the end to drill out holes for my textured pendants while they are still leather hard. But over time, that is hard on your fingers.
I would love to try tumbling sometime too - Thanks for the visual and direction!
Just as you suggest, I use my tumbler a lot for my metal components. It's so worth the time and effort to get them to come out so smooth and clean! But now you have me wondering if this approach might work with polymer clay beads too! Has anyone tried this yet?
Thanks for sharing this!
This is a great tip MaryAnn. Thank you! We will have to try this on our next beads. What a time saver!
I don't know about polymer. I did see a video about it on youtube, but it looked like it was for polishing them. Marsha, I use a dremel to clean out the holes after I glaze them to make sure the glaze doesn't stick to the wire.
Thank you, MaryAnne! I'll go digging for more info!
What do you use instead of shot ?
They just tumble against each other. You don't want to include any shot...... Just beads tumbling with beads. It takes care of cleaning the dust as well as rough edges on the outside of the holes. Just make sure to fill the tumbler about 2/3 full with bisqued beads. It shouldn't take anymore than 2-3 hours. And remember you don't want to put beads in the have texture.
Can you tell me what cone # you use to bisque fire?
Whether I do high fire or mid fire beads, I always bisque to cone 06.
Post a Comment