
by Marsha of Marsha Neal Studio
Ever since I could work my fingers to tie knots as a child, I've loved to do it.
I remember in first grade, tying my shoe laces into knots and knots, then untying them and putting them back to regular when the teacher was done talking. Talk about short attention span...
Throughout my life I have used a lot of different materials (embroidery thread from my mom's cross stitch supplies was my favorite) to tie knots for friendship bracelets, keychain adornments, zipper pulls, etc.
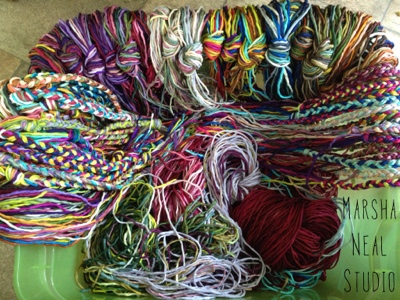 |
| Hand Painted 2mm silk cord |
Back in 2004 I was selling my ceramic beads out in Tucson when I met Ute from Silk Painting Is Fun (she mixes her own color by recipes and then hand paints the silks). I started carrying a few silks to sell with my ceramic pendants at bead shows back here on the East coast US.
They were such a huge success at the bead shows that I expanded and now sell through my Marsha Neal Studio website and Marsha Neal Studio Etsy shop.
I just LOVE these!!!
They are so soft and the colors are amazing!

Because these silks are 2mm in diameter, they are thicker than a lot of other strands that are often used for macramé, so I like to braid them. It's super fast to sit and make too.
These silks are also awesome in Kumihimo - especially combined with Sari Silk Ribbons and strands with beads (all about textures with those combos)!
Often I see similar knotted bracelets tied on, a button closure, etc - but I wanted an option for slipping it off and on fast without excessive wear on the silk, and this is what I came up with:

6" (inch) length of 18 gauge dead soft wire.
The general idea is to make a double loop where the ends of the wire are wrapped into the center and tucked in to avoid rubbing on the silk or irritating your skin.

I then split the number of silk cords at the end of the braid, put half through the loop, tied a knot, then another knot around the opposite side, and then secured with one of the silks in a simple knot a few times (knotting that one strand as the final knot), then cut off the excess (basically, knot, knot, knot, then knot again - whatever works for you).
I'm going to wear it for a while to see how the knotting holds up and if I need to adjust the design at all. I like simple though & want to keep this project portable and easy to do while the kids play or when I am hanging out with friends (yes - I always have to be working on something...).

Oh, and I took an 8" (inch) piece of 20 gauge wire and six beads and did a quick wire wrap accent to give the closure loop a little something extra.

Tying the braid onto this simple double loop so it wraps around my wrist 3 times is just so fast and simple. And I'm sure it can be expanded upon greatly!
What would you do with these silks?
How would you end them?
I'm curious to see if there are any that show up in the Blog hop for this handmade closures boot camp (link up for the blog hop is Monday, August 12, 2013 - Mark your Calendars!).
And as promised the giveaway winner for the Pearl And The Beard album that I picked up at their show and something special from me is commenter #6 (counting 1 comment per person from last Sundays post):
Congrats!!! I'll be in contact with you via email to get your shipping info!

Hope you are enjoying your summer - or whatever weather you are having at this time of the year.
4 comments:
Love it! How did it end up working out?
looks cute!
Love this idea!
So far so good with the wearing of it. We even ended up cleaning out a good portion of our garage and I wore it the whole time doing that. I even cut a bunch of 6" pieces of wire and grabbed my chain nose pliers to take with me so I could work on them whenever I had a few extra moments...
It's kinda exciting to finish something that is pretty darn wearable :)
THANKS!
Post a Comment