Showing posts with label braided bracelet. Show all posts

Thursday, June 25, 2015

Sticker Labels

In my world of process and making, I always find that towards the end of a project, I am ready to move onto the next without officially "finishing". And with my beaded bracelet kits - I felt they needed to be able to stand alone and not require me to be there to explain to everyone exactly what they were, what the box contained, and what other colors it comes in.

So after looking up ideas for packaging via Pinterest and Google, I decided that Stickers were my best bet. I found a couple of companies that had awesome websites to upload your images and ideas, and that used actual people to design & proof your ideas, and get the printers going.
I like companies like that!

I chose Sticker Giant because they look like an awesome company, had great reviews, were in the US (for me that saves on time and shipping costs) - and I needed these in under a week!


My happy mess of a table to quick grab a pic of the rolls of stickers - I did a custom die cut bracelet pic for the front. And a 3x5" color selection and item content label for the back.


And as I ran out the door to a craft show this last weekend, a bit more of me felt professional and happy knowing that some people were going to grab up some of these and be able to bead, braid, and wear some new bracelets that they made themselves...

Designing is pretty cool sometimes.

Now for more ideas on making some stickers for Bead Fest Philly...
Artisan Bead Stickers could be really cool and fun for shoppers!

Thursday, April 23, 2015

Silk Cord and Bead Obsession


I have an obsession.
It is with color. It is with texture. It is with feel.
It is with emotional connection to something handmade.

 There is something that moves me deep about colors and glass.
Seed beads - I cannot have enough!
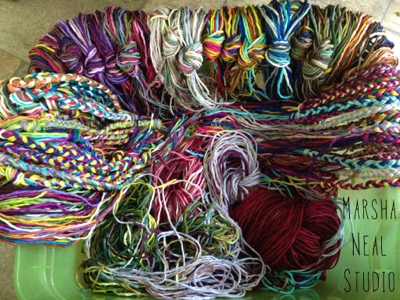
And with my recent class using these TR5 Myuki beads (size 5 Triangle Beads), I decided to organize my stash.
Which then led to - what else can I make with these - and use the 2mm silks I carry & sell?


After looking around on Pinterest for simple wrap bracelets, I figured out a design that was quick and easy to do. Something that I could make and wear on the go.
Testing and figuring out a design like this took me days of testing and fiddling with different materials and styles.


My final decision was 1mm Waxed Cotton Cord (about a yard).
1 strand of 2mm Silk Cord (40-42" length).
And 50 of the TR5 glass beads.
And a favorite button or disc bead as the closure.
I am working on the detailed directions for kits, but you basically make a loop with the cotton cord, tie on the silk at the mid way point, braid the three strands, and move a bead up into the braid whenever it is time to move the cotton cord.
When you get it to the desired length, you tie on the button and wha-la!
Ready to wear.

I already have plenty of silk color palettes that I sell.
Now I've come up with a bunch of bead mixes that coordinate too.
The last step is me coordinating my glaze colors for the closure piece to go with these.

Internet buying and matching colors can be such a pain sometimes, and nobody wants to be disappointed in the way of losing money, and not having a fun project to do.


And to me - these colors are happy.
These silks are so soft. And this is what I want to wear as it gets warmer.

Being able to take a project with me to t-ball practice, waiting at the bus stop, waiting in a doctors office, as a passenger in a car, flying on a plane, sitting on the beach, whenever my hands want to be busy and able to complete a task - that satisfies me.


This has been such a good challenge for me to fiddle with what I've got.
Simple projects. Fun projects. 
And something that makes me feel the happiness that I had as a teenager:
making bracelets for my family and friends...
That is where this takes me.
Summertime bracelet fun!

This blog post was written by Marsha Neal Studio for Love My Art Jewelry Blog.
If you are reading this on another site, it has been copied and used without permission of the author or blog owner.
Please do not copy and use this information without permission (many blogs are having issues with this kind of stealing).

Sunday, July 21, 2013

Braided Silk Cord Bracelet

by Marsha of Marsha Neal Studio

Ever since I could work my fingers to tie knots as a child, I've loved to do it. 
I remember in first grade, tying my shoe laces into knots and knots, then untying them and putting them back to regular when the teacher was done talking. Talk about short attention span...

Throughout my life I have used a lot of different materials (embroidery thread from my mom's cross stitch supplies was my favorite) to tie knots for friendship bracelets, keychain adornments, zipper pulls, etc. 

Hand Painted 2mm silk cord
Back in 2004 I was selling my ceramic beads out in Tucson when I met Ute from Silk Painting Is Fun (she mixes her own color by recipes and then hand paints the silks). I started carrying a few silks to sell with my ceramic pendants at bead shows back here on the East coast US. 
They were such a huge success at the bead shows that I expanded and now sell through my Marsha Neal Studio website and Marsha Neal Studio Etsy shop.
I just LOVE these!!!
They are so soft and the colors are amazing!
Because these silks are 2mm in diameter, they are thicker than a lot of other strands that are often used for macramé, so I like to braid them. It's super fast to sit and make too.
These silks are also awesome in Kumihimo - especially combined with Sari Silk Ribbons and strands with beads (all about textures with those combos)!

Often I see similar knotted bracelets tied on, a button closure, etc - but I wanted an option for slipping it off and on fast without excessive wear on the silk, and this is what I came up with:
6" (inch) length of 18 gauge dead soft wire.
The general idea is to make a double loop where the ends of the wire are wrapped into the center and tucked in to avoid rubbing on the silk or irritating your skin.
I then split the number of silk cords at the end of the braid, put half through the loop, tied a knot, then another knot around the opposite side, and then secured with one of the silks in a simple knot a few times (knotting that one strand as the final knot), then cut off the excess (basically, knot, knot, knot, then knot again - whatever works for you).

I'm going to wear it for a while to see how the knotting holds up and if I need to adjust the design at all. I like simple though & want to keep this project portable and easy to do while the kids play or when I am hanging out with friends (yes - I always have to be working on something...).
Oh, and I took an 8" (inch) piece of 20 gauge wire and six beads and did a quick wire wrap accent to give the closure loop a little something extra.

Tying the braid onto this simple double loop so it wraps around my wrist 3 times is just so fast and simple. And I'm sure it can be expanded upon greatly!
What would you do with these silks?
How would you end them?

I'm curious to see if there are any that show up in the Blog hop for this handmade closures boot camp (link up for the blog hop is Monday, August 12, 2013 - Mark your Calendars!).

And as promised the giveaway winner for the Pearl And The Beard album that I picked up at their show and something special from me is commenter #6 (counting 1 comment per person from last Sundays post):
Congrats!!! I'll be in contact with you via email to get your shipping info!


Hope you are enjoying your summer - or whatever weather you are having at this time of the year.
face
Related Posts Plugin for WordPress, Blogger...