Showing posts with label tips. Show all posts

Friday, January 15, 2016

4 Tips for Neater Macrame

by Sherri Stokey

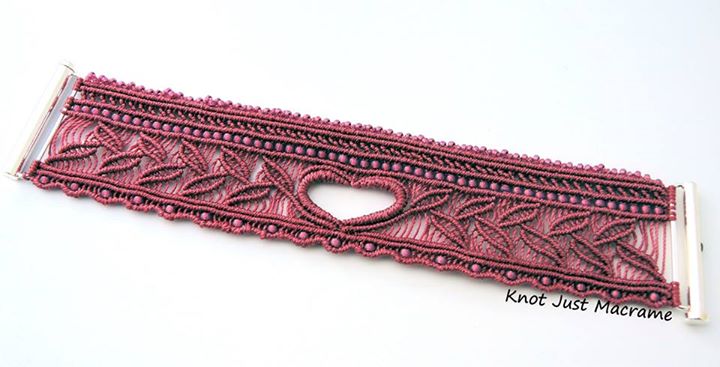
One question I get pretty often is how I get my micro macrame jewelry pieces to looks so perfect.  First let me point out that they aren't perfect.  They're tied by hand one knot at a time and there are imperfections in every piece.  That's sort of the thing about handcrafted jewelry - it isn't mass produced or made by a machine.  I think it's one of the things that gives handmade its charm.  

That all being said, I do try to make my pieces as perfect as I can.  I'm just wired that way.   Here are my top four tips for neater macrame:


1.  Straighten the cords before you begin knotting your macrame project.  I usually measure and cut my cord from the spools, then use my handy dandy hair straightener (flat iron) to get rid of the curls.  A large barrel curling iron will work, too.  I've heard of using a plain old iron, but  I cannot attest to the effectiveness of an iron since I steadfastly refuse to use one in any context.   The hair styling tools work swimmingly.  Getting the cords all straight like this will help you keep track of them much easier when it comes to knotting, especially if you're working with many cords.


2.  Use pins while you work.  I'm a pinnin' fool.  I use regular old sewing pins (straight pins) as well as t-pins to hold my work to the pinning surface while I knot.  This helps me keep the lines all straight and uniform.  It also gives me something to pull against when changing direction of a cord.
 

3.  Maintain consistent tension on the knots.  This is easier said than done and does require some practice for most of us mere mortals, but will make all the difference in your piece looking neater overall.   


4.  Be tidy when you finish off your piece.  The ends of your piece should look as good as the focal part, so don't slack off when you get close to the finish line.  The little details are what sets your work apart.  I like to use a split ring finish for many of my pieces (there's a free tutorial here on how to do that, if you're interested).  I like the more "finished" look this gives my pieces, but no matter what ending you use, make it neat and secure.  


And there you have it, my top four tips for neater macrame.  Do you have other tricks that you use?  I'd love to hear them!


Friday, December 4, 2015

8 Tips to Improve Your Jewelry Making Skills

by Sherri Stokey

Perhaps I should clarify:  even though I've titled this piece 8 Tips to Improve Your Jewelry Making Skills, please don't stop reading if you don't make jewelry.  Most of these tips (if not all) can apply to other crafts as well.  Either way, I've put a lot of thought into this article and since you're already here anyway, you might as well finish reading it.  Plus it's good manners.  If you get to the end and feel I've wasted your time or you don't agree with me on one point or another, you can always leave a comment and give me a piece of your mind.  With that out of the way, let's get to the list.  


1.  Practice!  Although we all like to think we are the 1% who can pick up something and do it perfectly the first time, it just doesn't work that way.  If you ask your most admired artists, they will tell you that they've come a long way and devoted a lot of hours to perfecting their craft.  Which leads us to #2...


2.  Strive for perfection.   This one might not apply to every art equally, but in some mediums, like micro macrame, neatness counts.  It's all about keeping the knots even with the same tension, crisp corners and straight lines.  In other mediums it might be a matter of getting a smooth solder or a perfectly coiled wire.  Mediocre isn't good enough - strive to do the best work you can.  You won't get this one without #1 (practice).  Fact.


3.  Play!  #1 and #2 make it sound like making jewelry is drudgery and it couldn't be further from the truth.  Allow yourself time to play around in whatever way is fun for you.  Sometimes I like to goof around with random knotting just to see what develops and sometimes I like to try the strangest color combination I can dream up.  Just for fun.


4.  Take a class.  I had never been able to take a class until last year, and I thought I'd done okay for myself with the self-teaching bit.  And I had.  But when I had a chance to take a class I was really excited by the whole experience.  There's just no substitute for learning from someone who really knows what he or she is doing.  I picked up some great tips and got a fresh infusion of enthusiasm for possibilities I hadn't considered.  


Even if you live in the middle of nowhere like me, with no access to local bead shops or experts, there are online classes available. Although a live class is nice so you can interact with the instructor and other students, online classes have some strong points of their own: you can pause them, replay portions and tailor the experience to your own schedule without disrupting other students.  Whether live or recorded, classes offer you an opportunity to grow and develop your skills.


5.  Network.  Find a local group of like-minded enthusiasts or join an online community.  It's fun!  I belong to several groups on Facebook and I really enjoy them.  I love to see the different styles of  artists from all over the world. Plus, having a group of friends who have the same interests can be helpful if you get stuck.  Usually there's someone  who has faced the same issue you're experiencing , or at least someone who can offer some creative solutions.  It's also a great way to find inspiration, which leads to #6...


6.  Look for inspiration.  Whether you find inspiration by taking a stroll through the park or a hike in the mountains or a trip to the zoo, or something more sedentary like scouring the Internet, inspiration is there and free for the taking.  Clear your mind and take a fresh look at everyday objects.  Think in terms of texture or color or lines, then try to replicate even one part of that in the medium of your choice.


7.  Experiment.  Don't be afraid to fail.  Try something different - if you usually work with polymer clay, try your hand at micro macrame.  If you are a knotter, pick up a bead weaving tutorial and give it a go.  Try torch fired enameling (make sure the blinds are out of the way first and don't ask me how I know that).  The point is to step outside your comfort zone, color outside the lines.  Sometimes when you do that, it blurs where you thought your boundaries were and opens the door to some amazing things!


8.  Find your style.   It has taken me a long time to put my finger on what makes one piece fantastic and another mediocre, even when the two are very similar and I've finally boiled it down to one thing:  authenticity.  The whole point of art is to express yourself.  It's great to learn from a class or follow someone's pattern, but in the end, you need to find a way to make it yours if you want to take your art to the next level.  Find your voice and then sing like nobody's listening (cliche, cliche, cliche - but accurate).  Do you like no one else can!


Friday, August 28, 2015

Just a little bit about us.......

by Staci Louise Smith

I just got back from Bead Fest, where I was both vending and teaching.  If you want to read about the fun trip from a behind the scenes perspective, you can check out my personal blog here


There is something really energizing about being around other creative people.  Bead Fest, as I am sure other bead shows and guilds are too, is just buzzing with energy.  Everyone is happy, and friendly, and you can stop just about anyone to talk about what they made in class or what or who they are wearing!  

While I was there I met a lot of new people, and directed many of them to this site.  So, I just wanted to take a minute to talk about our little creative group here.  Love my Art Jewelry is made up of a variety of artists from many different backgrounds.  We try to share what we have learned, and hopefully save you some of the trial and error we have all inevitably experienced.  

Did you know we have a great tab at the top of the page for "tutorials"?  Here you will find a TON of information on wire working, soldering, tools, making clasps, resin, polishing, antiquing, metal clay, making molds and much much more.  


If you search the blog you can find things about applying to juried shows, outdoor show set ups and tips, and marketing information.

You can also click on the "shop" tab to find links to all of our shops.  There you will find tutorials for purchase, jewelry, beads and other supplies.

Are you interested in becoming a guest blogger on our blog?  check out the "guest" tab to see how.  We would love to "meet" you and see what you have to share!

Anyhow, I hope you enjoy the blog and find a little community here that supports you and helps you to learn and grow !!!!!

Happy Creating!!!!

Thursday, July 17, 2014

What Makes a Succesful Show?

by Staci Louise Smith


I am sure there are a million posts out there on this topic.  If you wonder why, its because there are a million answers to that question.  And all of us who do shows, learn something new each time we do one. 

Today I will touch on one or two things that I think go into a successful show.


I happened to be at a show over the weekend.  I have been doing this show for 9 years- its simply one of my favorites.  I am always working on my display- every year I change it up a bit...though I really have it quite how I like it now.  So the last few years it hasn't varied very much.  


Last years booth with last years banner

One of my more recent additions was a larger banner that went across the front of my table.  A lot of vendors had them at Bead Fest last year, and Karen Totten's of Starry Road Studio caught my eye.  It showed a very clear sample of her work and really stood out.  I liked how she had individual pictures of her beads on it.


Karen with her banner at set up- note the ones also hanging in the back
www.starryroadstudio.com
Her daughter Nellie also had one in a rainbow of wooly wire

So this year I made a new banner for my jewelry shows, and thought I'd do something similar.  Rather then just show one piece on it (like I had the other year), I could give a better idea of my scope of work with a few pictures.  


Now, if you have done art and craft shows you know that there are always a lot of jewelry vendors.  I mean, a lot.  You really have to stand out, to ensure that the jewelry fans come to check out your booth.  

Well, I had a customer tell me that my banner drew her in from across the way.  She loved that she could see exactly what my style was (which was right up her alley) and it made her come to see what I had.  Otherwise, she wouldn't have stopped in.  She went on to buy some great pieces too.  I really loved that she took time to share that with me.  So I thought I would share it with all of you.  

Another tip is to make sure your business cards have a picture of what you do.  Your customers may pick up 10 or more at a show.  You want them to remember yours at a glance, and why they picked it up.  They should be able to look at it and know exactly what you do.  Below is my jewelry show card.


After all, artists, people who love art, we are visual folks.  Pictures are important.  

I had planned to write about the next tip because it came up with a fellow artist at the show.  When  it came up on Facebook in a bead and jewelry group again, I thought I would definitely write about it. It pertains to allowing customers take pictures at a show.  The question was whether you allow it, and why or why not...and, if you'd consider signage to discourage pictures.  I think it wound up being a great discussion.  It is a very hard thing as an artist, to know that someone may be out to try to make what you made.  Whether it is for themselves (rather then buying it from you) or the to make it sell, and be your competition. 


This is Cori Krewson-Catlow's mom running her booth- she had such a great way with people!  Look at that crowd!
http://www.elasticbangles.com/

Here is my take on it, and I have been doing shows a long time.  

If someone plans to copy you, they will do it, whether you allow them to take a picture or not.  If you are selling online, you already gave them pictures of your work.  

Though it does happen that some people copy, and then go on to sell at the same venue as you (and I am not discounting how much this sucks- believe me, I am sure that it is a horrible thing to have happen!)....but this post is not about copying, its about selling.


Here is Barb Bechtel at a show, look how enthusiastic she is!  I love her energy.

At the end of the day, you cannot practice defensive sales techniques.  As a customer, if I walked into a booth that had a sign saying "no pictures please" I'd walk right out.  Let's face it, it comes across as closed off.  Instead, I encourage you to talk about your pieces.  Talk about how you make them.  Engage the person to talk about what they like about the piece.  You may find yourself in a delightful conversation about color, or texture, or gemstones.  You may find they want to show it to their mom.  I have even had women shop for friends this way, and come back and buy things after their friends texted back that they wanted them. 


Mary-Lynne Moffat with some customers in her booth.  Mary-Lynne is so wonderful at talking about her art.  Her passion comes shining through when she speaks of her creations!
https://www.facebook.com/MaryLynneMoffattArt


 If you are afraid that every customer that comes into your booth is going to rip you off somehow, it will show through in your attitude.  No one wants to spend time and money on someone who is closed off.  What makes us different then chain stores and factory made goods, is that what we make is part of who we are, and our customers get the opportunity to meet us and hear about what makes us tick, and why we did what we did on the piece.....ect.....  


Chris Kaitlyn helping a customer find what they are looking for
http://chriskaitlynjewelry.indiemade.com/gallery/image/img1490edited-1jpg

So my advice- talk!!!!  Talk about why they like the piece they photographed.  Talk about your process, the materials, how you make it. It will draw people in.  They will appreciate your pieces more when they know what went into them, and even more, when they see YOU in them.  I have gotten crowds in my booth explaining how to use bronze clay, or do etching with electricity.  I have had men stay for 20 minutes talking about fossils, and made friends over sea glass discussions.  Will every conversation result in a sale?  NO.  But it may bring them back in.  Or, someone who IS interested in buying but may be shy, may hear about your pieces and buy one because they learned something new.


Customer can easily become friends- Laura Blanck (center) posing with some great customers at a show
http://www.laurablanck.blogspot.com/

Why do you think galleries have a "meet the artist" night?  People want to meet the person who creates the art.  They want to know what makes them tick.  It becomes part of the pieces themselves.

These are just some things I have learned.  I admit, I am a people person- I know not everyone is, but I was shy at first too.  It was hard to find that comfort zone to talk about my work.  When I started to relax, and just think of it as an opportunity to meet creative people, and thought of these people as potential friends with common interests, it came more naturally.  In the end, I have made lot of friends at shows.  I have found customers whom I LOVE seeing. I love to catch up on what is new with them, learn what they have been up to, see what other artists they are into, and on and on.   

I have found such joy sharing my craft, not just the actual pieces, but the passion I have for it as well.  

I hope that you can too.  Don't worry about what could happen, just enjoy what you are doing.  That will shine through, and your customers will get to see you.....really see the honest you....and it will only help you make connections. 

Everyone has their thoughts on allowing pictures, and these are just mine.  I was an art show customer for many years before I sold there, and I know how I'd like to be treated, and what drew me to certain artists, and what turned me off.  This is all just some food for thought.

Monday, June 2, 2014

Donuts are Good For You

by Staci L. Smith


Well, this kind of donut is not bad for you anyway.  If you know me at all, you know I love using donuts in my designs, and I make a huge amount of them as components as well.  I love the round shape, the negative space the hole creates, and most of all, I love the endless possibilities.

Not everyone shares my passion though.  Some people just don't know what to do with them.  So I thought I'd share some tips and inspiration for using donuts in your work. 

I wish I had pictures of my earliest work.  One of the first things I did with donuts was use it as a toggle clasp.  Alas, I do not.  But I did find this sample online.  I love how she used the flower donut as a toggle clasp!  


Necklace by Karen Grosset Grange
http://www.facebook.com/l.php?u=http%3A%2F%2Fginkgoetcoquelicot.blogspot.fr%2F2014%2F06%2Fblu-mudd-challenge-4.html&h=LAQHCibI_

Donut by Blue Mud Studio

If you don't do seed beads and can't make that kind of toggle, you can make one out of wire, or even use a center drilled stick pearl as a toggle.


You can also use wire to make a bail on a donut bead.  You can do a simple wrap around look- this one is just wire wrapped around the top a few times, and I make a large wire wrapped loop for a bail.  Then I did the same on the bottom to create place to add a charm.


Staci Louise Smith

Below an old style of pendant I loved making, it involved a wire bail, with a spiral...then I would dangle charms from the spiral.  A great way to dress up and plain donut.


You can also get fancy with the wire work like Dana Hickey did


www.etsy.com/shop/winddancerstudios

or like these pretty little earrings by Stacie Florer
www.stacieflorer.com 


Another options is to bezel them, either in seed beads


Carol Dean Sharpe of Sand Fibers
http://sandfibers.blogspot.com/

Or bezel them in metal

 Staci Louise Smith

Staci Louise Smith

You can even prong set them- this is great especially if they are thick, highly textured, or you just want to leave as much of the donut showing as possible


Collaborative piece by Staci Louise Smith and Lisa Peters Art
www.stacilouiseoriginals.com
www.lisapetersart.com 

Another option is using fiber to tie your donuts into your design.  You can use waxed linen, silk cord and leather, just to name a few.  (ok, leather is not fiber, but I thought I'd group it here)


Waxed Linen Cord used as a bail from the donut onto leather cord
Staci L. Smith

 Plain old leather looped through the hole, through a large hole bead, and as a cord
Staci L. Smith

Silk Cord or something, tied through the donut on these earrings by Marcia Dunne
It really makes them light and dainty, and compliments her wire work and small beads perfectly
https://www.facebook.com/l.php?u=https%3A%2F%2Fwww.etsy.com%2Fuk%2Fshop%2F13Alternatives%3Fref%3Dl2-shop-info-name&h=YAQHYKOtt

Here is a piece I made a couple years ago, called Khaleesi, after my favorite Game of Thrones Character.  I used a large donut, with a smaller donut inside, and linen cord to add the accents to the piece.


www.stacilouiseoriginals.com


Someone who is always SUPER creative when using donuts (or any focal for that matter) is Keirsten Giles

She used wire and sheet metal to make high end bails for her donuts, and it absolutely makes the bail part of the main design of her piece.


http://www.facebook.com/l.php?u=http%3A%2F%2Fwww.etsy.com%2Fshop%2Flunedesigns&h=xAQGGUlTa

Another design that I adore are these bracelets by Judith Boyer.  I really like how she used the donuts, to make an symmetrical bracelet.....and the genius of it, is that the multiple strands will be heavier, and land on the bottom of the wrist, allowing the donut to be on top as the focal bead.  

https://www.facebook.com/l.php?u=https%3A%2F%2Fwww.judithannboyer.com%2F&h=HAQEJ6Nwt


Lastly, I like to use donuts in my pieces, using them among other donuts and beads, either in a choker style or a long dangle.  It is achieved by using wire to wrap them into place.


I figured I'd share this technique with you, since I get asked all the time how I do my wire for the above style pieces.

You begin by taking a nice long piece of wire and a donut.

Make a wire wrapped loop, and go through and around the donut, wrapping back around the base of the loop.


Now take the wire and feed it over the top and through the donut hole again, so it comes out on the bottom of the other side.


 back view


Now make a wire wrapped loop on the other side, wrap the wire around the base, and come back over the top of the donut


Feed the wire through the hole again, it will come out on the other side from the bottom


Wrap the excess around the base of the loop and cut, or, you can continue to go back and forth a couple more times, depending on the look you want.


Wrapping donuts this way allows you to use them in designs, and control how they hang.  By having wire on both sides, your donut will not flip around on you.  It also creates a look of the donut floating in the wire.  Essentially, you are doing a figure 8 through the donut.

I hope this helps to give you some inspiration and encourages you to use donuts in your designs. 

Please be considerate, the examples here are peoples original designs, are are not to be copied, but, merely a jumping point for you try something new.  Be inspired, but give it your own flavor, make it your own.  

Some of the art bead donuts in this post and just some of my favorite places to get art bead donuts are listed below

www.lisapetersart.com

https://www.etsy.com/shop/MarshaNealStudio

https://www.etsy.com/shop/suburbangirlbeads

www.stacilouiseoriginals.com 

www.starryroadstudio.com 


face
Related Posts Plugin for WordPress, Blogger...