Showing posts with label cold connections. Show all posts

Tuesday, July 21, 2015

Tutorial Tuesday – In Focus, Using Optic Lenses in Jewelry Design by Karen McGovern

Howdy all! I almost missed this post. I fell into a black hole….decided to binge watch the first two seasons of True Blood! Guilty pleasure admission—when that show came out I fell in love with it, but didn’t catch the first two seasons. Read all the books, hilarious! So, basically, I’ve been doing nothing but lying in bed with super-sized bags of assorted snack products shouting at the TV. Eric getting his hair highlighted while torturing Lafayette in the basement?!?!? LOLS for days. Endless episodes featuring Sam Merlotte’s bare butt? YES, PLEASE. Haven’t gotten to Alcide yet—OMG. Anyhoooo…..


Before my vampire binge, last week I finished a pendant design that I’d been imagining for a while. A tribute to Frida Kahlo (who would have loved True Blood, I bet). I got the idea when I heard about all the love letters that had come to light written by Frida to Diego Rivera, her lover, partner and sometimes adversary. I wanted to feature a bit of one of her love letters in a pendant, and decided to use an optic lens to do so. Optic lenses are great to work with, and have been around the jewelry world for a long time now. Wildly popular and readily available in reproductions by several jewelry finding lines. I started collecting them a couple years ago and am lucky enough to have actual vintage and antique lenses, many dating to the late 1800s and early 1900s. Found these beauties at antique fairs. True vintage lenses are not as easy to find these days, but you can find them if you dig deep enough on the Internet.

AMOR. My tribute to Frida Kahlo and Diego Rivera

So, today I’ll show you how to easily create a pendant to hold a memory (letter, photo, favorite page from a book, dried flowers, insect wings—whatever) using an optic lens, copper, bits of this and that, and micro screws. All cold connected, no soldering involved.

Vintage lens I grabbed from an antique show.

First, lay your optic lens on a sheet of 24 gauge copper and trace a shape around it for the pendant base. I like shield shapes, they fit the optic lens nicely and allow the “handle” of the lens to become an attachment point to the base at the bottom. Allow enough room around the lens to add other items you will use as attachment points for the lens and as embellishments for the design itself. I used layers of brass flowers, enamel copper and assorted beads for the Kahlo design referencing the elaborate floral designs she often wore in her hair. You need at least three strong attachment points for the lens to hold it firmly and permanently in place on the copper. Cut or saw out the copper, sand the edges smooth, then lay out your design roughly so you can mark where your attachment points will be. I usually create a nice, larger embellishment right on the top of the lens that will also be the point where I attach a pendant bail…we’ll talk about that later. Anything with a hole big enough to accept a micro screw can be used as embellishments and attachments for the lens. Brass flowers and leaves are great here, end caps you flare or flatten, buttons, discs--the possibilities are endless. Choose items that play a part in the overall design or memory you want to create!


Once you have the design laid out to your liking, mark where you need to punch or drill holes for the micro screws using a fine line Sharpie. Punch or drill the holes and clean the holes with a needle file. At this point you can texture the copper if you like, etch a design on the back for added interest, patina, whatever you like. Seal any colored metal with clear acrylic specific for metals.

Now the fun part—putting it all together. If using an image or papers under the optic lens, cut them to size and glue them in place on the copper using something like Modge Podge, which is a glue/sealer designed specifically for papers. You can coat and seal the papers first with Modge Podge if you want to—I just glued the paper in place for the Kahlo design (printed the text off of an image of an actual letter she wrote that I downloaded from the mighty InterWebs). I also glued a butterfly wing fragment on top of the letter, then topped it with the lens. Once you have all the goodies in place under the lens, begin adding your embellishments to hold it in place using micro screws. The handle of the optic lens usually comes with a hole in it already.  I began here, adding a brass rose with a silver bead. I inserted the screw front to back through the design, attaching the nut on the back just finger tight. I wait until all embellishments and screws are in place before a final super-tightening in case I have to tweak or remove/add something. Layers are fun here. I especially like the enamel copper discs I used on top, courtesy of MaryAnn Carroll, layered with the brass flowers. To attach a bail, you can create one from a length of rolled copper, aluminum or silver (with a hole punched or drilled on the end), or use a pre-made bail or attachment that works in size and design. The silver hoop you see on the Kahlo pendant is actually the hoop from a toggle clasp set. A super easy bail is simply to take a length of 12 or 14 gauge copper, hammer and flare the ends, drill holes in each end, double it over on itself and thread on the micro screw. If you don’t want a centered bail, drill or punch two holes on the top “corners” of the pendant as attach points for jump rings and chain. Whatever you like!

For this pendant I am going for a bird motif. Will drill
a hole in each wing tip to attach jump rings, and will
drill a hole through the center to attach to the copper back
plate, overlapping the lens for stability.
Once everything is in place and to your liking, tighten the nuts on the micro screws as tight as you can. Be careful tightening the screws that hold elements directly on the glass of the lens, you don’t want to crack it! Just make sure the lens is held firmly in place, cannot move side to side, etc.  Then, snip the excess screw material from the back, file the end of the screw and add a dab of strong metal glue to hold the nut in place. I used Gorilla Glue, and also flared the end of the screw whenever possible by placing the pendant face down on a bench block and hammering the end of the screw flush with the nut. This may or may not work depending on your embellishments and placement. You don’t want to hammer anywhere near the glass of the lens!!!

You can add more details outside of the attachment points to continue the story of your design. For Frida, I added two silver skulls below the lens to represent Frida and Diego, together for all eternity. I also drilled a hole below the lens handle rose attachment so I could suspend an anatomical heart charm (real love) and a sterling silver cast hummingbird skull (hummingbirds represent spirits and love).


I’ve made several optic lens designs over the years. This one is a favorite, along with a pendant I made using a photograph of my Grandfather holding my Dad when he was a baby. These mean a lot to me, they both tell a true story that has meaning and beauty to me.

My Grandfather holding my father.

Some of the other designs I have made are representations of a short story or poem I wrote, or imaginings inspired by the tin types I also collect. There are so many designs you can create here!!! I love jewelry that tells a story, and optic lenses are perfect for focusing attention (see what I did there???) on an amazing bit of memory, real or imagined.


So, do you have a story to tell? Create it in a jewelry design and send us a picture! We’d love to share with you….Now, GO MAKE SOMETHING AMAZING!

Tuesday, January 27, 2015

Tutorial Tuesday-ish! By Karen McGovern

This post was suppose to be on TUESDAY.  Sorry....

*NOTE:  Any tutorial I post is just MY TAKE ON HOW TO DO SOMETHING.  I do not use words like “right” or “wrong” when describing how I work.  This is just what I have figured out and there may be folks out there that do things differently.  GOOD FOR YOU!  Go with what works for you!  Also, be an adult and follow basic safety rules.  Wear protective eye gear when needed.  Work with fire and fumes in a well-ventilated area.  Don’t burn yourself…BE SMART!!  Also, all supplies used in this tutorial are easily found online at Etsy, Amazon and RioGrande among others.*

My first tutorial of 2015 comes by request from MaryAnn Carroll, who said she wanted to know more about how I make my bezels.  I figured I’d give that a go, since the style I most prefer came about due to a complete accident on my part.

I like to make bezels that feature a combo bezel/prong setting with dots of silver as accent.  My style is rustic, and the combination of bezel wire with rustic prongs appeals to me.  The combo came to me as a sort of ”salvage” effort when I was first learning how to solder bezel wire.  I’ll try to explain…

For this pendant I chose a nice, long slice of jasper.  I plan to bezel set it and run prongs along one side.  Here we go….

I use Easy Solder paste solder for just about everything (cooltools.us).  I prefer paste solder because it acts as a sort of glue, sticking things together nicely, and it has flux in the paste, so you get to skip that step!  I love anything that saves time.  I use a jumbo Max Flame butane torch (available everywhere.  I got mine through Amazon).  I have not graduated to anything fancier, and find that this torch suits my needs just fine.  I have had this torch for a couple years now and love it.  If you want to know the dirty truth, I have a jumbo and a regular size Max Flame.  My jumbo’s igniter stopped working a while ago, so I immediately ordered another, not realizing I had ordered a smaller version of the jumbo.  It works fine also, but the jumbo gets hotter and I need that quite often.  So, I use the smaller Max Flame to light my jumbo.  Yes, I have them both lined up at my soldering station and use one to light the other.  Whatever works, right?!?!?! Okay, now on to the bezel setting….

My dirty solder station.....

I use 24 gauge sheet for my bezel backs.  Silver, copper, brass, whatever.  Bezel wire comes in graduated widths, I have an assortment, also in a mix of metals.  When I first tried to solder bezel wire (which is very, very thin), I burned up a TON OF IT! So, practice with copper and brass before sterling—my advice to your wallet.

Cut a back piece from sheet that is larger than your cabochon, leaving room for the bezel wire, prongs and any accent metal you may want.  I’m using sterling silver here for the back, but copper bezel wire for some contrast.  Wrap the bezel wire around your cabochon to size the wire.  Bezel wire is super flexible and thin, so you should be able to shape it around the stone easily.  Allow a bit of overlap for filing and perfecting the ends so that they meet flush (using flat files), and conform snugly around the stone.  I use my good metal shears to cut bezel wire, but you can use extra sharp scissors as well.  Just be careful and try to cut as straight as you can.  You want the ends to meet FLUSH.  Manipulate the bezel wire to fit snug around the stone and still hold its shape on its own.  This is a bit tricky, but you can do it. Make sure the stone can be seated easily within the shape, but still meet the edges of the stone.  Once you like how the ends meet, ad a dab of Easy Solder paste to the seam, place on a solder block and heat with the torch.  Heat evenly and move the flame around the bezel CONTINUOUSLY.  Don’t let your flame remain in one spot for any length of time—too much heat in one spot will MELT THE BEZEL WIRE.  Paste solder will flame up—that is okay, it’s just the binder burning off.  Soon you will see the solder melt and flow up the seam.  Quench immediately and check the seam to make sure the solder flowed correctly and the seam is sealed strong.  (Note:  Silver solder will leave a thin line in the seam of a copper bezel.  I don’t mind this and usually make sure this is where I add a prong or accent metal.)

Now, reshape the bezel wire around your stone and make sure the sides of the bezel are straight and that the entire bezel will sit flat on the back plate with no spaces between the bezel and the back.  The wire is soft and easily manipulated.  Take your time and make sure the form is true and the stone fits well in the bezel.

CAREFULLY apply tiny dabs of Easy Solder paste to the bottom of the bezel wire (roughly 2 mm dab close together all along the bottom).  Remember how soft the bezel wire is.  You need a very light touch here or you will change the shape of the wire and your stone won’t sit well. Be patient, you may have to start over a couple times until you get the “feel” for this. Place the bezel wire on the back plate, press lightly but firmly flush to the back plate.  The solder paste will hold the wire nicely in place. Set on a solder block and begin gently heating with your torch.  HEAT THE ENTIRE PIECE, CONSTANTLY MOVING THE TORCH AROUND.  If you concentrate the heat on one spot you will MELT THE BEZEL WIRE INTO GOO.  So, constant movement!  The solder paste will flame up again, that is the binder burning away.  Keep the torch flame moving, and heat till the solder flows.  Again, patience here!!!  Once the back plate begins to glow a bit red, the solder should flow nicely.  Quench in water, dry and look to see if any spots of solder missed or didn’t flow.  If needed add more solder paste and re-heat in the torch.  Quench and pickle if you want, or give it a basic clean with sanding sponges.

Next, use a bit of dental floss across the back of your stone and set it in the bezel (the dental floss allows you to lift the stone out in case it is in there tightly).  Using a Sharpie, mark where you want the prongs to be.  For this design I wanted six prongs.  Remove the stone and drill holes where you marked.  I usually use 14 or 16 gauge wire for the prongs—make your holes as close to the same size as you can.  You want the prongs to fit snugly in the holes.  Put the stone back in, then decide how long you want your prongs to be.  If using copper or sterling wire, you can ball the end in your torch if you want that look.  I made sterling prongs and balled the wires. Cut the prongs a tiny bit longer than you think you need. With your bezel setting on a soft solder block, push the prongs in place through the holes in the back plate and into the solder block.  Tap with a hammer to even the heights if you want. When you are happy, remove the stone and add a dab of solder paste to the base of each prong where it is inserted into the back plate.  At the same time, you can place any other accent balls or metals around the bezel.  Yes, many folks make their own silver balls by torching scraps of silver on a charcoal block until they form balls.  I use sterling silver casting grain because I am lazy and want to have this on hand all the time. (I do plan to make my own balls soon, because I like the organic look of pits and rough spots you get when you make your own.  But for convenience, you can’t beat casting grain, and it comes in silver, gold, copper and brass!) Add a dab of solder paste where you want the accent, place the balls, and torch the entire thing till all pieces (balls and prongs) are soldered in place.  Again, constant movement of the torch is key.  If you over-heat your prongs may wilt….nobody wants wilted prongs.

When it’s all in place and soldered secure, quench, clip any excess prong material from the back, and sand the back smooth.  Pickle, use shears to cut the bezel form to your liking, and finish by sanding the edges.  Use needle files to get in and around balls and prongs, finish as you see fit! I added some wonky lengths of wire to the top for a bail and accent.   

Pickle the setting and clean thoroughly.  I use a brass brush on my flex shaft and polish till it’s bright.  Then it went into a liver of sulfur bath.  After that, I set the stone (standard bezel pusher and burnisher), gently bent the prongs over (tapped them in place with a rivet hammer) then polished and finished the setting.  I textured the side with the prongs for added interest.  Once I was satisfied with the look I polished with a polishing cloth.

Viola! Here is a crappy slideshow of the entire process.  If you have questions, please contact me here!


When I started this post I said I discovered this setting design by accident.  Well, I was learning to solder bezels and failing miserably.  I burned a portion of bezel wire away on a ring and instead of trashing it I thought, “I’m going to put a prong there instead!”  And it worked.  Filed the bezel edges, drilled a hole, set the prong as above, and finished the design.  I liked the look so much I continued experimenting.  And yes, I still occasionally burn my bezels and now add prongs or metal balls to cover the “mistake”.    

Most recently I made the ring you see here using gorgeous labradorite and ocean jasper.  I wrecked the bezel wire around the labradorite.  I tried to cover by placing the ocean jasper cab right next to the “mistake” and it sort of worked.  BUT, by the time I set and finished the ring, I still didn’t like the look.  So, I drilled a hole between the stones and cold connected a tiny enamel copper cup and sterling silver cast twig in place.  I used a brass micro screw (that I topped with sterling silver in the torch).  I hammered one end of the twig flat, drilled a hole, and used the micro screw to hold It all in place.  It worked because the ring is a large statement piece and I had enough room on the back to accommodate the screw and nut, which I hammered flush to set.

The beast of a ring before and after I set the enamel and sterling twig.
You can see in the "before" pic how crappy the bezel is around the labradorite!

Moral of the story—there are no mistakes, only opportunities!  Don’t throw away a design you think you have “ruined”.  Take a minute or three, look at it again, and maybe you can salvage it through the placement of elements you hadn’t originally considered.  Combine hot and cold connections.  Add prongs, accent metals or another layer of “something”.  Sometimes our disasters lead to the best design ideas yet!!

Thursday, December 12, 2013

What have I been up to you ask?

by Staci L. Smith
 
Well, the holidays are all but upon us, and to make it even sweeter, we got some nice snow this week in PA.

(aren't they so creative, I just love my little guys snowman)
 
The boys also built a fort, and it is REALLY good!
This is a shot from the side.  It is in the tree line.
 this is within the tree line, so you have to climb in to see the opening
 and this is a close up, you can see they hung their gear inside
 
I just love that they are each creative in their own way too!
 
I have been taking some time to play around a little more since my shows are done.  Both with family, and with creating things. 
 
You can read my blog here about these new prong settings I made.
front

back

  They were great practice for soldering, and I even made the larger links in the chain.  So I also got to buff and polish. 
 
I have been working on some mixed media art as well.  I carved some linoleum blocks and made some prints, as well as played with paint and other mixed media techniques.  I justify this, because some will be Christmas gifts !!!!!!


Seriously though, I really needed to take some time to play- because its how I learn.  It's how I process, and its how I discover new things too.
 
Now I need to play with some cold connections so I have something new for the blog hop on Monday!  I really hope you join us too!
 
 
Rings and Things recently sent me some samples to try out, and I think they KNEW we were having a cold connection blog hop coming up, because they sent me these............
 
Brass Blank Windows
 
I got one of each of the new designs (I think).  How perfect to add a picture between and rivet together, or make them into pins or pendants!!!!!  They have a bunch of great designs, already cut and ready to assemble.  Check them out here.  (I do not get any endorsement from them for this, I just thought they were perfect for our boot camp).
 
Sorry for the rambling, just wanted to let you all know how many directions my brain has been in this month!  At least things come out of that mess!  Whew!
 
How do you do the holidays' creatively?  Do you do handmade gifts, or just prep for shows?  Or both?  And do you hop to various mediums for gifts (like pull out all your creative juices?)


Wednesday, November 20, 2013

Show it Off

by Staci L. Smith
Have you been following the latest Boot Camp:  Hold your Fire- Cold Connections?  It's a good one, a tool for your tool box with limitless possibilities!  You can check for new posts each Monday on cold connections, and throughout the week as well!!
Whether you are already an expert at cold connections, or you are trying them for the first time, you can join with us, and show off your what you are making with them in our flickr group. 
If you have been doing them for years, show it off!  It's a great way to inspire those new to them. 
 
If you are trying them out for the first time, show it off- your hard work and creative ideas are what we want to see !
 
Lynnea of Designs by Lynnea gave rivets a shot, and she nailed it! 
 
 
I must admit, her cuff, is exactly the sort of thing I hoped you guys would try out with rivets.  Layering metal and mixed media has endless possibilities!  And using photo's make it so much more personal. 
 
Stay tuned for tomorrow, on how you can make a project with a picture and rivets (or micro-screws or tube rivets).


Monday, November 11, 2013

Hold Your Fire: Rivets

by Staci L. Smith

 
What is a rivet?  Using wire to connect two pieces of metal (or two items) together.  It is probably the most commonly used cold connection of all!

Learning to make rivets will prove to be life changing.  It will open up doors to new and wonderful creations that were just not viable before.  It is another valuable problem solving tool in your tool box as well.

Here are some references, links and printable  that should help to you learn and practice this new technique.
 
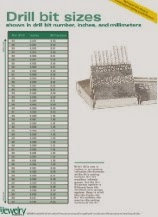
The first thing I like to have handy is the drill bit and wire gauge chart.  This allows you to know what size drill bit to use, for the gauge wire you will be using to rivet.
 
There is a nice printable version from
Art Jewelry magazines website here. (then you can keep it right in your studio)
 
http://art.jewelrymakingmagazines.com/~/media/import/files/pdf/8/a/d/art-jewelry-drill-bit-sizes.pdf

I also refer to this one at Rio Grande because they give you the measurement in the fraction form, which is how some drill bits list them.

http://www.riogrande.com/Content/Drill-Bit-to-Wire-Gauge-Conversion-Chart-CG-html?Pos=1
 
I was not able to make my own photo tutorial for you, but I did type up a printable PDF on making rivets.  I know I still like to have a paper in front of me while learning something new.  It has your material and tool list, as well as step by step instructions.
 
 https://drive.google.com/file/d/0B2x2Hxljc64UMnluTjZDeVdFVkU/edit?usp=sharing

If you are like me though, you will need to see this in action.  So print the tutorial, and watch the awesome video I found by Charles Hamm.
 
 It is very thorough.  I love his diagrams, and step by step demonstrations.  It is worth the 8 minutes of viewing time! 


Rivets have really opened a whole new world to me!  If you don't have a good vice to make your own, you can use these from Rio Grande.  They are also time saving, but not near as nice and finished looking on the back as making your own.
 
 
http://www.riogrande.com/Product/Copper-1-4-Rivet/628112?Pos=2


I have used them a lot.  However, I now have a nice little vice in my studio, and can't wait to make my own rivets!


As soon as I do, I will post pics to the flickr group- and I hope you will too.  Its a fun way to show off what you are creating with cold connections during this Boot Camp.

Monday, November 4, 2013

Hold Your Fire! Cold Connection with Micro Screws by Karen McGovern

Welcome to our next BOOT CAMP!  This go round we are going to show all sorts of amazing ways to create using cold connections.  Cold connecting is awesome.  The term refers to joining metals and other materials without heat. The minute I read Making Connections by Susan Lenart Kazmer, I was totally hooked on using rivets and screws in jewelry connections.  Especially since at that time I had never used a torch and was actually too scared to try soldering.  My, how times have changed!  While I do a fair amount of soldering in my work now, I still use cold connections whenever I can.  They are quick; and require so much less finish work than hot (solder) connections (no fire scale, no pickle!). 


A variety of designs I have created using micro screws...
For the purposes of this post I will be discussing and showing how to use micro screws in jewelry design.  This boot camp is going to be full of cool ideas (see what I did there??) so I hope you will follow all the Monday posts—rivets are coming!
Micro screws are really gaining popularity in jewelry design.  Objects and Elements is a great source for brass and steel micro screws and nuts in a variety of lengths.  Nunn Design offers brass and copper micro screws in a medium length.  Just found out about the copper—my order has been placed!  The screws come in a standard 1/16th size, listed at O and E as short and long lengths.  I usually default to the long length; it’s easier to trim excess than to come up short when stacking and connecting elements in your design.
The look of micro screws is a bit industrial, which I love, but the screws are tiny enough not to overwhelm a design.  They are perfect for connecting metals and components that cannot be soldered together (aluminum, enameled elements), great for adding delicate materials to a design (like paper or resin/plastics), and wonderful to create elevated layers and stacks.  I use micro screws almost exclusively for my line of aluminum embellished cuffs.  So, I will be showing here how easy it is to make a really interesting cuff using a variety of materials all held together with micro screws.
 
What you need tool-wise:  micro screws and nuts in your preferred metal, micro screwdriver, a Dremel, Flex Shaft or EuroPunch tool with a 1/16th drill bit or setting, wire snips, metal shears, needle file, flat file, medium sanding sponge, round end riveting hammer or chasing hammer, domed face chasing hammer, bench block, steel bracelet bender or mandrel.

What you need materials-wise:  6 x 1.50 inch aluminum bracelet blank (available in many widths, this is just my favorite), 6 x 1 inch (or so) length  metal of your choice to overlay (I am using tin from an old cookie container), embellishments (this can be beads, discs, charms, whatever you like, just make sure they have a 1/16th hole in them).

Micro screwdriver, aluminum blank, brass micro screws and nuts,
riveting hammer, curved chasing hammer, round nose hammer.
First, I like to texture the aluminum.  I use a curved/domed end hammer for this and usually just hammer on an interesting surface, like the concrete stone pavers outside my garage.  Aluminum textures incredibly easily, so you can use just about anything for a texture plate.  Wood with a deep grain, brick, wire screen, or just a simple hammer texture all look wonderful.  Using a softly rounded hammer insures the inside of your cuff won't be scratched up or marked by the hammer.  Go crazy!  Run the sanding sponge along the edges when you are done to make sure everything is smooth with no rough spots or snags. 
Bracelet blank after texturing.  Using a hammer with a slightly curved
face prevents metal marks from marring the interior of the cuff.
Next, bend the aluminum into a cuff shape.  I have a bracelet bender and it is so easy and quick.  Two bends and I’m ready to go.  I can’t live without my bracelet bender.  I like oval cuffs, but you may prefer a round shape…do what you like! 

Blurry shot of the bender in use, then the finished shaped cuff.  Adjust with
your fingers as needed to get a perfect fit.
Prep your metal overlay.  For this cuff I cut a length of patterned tin from an old cookie container.  I used metal shears to cut the tin.  I like a tapered look to the overlay, so I cut mine a little narrower to one end.  Make sure the metal is filed smooth on the edges, especially with tin, leaving no snags or rough edges.  I round the corners also.  Sanding sponges work great here to finish and soften edges quickly.  If you are using copper or brass, I suggest a lighter gauge than the aluminum base.  I usually use 24 gauge copper and brass. 
Metal shears, sanding sponge, my favorite flat file and the cookie tin material.
*Don’t panic—I’m listing sources at the end* 
EuroPunch tool...love it.  Quick and easy.
Drill or punch two holes at each end of your overlay metal, then bend the metal over the aluminum cuff, centering the overlay top to bottom and end to end.  Once you have the metal placed where you like, mark through the holes at one end to the aluminum using a fine line Sharpie marker.  Drill or punch ONE marked hole in the aluminum, then insert a micro screw from the back of the cuff, through the overlay and add a nut, then tighten.  I learned to place a bit of tape over the screw head to hold it in place.  I have dropped approximately 7,000 micro screws and nuts on the floor under my bench.  On the filthy, bead-ridden, no-man’s land that is my floor…sigh...they are lost forever, or until I clean, so let's just go with FOREVER.  Drill or punch the second hole and repeat with another micro screw. 
Now you have one end in place, smooth the overlay metal to the other end, hold tightly and mark the other end with the Sharpie.  Drill or punch one hole, insert the micro screw, add the nut and tighten.  Finish by drilling or punching the last end hole and assembling the screw/nut as before.
 
 
Now you can really tighten the nuts to the screws.  TIGHT!  I usually hold the excess screw material with my fingers or needle nose pliers and tighten the nut with bent nose pliers until the nut won’t turn anymore.  Then snip the excess screw material to about 2mm above the nut.  Place the cuff on a steel mandrel (I use my ring mandrel) and hammer the excess screw material flush to the nut.  Use a round nose riveting hammer or round nose chasing hammer for this so the metal flares and domes, securing the nut in place. Hammer at an angle, not straight down, to flare and dome the excess metal.  Feel it with your finger—you want the metal to be smooth, no rough edges.  Hit it with a sanding sponge to make it smooth as needed.
Pic on left after cutting excess screw material, getting ready to hammer using
my steel ring mandrel for support from below.  Pic on right shows the screw
material after hammering, flared and smoothed.

Coming along nicely!!  Now to add more stuff.....
You’re basically done!  Now the fun part, adding extras!  I love MaryAnn Carroll’s enamel discs and use them in most of my cuffs (and just about everything else I make).  Here, I chose a nice big disc (1.25 inch) layered with a smaller round I cut from the cookie container cover that I drilled and dapped, and another tiny enamel disc.  Be creative here!  Layer large, flat beads, resin paper, stampings--whatever you can think of--as long as it has a hole big enough for the micro screw.  Position your base disc or bead where you want it on the cuff (I like a slightly off-center asymmetrical look), mark the spot with the Sharpie, then drill or punch a hole.  This time, insert the micro screw through the bead/disc stack from the top down so the screw head shows.  Then insert the screw end into the aluminum, add the nut to the back and tighten as tight as you can with your fingers.  For the final tighten, use the micro screwdriver inserted in the screw head, hold on to the nut with your fingers or pliers, and tighten really snug.  Snip the excess screw material.
Adding elements and using the micro screw driver.  A handy little device!

Now, here it can get interesting.  If you use dapped discs like I did, you will need to create a curved surface in order to set the nut.  The screw head must be supported by a metal surface in order to hammer without cracking or ruining your discs.  So, here’s my solution because I don’t have a ton of fancy tools.  I simply place my round nose hammer in a vise.  Then I invert the cuff, make sure the screw head is right on the ball of the hammer, then hammer and flare the excess screw material to the nut using a riveting hammer or another round nose hammer.  Yes, once you become addicted to riveting you will come up with all kinds of contraptions to get the job done.  Again, make sure there are no rough spots or snags and you are DONE!
It may not be elegant, but it works!

Definitely a balancing act, but you need to support the screw head while
hammering from behind.  Otherwise, you will crack and ruin your stacked elements!
Cold connecting designs are as endless as your imagination.  I’m including pictures here of some of my cold connected designs, and please visit our Pinterest page to see cold connections created by other artists in and out of LMAJ.  Come back often, we have more fantastic cold connection tutorials scheduled exploring tube rivets, nail head rivets and more. 
A recent and favorite assemblage pendant I created using micro screws
and nail head tube rivets.  More on those in future Monday boot camp posts!
Until next time—Keep Calm and Rivet ON!!!
 
Sources:
Micro screws and nuts, hammers, riveting tools/punches:  Objects and Elements, Nunn Design
Aluminum/Brass/Copper bracelet blanks:  Gotta Getta Deal (check out the anodized aluminum in beautiful colors!)
EuroPunch Tool:  These are now available in many places including Michaels, Etsy, Objects and Elements
Dremel, micro screw driver and drill bits:  Any local hardware store
Sanding sponges:  Local hardware stores
FlexShaft:  Shop around, Google it, and Rio Grande has a good selection plus supplies
Copper enamel discs:  MaryAnnCarroll/Artisan Beads Plus
 

Saturday, November 2, 2013

cold connections - alexander calder

mary jane dodd

alexander calder - stabile

yesterday and today are about inspiration - 
susan lenart kazmer's book not only inspires, but teaches. 

today i wanted to share a side of one of the great masters of art that some of you may not have known about. many of you may recognize alexander calder for his sculpture - huge mobiles and stabiles that are perfectly balanced... often massive metal works that float seemingly effortlessly in the air, set in motion by only a slight breeze. 

this amazing man also made jewelry - and with his very large tools i might add.

i took some pictures from another of my favorite books, calder jewelry, to show you how he used cold connections in his work. 

alexander calder 

rivets

alexander calder

wire loops

alexander calder

tabs

alexander calder

paddle ended wire

cold connections aren't what you use because you don't know how to solder. this method isn't 'less' to soldering, it's just different. 

it's a choice. 

a choice that adds much to the overall design, a choice that will challenge you to be certain that your technical and aesthetic considerations have been thought out well. 

do you want these connections to take center stage? because they certainly can

or do you want them to be what they are? a way of connecting, providing structure, movement and a subtle design influence.

i am really excited about this challenge. 

like most of you, i have to allow things to percolate for a bit before sitting down to make. whenever i would submit to art bead scene's monthly challenge i inevitably would get my entry in on the last day. simply because ideas had to move around in my brain, get filtered and distilled.

mjd - 2010 calder challenge


enjoy your weekend - here in the midatlantic, foliage is peaking. 
life is good, yes?


face
Related Posts Plugin for WordPress, Blogger...