
Every fall the hubs and I get away for weekend, to make our way to LBI NJ for a weekend away from the kids. We go to Chowderfest, and I used to a sea glass festival there too. However, I have since let the show go to spend the time with the hubs. Well this year, a Nor -Easter with flooding canceled Chowderfest and plagued the island with HIGH winds and flooding. We had rented a house, and decided to go anyhow. It was fun and he and I enjoyed watching the ocean rage and being rained in. It was sort of peaceful (except for the ever present wind howling).
(here is a video of the winds and sea, turn down the volume, its howling)

Because of the weather, we decided to go the next weekend as well and take the kids (this is the life of two self employed individuals- we can't plan anything and do last minute stuff all the time). The weather was calling to be wonderful and we didn't do a week vacation this year, only a couple day trips to the beach. Now, I love the beach. To say my kids also love the beach is an understatement.
 (same beach a week later, huge difference, right?)
I am so thrilled that they share of our love of beach combing, and just relaxing in the beauty of the shore. We have come to love that little island, and October is my favorite month to go. The beach is cooler, but the water is still warm. NO crowds on the beach, and people are there fishing with cars on the beach, walking dogs or sitting with coolers of beer and watching the waves. The entire vibe is different and everything slows down.

I am so thrilled that they share of our love of beach combing, and just relaxing in the beauty of the shore. We have come to love that little island, and October is my favorite month to go. The beach is cooler, but the water is still warm. NO crowds on the beach, and people are there fishing with cars on the beach, walking dogs or sitting with coolers of beer and watching the waves. The entire vibe is different and everything slows down.


We had two days with the kids and it was wonderful. Saturday we hit one end of the island, Holgate (both ends of the island are the BEST for beach combing you know!) While beach combing with the family, I loved seeing the different things they each though of as treasure. My youngest son, he finds the odd things- knife handles, pieces of old tools, plastic army men..........and each one holds some sort of story to him. For instance, he found some sort of crank handle and swore it was part of a harpoon. How could we tell him it wasn't ! (they made swords to play with from old fence and grasses)

My sweet daughter has a bleeding heart for all the broken shells. Ever since she was a toddler, her beach pile contained all the broken ones. I think she is sad no one loves them and so she takes them home with her.

 (art on the beach with her broken shells- it spells "sea")
My eldest, he looks for fossils, sea glass and stones. He is constant competition with me for the most or best sea glass!!!!
 (he got the "find of the day" award for this old bottle neck)
 (this beach was pure beachcombing joy and we found lots of amazing treasures here)
Below is just some of the loot we scored from the beach at the other end of the island- Barnagat Light- this weekend.


 (horse jaw?)
As we all walked the beach, shrieking for joy at the odd things we found, I looked around, and thought- man these guys are my heart, and this place holds it.

My sweet daughter has a bleeding heart for all the broken shells. Ever since she was a toddler, her beach pile contained all the broken ones. I think she is sad no one loves them and so she takes them home with her.


My eldest, he looks for fossils, sea glass and stones. He is constant competition with me for the most or best sea glass!!!!


Below is just some of the loot we scored from the beach at the other end of the island- Barnagat Light- this weekend.


As we all walked the beach, shrieking for joy at the odd things we found, I looked around, and thought- man these guys are my heart, and this place holds it.
:sigh: ok, enough sappy stuff (they grow so fast, I am really feeling it these days). All this beach combing, and visiting the sea glass festival got me to thinking about sea glass again. So, I want to share with you a short wire wrapping tutorial on sea glass. I have seen A LOT of them out there, and so many have you wrap it real fancy or pretty, but if you pull on it, your sea glass will fall right out. And take it from a fellow beachcomber, losing a dear found treasure is NOT what you want.
_______________________________________________
Here is how I wrap. Each piece is totally different, so, it will vary, but the concept is the same for all of them.


_______________________________________________
Here is how I wrap. Each piece is totally different, so, it will vary, but the concept is the same for all of them.
1. I used 18g copper wire for this. I like to use the thickest gauge I can manage without blocking out the sea glass. 18g is definitely my go to size. I also chose a square piece of sea glass, because for me, they were the most challenging. Since you have to capture each side so it can't move, it is a bit harder then with triangular pieces, with have points you can wrap the wire around to hold it tight.

2. I always start with the bail, and there is GOOD reason for that. Make a wire wrapped loop and close it

3. Hold the bail where it will go, and bring the long wire down the center of the back

4. Bring the wire back up the center to the bail, and wrap it tightly around once. Make sure the wire is tight to the glass the entire time.

5. Now you need to capture the sides so the glass can't fall out. First I go around a corner and then halfway down, pull the wire to the back of the sea glass. Then holding it tight, I wrap it up and around the bail again. Wrapping the wire around the bail each time secures that it can't move or shift, and you won't be able to pull it apart when you are done.

6. Now come from the back again, to the other side, so down to the bottom and then back up the back side, and wrap around the bail again. If your wire feels tight, and the sea glass can't be moved within your cage, you are done.

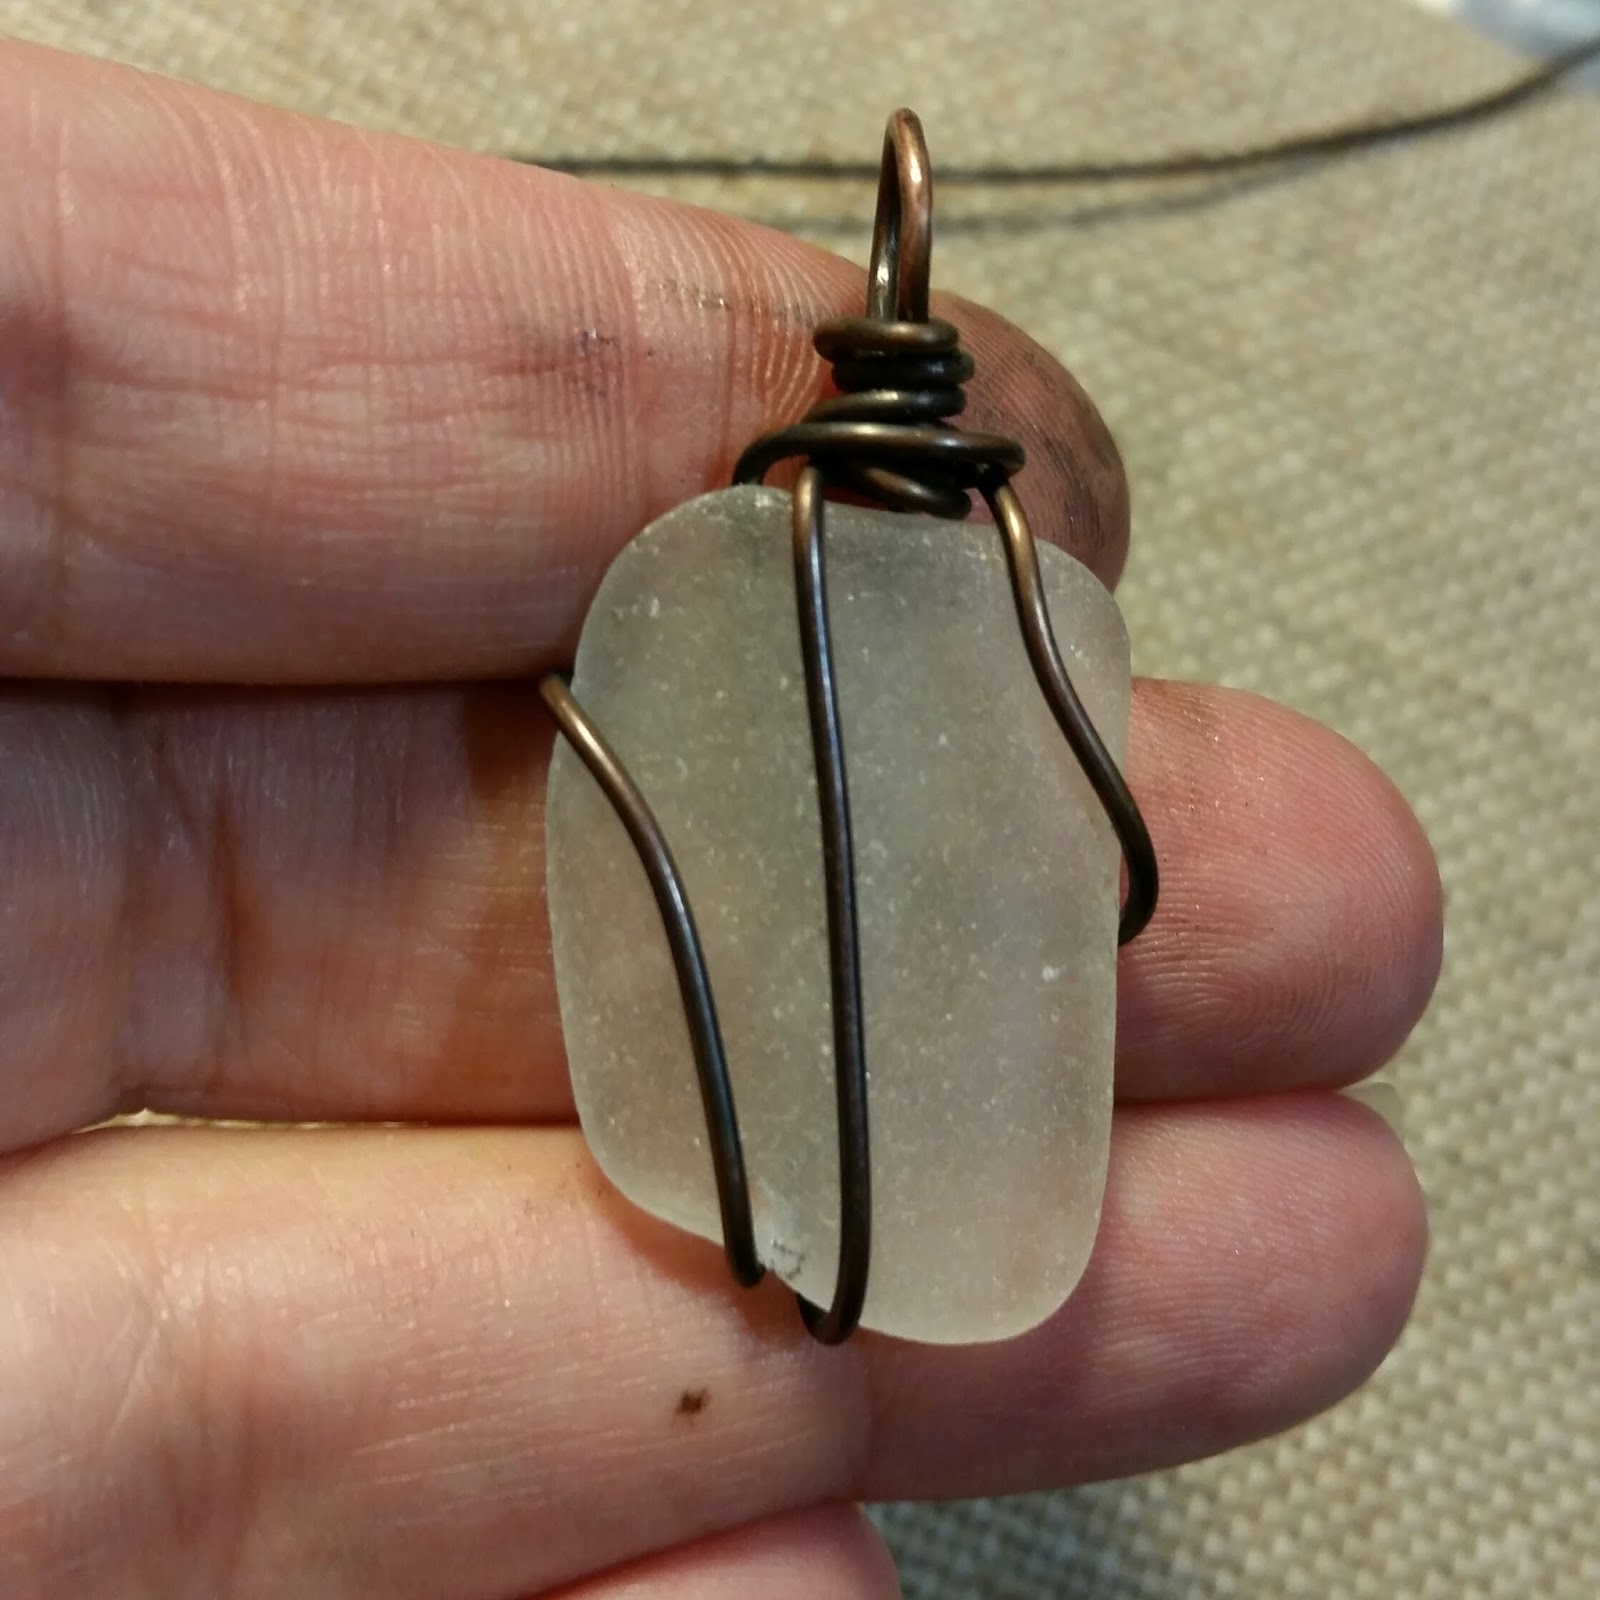
7. Wrap around the bail again and tuck your end in. File any sharp edges of the wire if needed. this shows the back side

8. This shows the front
Here are some other samples of my wire wrapped sea glass. You can see how each one is going to be very unique.

If you really want to have some fun, you can drill the sea glass and then use wire to attach them (as seen below)
I have a free sea glass drilling tutorial here
along with a video. I will be adding some sea glass kits (drill bits and genuine sea glass pieces) to the shop next week if anyone is interested, check back then (here).

I leave you with one of my newest pieces, inspired by our trips this weekend with a piece of wrapped sea glass, an ammonite, fossil bones and other goodies! It will be at the Crafts in the Meadow with me, for sale this weekend.


Have fun with your beach finds! I know I do!!!!


