
Carol Dekle-Foss
Happy new year! I wish you all a healthy, happy, and prosperous 2016 and that this year brings you closer to living your most authentic life possible. So far, I've hit the ground running. The day after Christmas I started a complete overhaul on my studio. I worked for four days straight organizing and getting rid of unnecessary things that were killing my creativity.
Also, one of the things I've been focusing on is making rings. I've never been that confident in making them or setting expensive gemstones. I started by downloading and printing this ring sizer chart by Contenti. I like this chart because it takes into consideration the thickness of the material you are using and gives the the exact dimensions your ring shank should be.

I then made these.

I'm happy with how they turned out, size wise but I still have ALOT of practicing to do. Like Patti says, practice, practice, practice!
For instance, this poor ring. The bezel setting is not bad! Oh, but look at how I completely DESTROYED that beautiful fluorite stone. OOPS! It has hairline cracks and scratches everywhere. I realize now I shouldn't have set the bezel so high and pushed MUCH gentler when setting. I am still learning!

This brings me to my bezel setting tools.
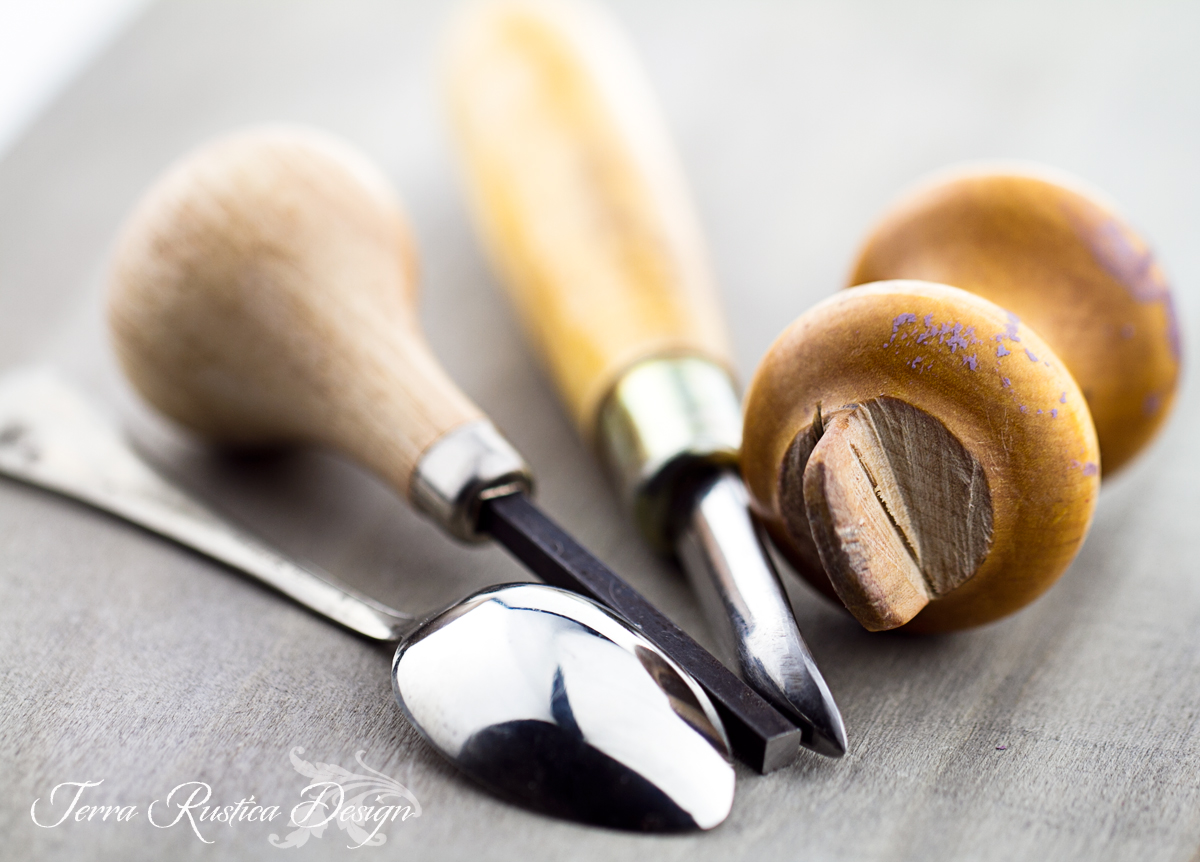
I use a small sterling silver spoon, a burnisher, a prong setter, and a handmade wooden bezel rocker.

I prefer to use this handmade wooden tool to set most my bezels, because it fits perfectly in my hand and doesn't scratch or crack my stones. (The above ring was damaged by using my prong setter in the corners. I won't be doing THAT again) That's my curious kitty Abby.
She's such a doll.

Do you have a mini backsie roller laying around the house? I've had one for years, and realized it's the perfect size for a bezel roller. I marked the lines with a mini t-square and sawed out the shape. You can also cut out wooden dowels in the shapes that you want. I think I'm going to make another one out of a small wooden dowel for those hard to reach areas. What's nice about making your own tools is you make them according to the way you work and tailor them to what you want. This handmade bezel setter is one of my most favorite tools in the studio! Abby likes it too.

I plan to to make a TON of new rings, and by this time next year I will be more confident and won't crack anymore stones. Ha! Ya right!
Thank you for reading!
2 comments:
Your settings are gorgeous - and I am still in awe of the coloring and facets in that fluorite cab! I feel your pain as I think everyone has done something similar (my first crack was on a labradorite...I cried)!
I use wood as well - I use the "wedge" piece from my wooden ring clamp. You have more wood working skills than I do - as the handle on your wooden tool would certainly make it more comfortable in the hand.
I am so happy you shared your challenged piece cracks and all. I am going to be setting up this year hopefully to do metalwork and your handmade tools and sharing your experiences is such wonderful inspiration. You tips and even your "failures" are a huge help to me as I prepare to go into this. I haven't yet due to needing to overhaul my workshop and it is a step by step process...and a real mess down there. I live in Maine where there is static all winter. I don't remember how I dealt with it when I had long hair...hats, ponytails...hand lotion on the hands: wipe hair a bit...
Post a Comment