
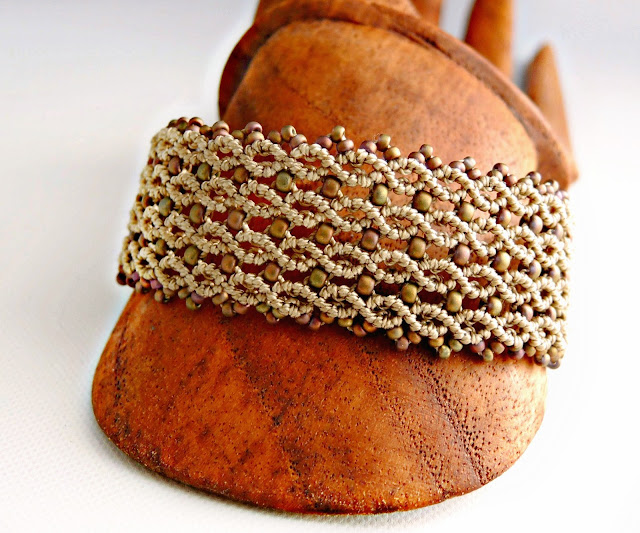
Have you ever had one of those pieces that just won't come together like you want? I'm always thinking "outside the box" which translates into "always running into snags". It's an occupational hazard, I think. My latest conundrum was finding a closure for this micro macrame cuff bracelet:

I have a favorite button (doesn't everyone?) that is copper with a dragon on it and wouldn't you know since I love it the most, they discontinued manufacture of it a couple years ago. I bought up all I could find and have a tiny stash of them I hoard jealously and use only on piece deemed worthy. I really wanted to use one on this cuff, but I also wanted to use copper bars on the ends. I didn't want to just do a button and loop closure, I wanted to make an actual clasp that would have the button on top of it. I started messing with wire and the button and ended up with this:

It doesn't look too bad, do you think? Until you fasten it, and then it does this:

Well, pooh. That's not exactly what I had pictured in my head. I wanted the hook under the button like that, but hadn't anticipated the gap the hook would create, and that fact that it would put the button off center. The hook part of the closure and the loop it went through just stuck out too far. If I'd added an extra big loop on the other side to offset it, it would have made the bracelet too large.

Then I thought maybe I could do a sort of "S" clasp instead of just the hook. That would make both sides equal. I just had to make sure to keep it as small as possible so it wouldn't add length to the overall bracelet.

It seemed like this might work, until the main wire of the hook started slipping back and forth within the wire wrapping.

Well, shoot. And by now my work area looked like a bomb went off:

I asked for some advice from someone who knows more about wire work than I do (I don't even pretend to be an expert on that subject) and after a lot of back and forth, came up with this:

It was late and this was a prototype - please don't judge me. I figured I could refine the design later and make it neater. It did at least put the button in the center of the closure.

But when I was testing it out, this happened:

The whole closure wanted to sit sideways in the piece! By this time I was using language my grandmother would not approve of. Oh, who are we kidding here - I was using language that would make sailors blush. How could it possibly be this complicated to use a button as a closure without just using a loop around it? So I put the whole thing aside (threw it aside might be more accurate) and left it sit. For a long time - like a couple of weeks. And when I came back to it today, this happened:

Yes, after all that, I went back to the button and loop. And guess what? The button sits off center again!

So what's the moral of this story? I'm not sure I know. Maybe I'm just supposed to learn patience. Meanwhile, I've decided to leave the loop closure. And market the bracelet like this:
So, tell me - do all your ideas work out like you planned? Or do you have a not-so-perfect ending you're willing to share and make me feel better?

Yes, after all that, I went back to the button and loop. And guess what? The button sits off center again!

So what's the moral of this story? I'm not sure I know. Maybe I'm just supposed to learn patience. Meanwhile, I've decided to leave the loop closure. And market the bracelet like this:

So, tell me - do all your ideas work out like you planned? Or do you have a not-so-perfect ending you're willing to share and make me feel better?


