Showing posts with label Kimberly Rogers. Show all posts

Tuesday, February 16, 2016

Slow Recovery and the Season for STONES

Ugh. Excuse me while I blow my nose for the 40,000th time today. *Cough*Wheeze*Sniff*

I got bronchitis. Then, because bronchitis is for BABIES, I got low-grade pneumonia. As opposed to fancy high-grade pneumonia--I'm not THAT high maintenance. No, just give me the garden-variety lungs filled with fluid, mucous producing viral infection that only makes you FEEL like you are dying as opposed to ACTUALLY dying. As I said before, ugh.


In all seriousness, if any of you are suffering from this terrible season of snot slinging illness--I FEEL YOUR PAIN. As one friend put it--the Holy Trinity is NyQuil, DayQuil and your cough drop of choice. (I prefer lemon, thank you). Also, I am not an Earth Mother. I did not gather my own organic echinacea flowers to brew into tea. I did not get a Z-pack (whatever THAT is), and if I hear the words "neti pot" again I will punch someone in the throat. Humans are gross, germ infested snot manufacturing organisms and I PEAKED at mucous production. Seriously, I deserve some type of award. My trash cans overflow with used tissues, and I believe I have been directly responsible for the felling of a swath of the Amazon rainforest for paper production. My deep-chest cough would attract a bull moose. My raw, red nose rivals a baboon's flaming butt.Give me the strongest over-the-counter product that will simultaneously knock me out and clear my sinuses. I fall asleep every night on a NyQuil/Zyrtec buzz that mostly gets me through till morning.

That being said, I'm actually feeling better. After almost a month. DAMN! Thank you to all my friends who were kind enough to leave me completely alone knowing full well that when I am sick I turn into a cave-dwelling troll. I appreciate the Facebook messages and the refusal to visit. Seriously.

So, studio time was a distant memory. Up until yesterday (for REAL) I hadn't been in the studio for almost three months. Holidays, life, work all got in the way then the freight train of illness really stopped me in my tracks.

BUT I'M BACK, BABY!!! Yesterday and today were good days. I have continued my Time Traveler series and begun fondling all the cabs I have in stock. YOU KNOW YOU DO IT TOO! Sit and run your fingers over all your pretty rocks....sigh.  

The Path Least Traveled - from my Time Travelers Series

Gorgeous natural surface quartz cut by Angela Fowler

Which brings me to my next topic--IT'S ROCK SEASON!

The Tuscon gem show is over, all our favorite vendors and artists are home. Most are also fighting some sort of travel bug, because as wonderful as the Tuscon gem show is it should really be named the Tuscon Gem and GERM Show. Everyone gets sick there--I believe from handling all the gorgeous beads and gems that everyone has literally DROOLED OVER ALL DAY. Anyway, everyone is home with suitcases full of loot and it's now ROCK SEASON! Be sure to check in with your favorite vendors to snatch up all the wonderful goodies they have brought back. For instance...

Kimberly Rogers of Numinosity Beads is offering GORGEOUS stones she got in Tuscon along with her spectacular lampwork. I'm FREAKING OUT over the spiny oyster shell strand...TAKE MY MONEY, KIM!


Nikki Zehler, the force of nature behind LoveRoot, is creating AHHHHMAAAZING works with stones from her endless stash--her new stuff is DELICIOUS.


And my go-to for super-spectacular cabs, Angela Fowler, is offering some serious treasure over at Designer Cabs and More on Facebook.


So, wipe your noses and get back in the studio as soon as you can. There are so many lovely rocks to play with, beads to string, metal to melt and wire to wrap!!! Remember, we have an awesome David Bowie inspired blog-hop, too!!

Here's to a healthy rest of Winter--remember, Spring is right around the corner. Then we can all start bitching about our allergies.

Now, GO MAKE SOMETHING AMAZING!

Thursday, December 5, 2013

Candy Canes and Eye Candy Canes

By Kimberly Rogers of NuminosityBeads

Image taken from Logan's Candies website.

Have you ever heard the terms "millefiore" or "murrini"?
Murrini and millefiore are made from canes... glass canes made the same way that candy canes are made.
Layers of glass (or candy) pulled and or twisted when hot enough to stretch.
In the case of glass cane they are then sliced into usable chips to melt into a bead base for some stunning and very organic results.
All you have to do is google image "millefiore" which means "many flowers" to see an incredible array of fine glass work. Here is one example of hundreds.

from www.frantzartglass.com 
( my primary glass source for my lampworking supplies)


You can find several sources for beautiful murrini chips on Etsy if you are a lampworker.
Peony Petal Murrini by Beatlebaby


or these wonderful ethereal beauties using silvered glass ~

Aptly named for the holidays ~

by Donna Millard of FyreBeadz

She also has an Etsy shop for her magnificent beads using her own murrini.


You see how I used some of Donna's murrini chips for these eye-popping headpins


Here's looking at you!
Murrini has been used in beads for 100's of years

used to great effect leaving them raised in this bead by SkyValleyBeads

A drop dead gorgeous example of magnification of murrini by 
CCGlassArt named "Beachcomber"

or melted in and swirled by JanZart
Lampworkers can make their own canes with their own choice of colors or buy the chips from other lampworkers.  It takes some concentration but the results are so rewarding.
So when you see murrini in beads now you know that the components that went into your bead were created during a whole separate step at the torch and adds great value to your art beads that puts them another notch above factory manufactured beads.


Thursday, October 3, 2013

Frit, What's That?

by Kimberly Rogers of NuminosityBeads

Some of us artists who specialize in certain techniques such as lampworking tend to forget that not everybody is as familiar with terms as we are and maybe throw some words around thinking that folks will understand what we are talking about.
Recently I have been asked a few times "What is frit?"
In lampworking or glassblowing terms it's just a crushed glass that can be applied to the hot glass that will give a very organic spotted look.
It can be a slivered glass that will produce more metallic and ethereal effects such as these by JsavinaBeads

or simply a more colorful confetti-like array of colors

Here is an example of frit that has been applied and not fully melted in for a unique texture by
                                                                    CabariBeads
or these more ethereal and organic spots on these rounds by the same artist.

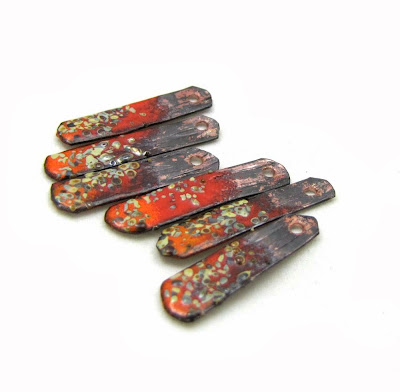
I applied some very coarse frit to this enameled copper here


and  I used some multicolored frit called "raku" although it has nothing to do with actual raku ceramic technique other than the oxides that cause this frit to vary in color when introduced to the heat.

Some of my headpins with some coarse silvered metallic frit


The smaller frit can produce a more granite- like stone effect in conjunction with the baking soda treatment I use to "crustify" my beads


Shiny or crusty it's an effect that I employ for a large part of my handmade components.

Some of you might recognize this from my NuminosityBeads avatar. It's an extreme close-up of a cased bead (meaning a layer of clear glass has been applied over the base and frit to achieve magnification)

So now next time you hear or see the word frit you'll be in the know.

Thursday, July 25, 2013

A Good Day To Thank Your Hands

I got to thinking about my hands when there the subject of clasps came up for the Boot Camp.
Because I really haven't made many of my own clasps or toggles my mind sort of wandered off as I sat out on the swinging chair on a gorgeous and warm Alaskan summer day. 
I thought to myself that I really ought to thank my hands for all they have done and what they do for me every day. I massaged them and thanked them finger by finger, so grateful for what they've allowed me to manifest creatively.
They are rather pained these days so I think about them more.
This is one of the images that sprang to my mind when thinking about art jewelry and hands.  I got it from the blog I have linked  here so I hope you go have a visit and learn about the history of the Claddagh ring that the author Elizabeth Barrett has thoughtfully written up.
The image reminds me of the exercise that I was taught by my chiropractor to stretch my cramped hands. I can only show you half of the exercise since I can't take a picture of both of my own hands!

Brave woman of a certain age shows her hand on blog!

You press your hands in this position with thumb splayed as far as possible from the rest of your fingers, touching thumb and forefinger with the thumb and forefinger of the other hand ( like a mirror image) Press down on the surface while pressing the top halves of your forefingers and pads of the thumbs giving a good stretch and count to 30. It's recommended to do this exercise once in awhile before  during or after  doing fine motor work with your hands.


I am grateful that the hands that held the crayons that did this have carried me over 50 years to today.
My mind and hands didn't quite connect then, I had the hardest time doing hair.

This made a bit more sense, A fur ruff.
I must have had a premonition that I would end up in Alaska!

XO Kim

Thursday, July 4, 2013

Revisiting Old Supplies

Lately I have been going back to some supplies that I had bought way back when I first started making lampwork beads almost 15 years ago. For one reason or another I abandoned them before I had used them up.
In this case I had first bought a sampler pack of what was called "Pixie Dust" for coating my beads with a shimmery sheen. And because I was casing most of my beads back then I found that it wasn't working so well for that application, tending to clump up and loose its luster.
Now that I am making more simple components for other designers rather than complex lampwork focal beads most of the time now I pulled out the set of colors of Pixie Dust to give them another try. It had been successful on a few sets of headpins I tried recently and today I had the idea of combining it with my torch worked copper enamel components.

I simply first melted in a layer of colored enamel. I had combined some of the dwindling piles on my worktable as it didn't matter so much what colors they were only that they provided a sticky base for the Pixie dust to adhere to.

I'd say they were a success

I even applied the crushed glass frit on top of the pixie dust and it adhered well enough for some added speckley texture.
The problem is with using up old supplies and having success with it is that then you want to turn around and buy more. In this particular case that is impossible as I have heard they don't manufacture it anymore.

Here is another idea that I am revisiting...double headed baubles.
I first was inspired when I saw Cindy Gimbrone's double headed headpins and she was gracious enough to let me put my own spin on them when I asked her permission.
These are great for twisting into necklaces or dangling from earrings.
I plan on making more of these soon.

A couple of KristiBowmanDesign copper charms and some ScorchedEarthOnEtsy ceramic hoops
and my NuminosityBeads baubles.

Have a safe and relaxing holiday for those of you in the USA.
The rest of you...be safe and relax too!

Wednesday, June 26, 2013

We're So Sari

If you haven't yet discovered the sari silk ribbon, let me introduce you to its versatility and the vibrancy it can add to your designs.
It's  just perfect for wrapping and and the fringy edges only add a bit of fun texture.

Here I have wrapped a silver choker that I bought in Bali several years ago when I was visiting my brother.  Yes, I'm am pretty lucky to have a brother living in the center of one of the most artistic paradises on earth!
After wrapping the sari silk ribbon you simply secure it by wrapping the wire of your choice over your fabric wrap.
I've used a ScorchedEarthOnEtsy ceramic piece by Petra as a focal piece here.

The beauty of some of these silk ribbons is that they can be multicolored or "color shift" all in one ribbon. This was made with a single ribbon and wrapped with oxidized silver fill wire.
The focal piece is a nice polymer paisley by Heather Powers of HumbleBeads.
I wrapped some of my double ended copper wire lampwork that I call "baubles"
(I hope to return to making some more of these as it's been a long while since I have had any in my inventory)

You can dress up some earrings and it lends some softness to your design as  LoveRoot did here.


Here's just a sample of a sari silk ribbon search on Etsy.
Guess who just earned how to take a screen shot this week!
I first got my taste of sari silk ribbon from MudhoundStudio shop but you can find larger amounts at Darn Good Yarn. She has a great and reasonably priced selection

I was dabbling in the fabric realm last week and this wrap is made with some sari trim that I picked up on my visit to India as well as some vintage lace and fringy linen from a thrift shop and some other trim I got from a trade with Lorna from Artymess.

Wednesday, May 22, 2013

An Introduction and Some Salmon Skin Leather

Hello folks, let me introduce myself before I launch my very first blog post on LMAJ.
My name is Kimberly Rogers - aka Kim
Some of you may know me already from my blog Numinosity ( pronounced new-min-osity) or my Etsy shop numinositybeads.
I make lampwork and torch fired enamel components as well as my own jewelry designing.

Now that I am retired from my many years working as a heavy equipment operator and groundskeeper for the great Sate of Alaska I can pursue my passion for creating both in mixed media and jewelry making. I am fortunate to enjoy the snowbird lifestyle spitting my time between Alaska and Arizona with a healthy dose of world travel in between.  My husband and I are inveterate collectors and share a love for the shiny, sparkly, vintage and antique collectibles, ephemera and stones. 
I maintain two glass studios now as I can't bear to be with out my ability to do some torching for half of the year.
This past March we went on a trip to Chile Argentina and Uruguay.
It was in Puerto Montt Chile where I found an artisan leather shop that was selling leather made out of tanned salmon skins. I just knew that it could be an element that would work well in my designs.
I simply cut out the leather for dangles in these pieces.
I appreciate the lightness of the leather as I like to make large pieces and the weight of the components can add up quickly.

A simple redo on some earrings I had made previously that had sari silk ribbons that didn't highlight the lampwork. I was much happier with the backdrop of the salmon skin leather.

Some of my torch fired enamel against  a bit of fringe.
 ( almost too easy but I like the effect and these sold immediately!)

Putting the textured leather behind some nearly transparent beads gave the beads some new life.


Here's what the pieces looked like before I started cutting them. I left half of the supply back in Arizona for when I return next fall.

Here's what Staci Louise made with some fish leather.
She sandwiched it between the elements in the focal piece.

I'm sure there must be more sources than Chile for fish leather. Right off the bat this Canadian company selling fish leather showed up on my google search. 
It's quite possible that I may be able to dig up my Chilean source as well but with my moves back and forth I sometimes have trouble locating things!

And here I am happy at the Pink Palace in Jaipur from when we travelled to India last year.
It's hard not to be inspired when you go to a place like that.

Thanks for having me as a new contributing member to Love My Art Jewelry.

You can also find my facebook fan page here or see my Pinterest boards 
I have a board that features the way other jewelry designers are using my components here.

face
Related Posts Plugin for WordPress, Blogger...